Hey, beaders!
So, I was going through some of my older YouTube videos, and I realized that the pattern for one of my beaded fringe earrings might not have been as clear as I intended. To make things easier for you, I decided to post an image of the pattern here on the blog. This way, you can use the video for instructions and the image for a crystal-clear view of the pattern. I hope this makes your beading experience a breeze!
The Video Tutorial
Here’s the video we’re working with: In the video, I walk you through every step of the beading process, but now you’ll have this handy pattern image to follow along with as well.
*This post contains affiliate links and commission may be earned*
Beading Supplies
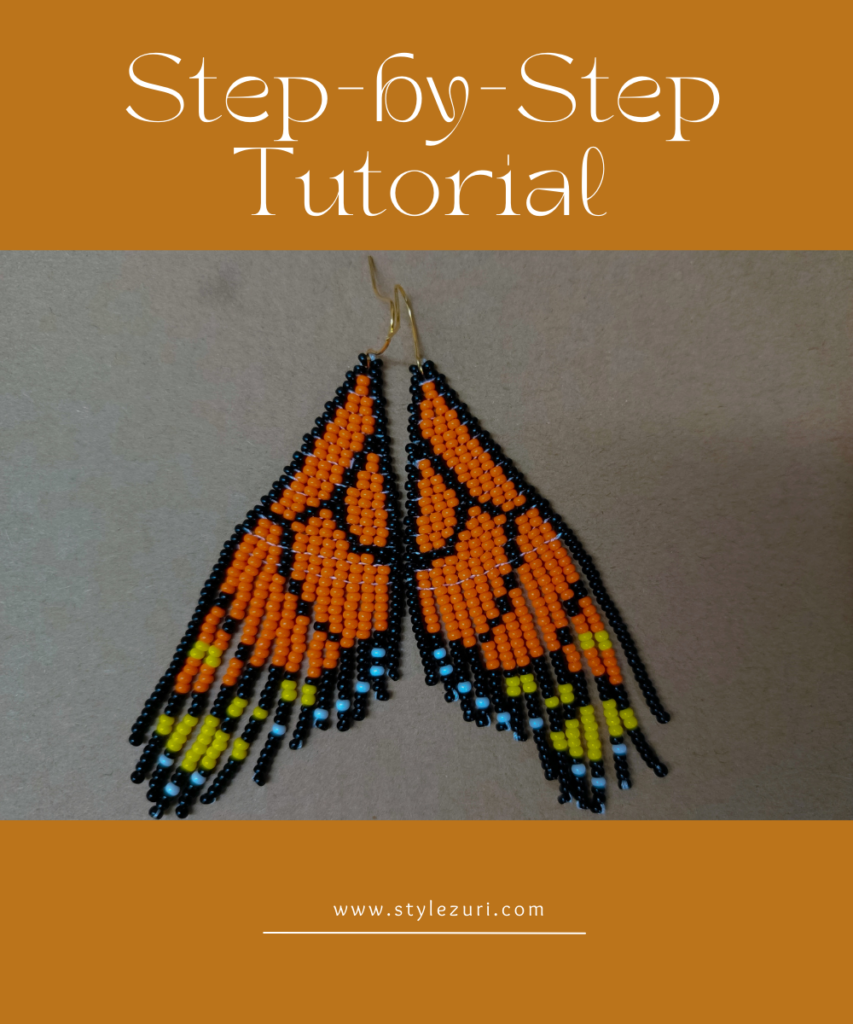
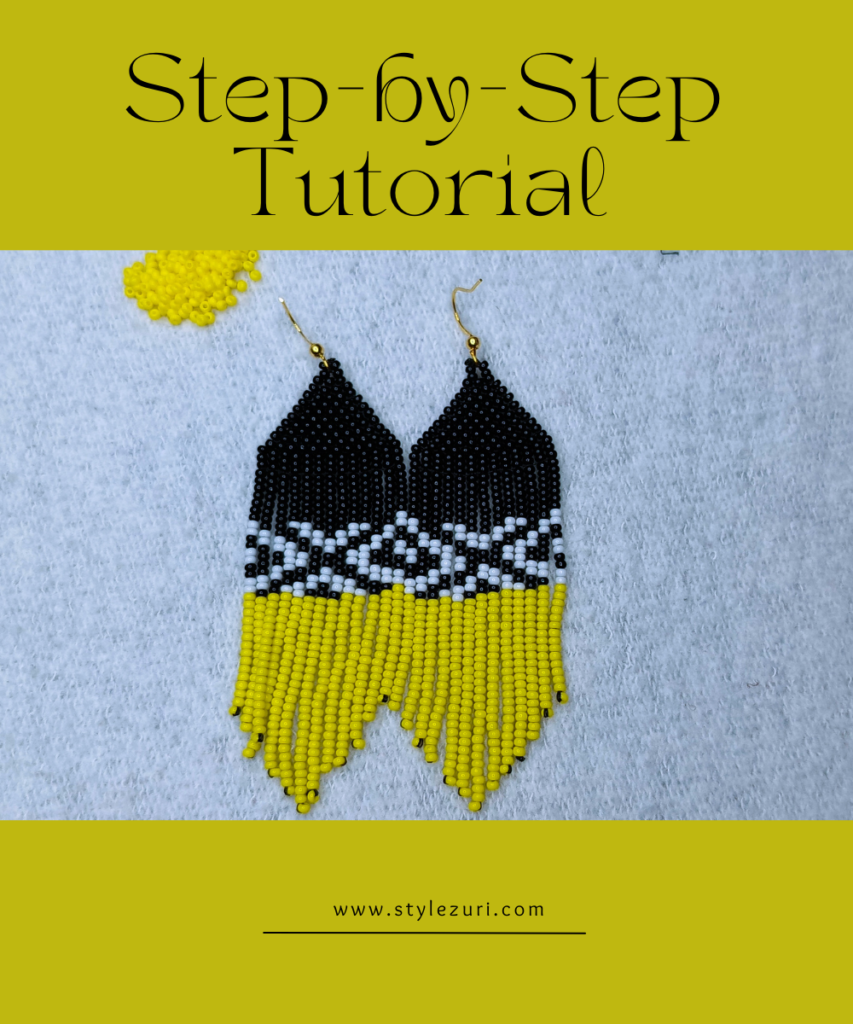
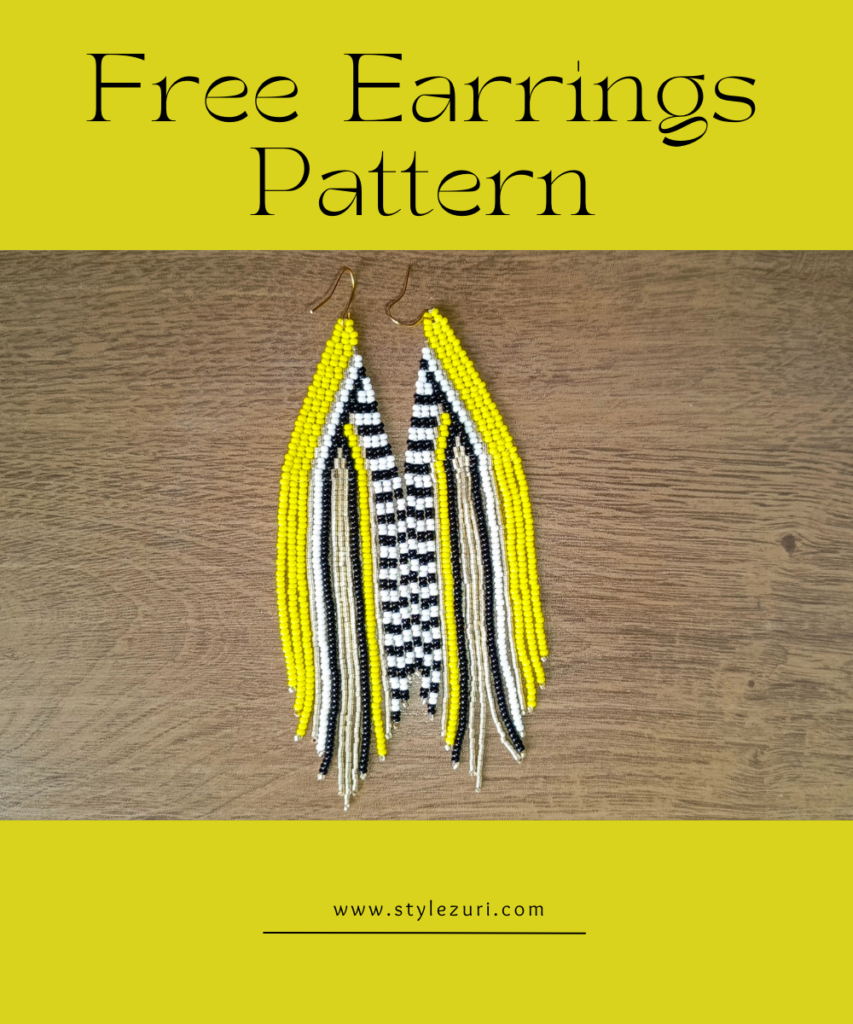
For this project, I used a mix of size 10 seed beads and Miyuki Delica size 11 beads. But here’s a little tip: I suggest sticking to the same bead size throughout your project to achieve a more uniform look. I ended up using different sizes because that’s what I had on hand at the time!
Now, about the color codes—I’m not an expert when it comes to those, so I’ll keep it simple. In this pattern, we’re working with yellow beads, white beads, black beads, and some beautiful gold Miyuki beads. Just follow the colors in the pattern image, and you should be good to go!
The Fringe Earrings Pattern Image
This image should help you see exactly where each bead needs to go, making it easier to work along with the video. The pattern starts with the top part, where you’ll be using a technique known as the ladder stitch to create the foundation row. This stitch is perfect for creating a strong, stable base for the rest of your design. From there, you’ll transition into the brick stitch, which helps to build up the layers and add structure to the design. These techniques might sound complex, but don’t worry—everything is clearly demonstrated in the video tutorial. The combination of the visual guide and the step-by-step instructions should make your beading project smooth, enjoyable, and a great learning experience.

Final Thoughts
While I may not be a pro, I’m passionate about helping you create something beautiful and unique. I truly hope that this new approach, combining the pattern image with the video tutorial, makes your beading experience smoother and more enjoyable. Remember, crafting is all about having fun and experimenting, so don’t hesitate to make this project your own.
If you enjoyed this project and want to dive deeper into the world of beading, I invite you to explore my YouTube channel, where I have a treasure trove of tutorials. Whether you’re interested in mastering basic stitches or tackling more advanced designs, you’ll find plenty of inspiration and guidance.
So, grab your beads, watch the tutorials, and let your creativity shine. There’s a whole world of possibilities waiting for you, and I can’t wait to see what you create next! Happy beading!
RELATED