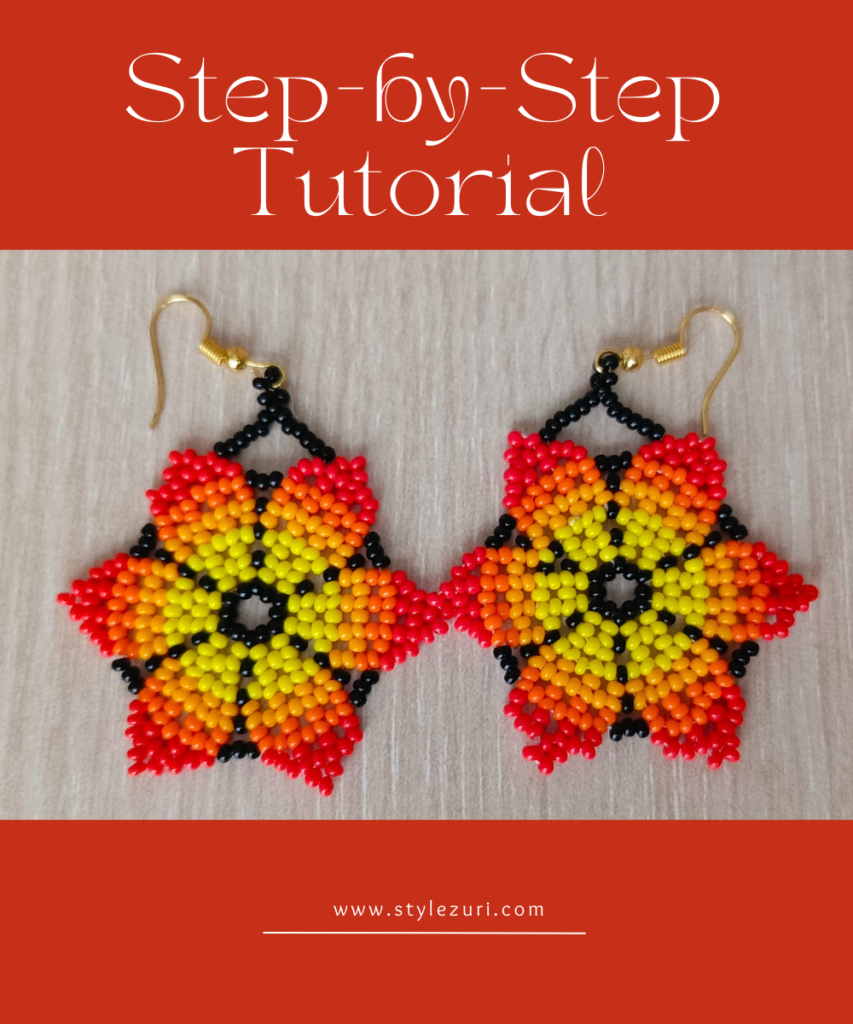
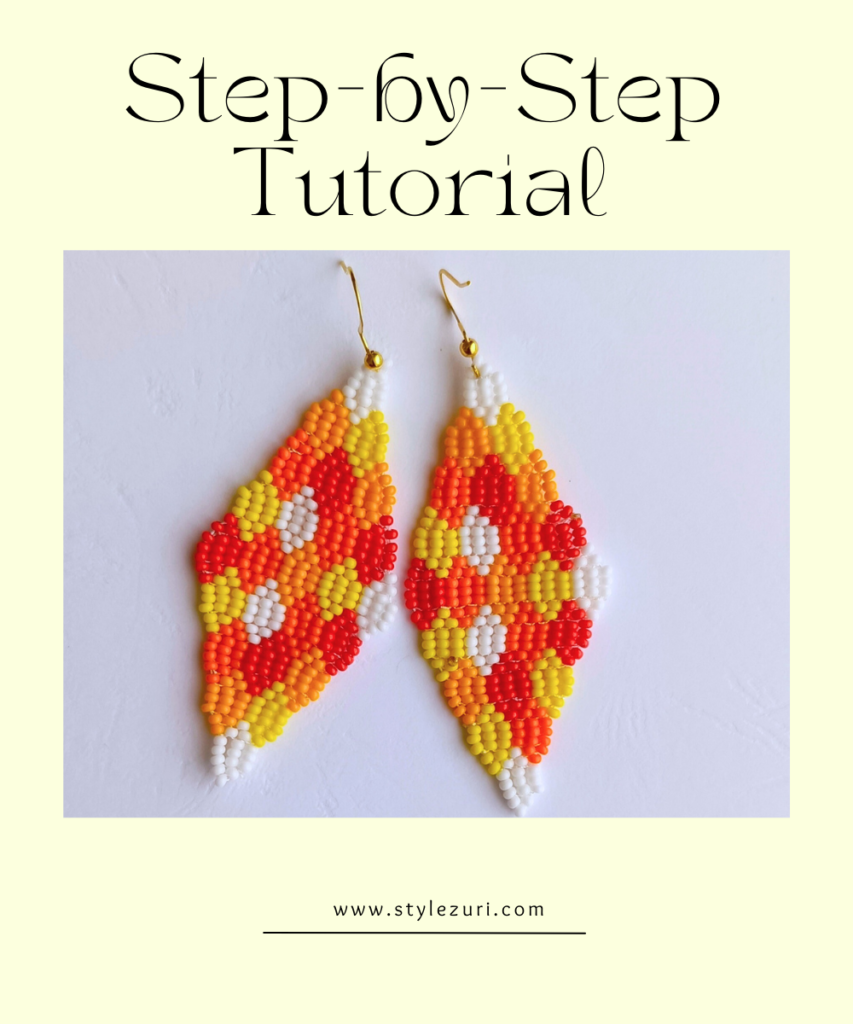
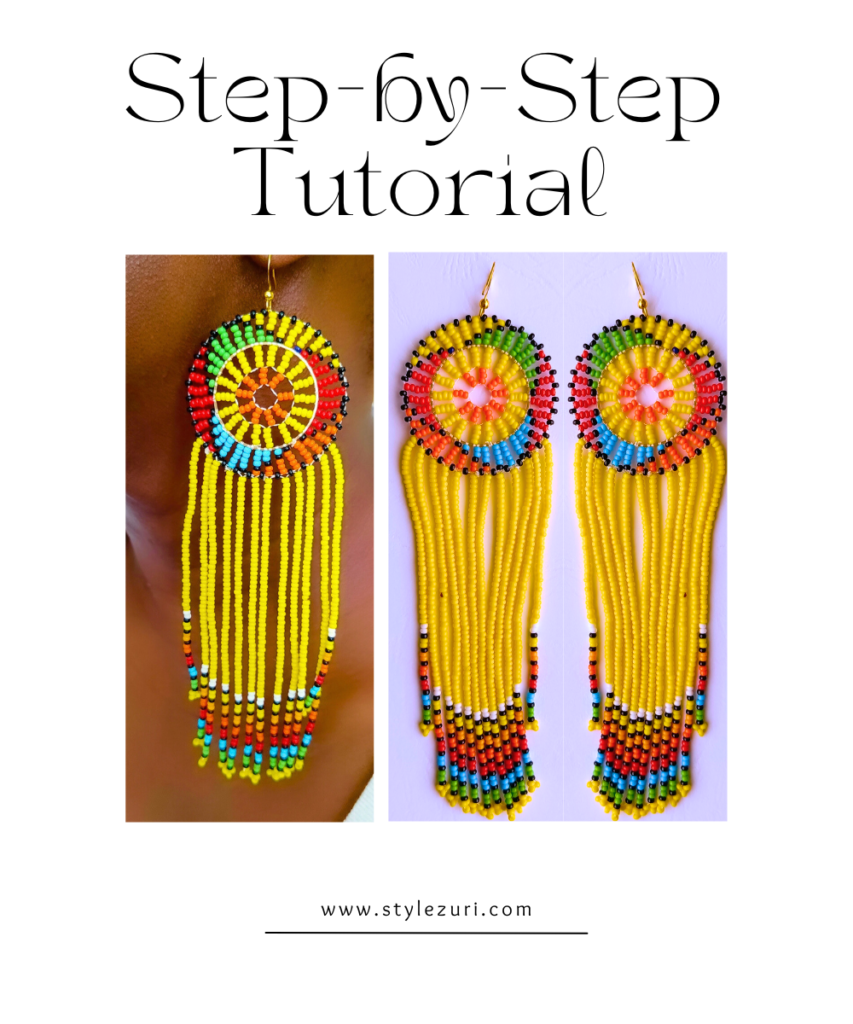
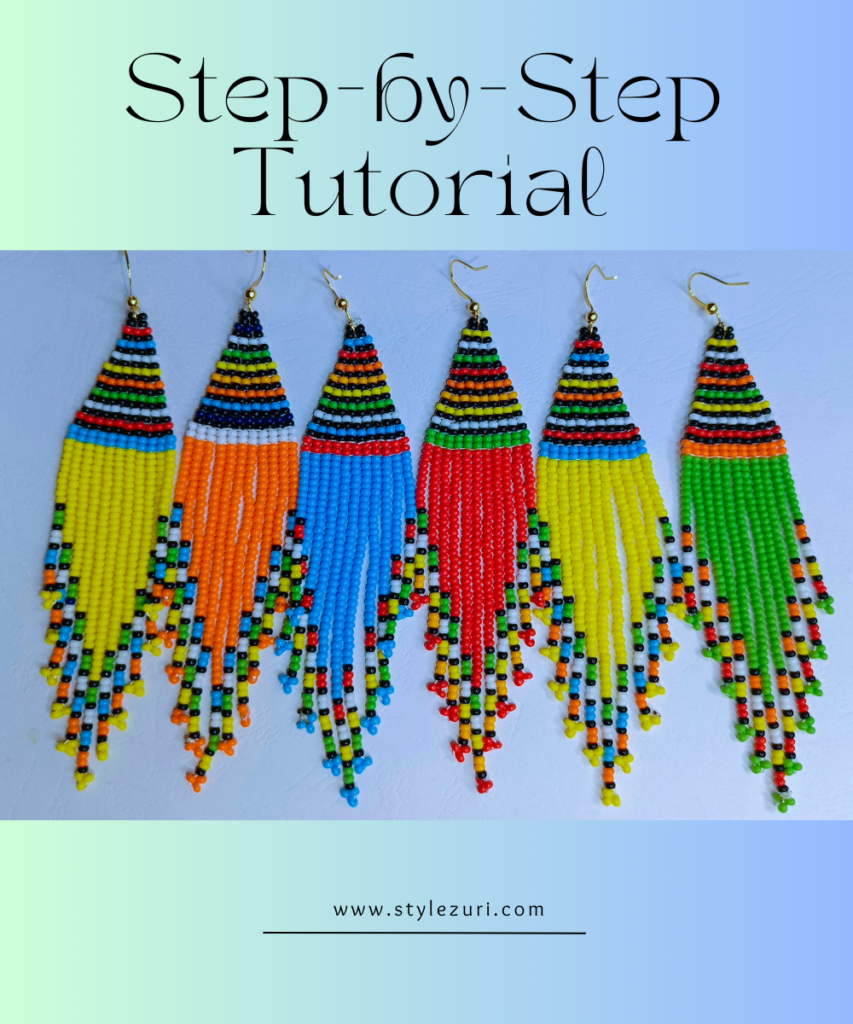
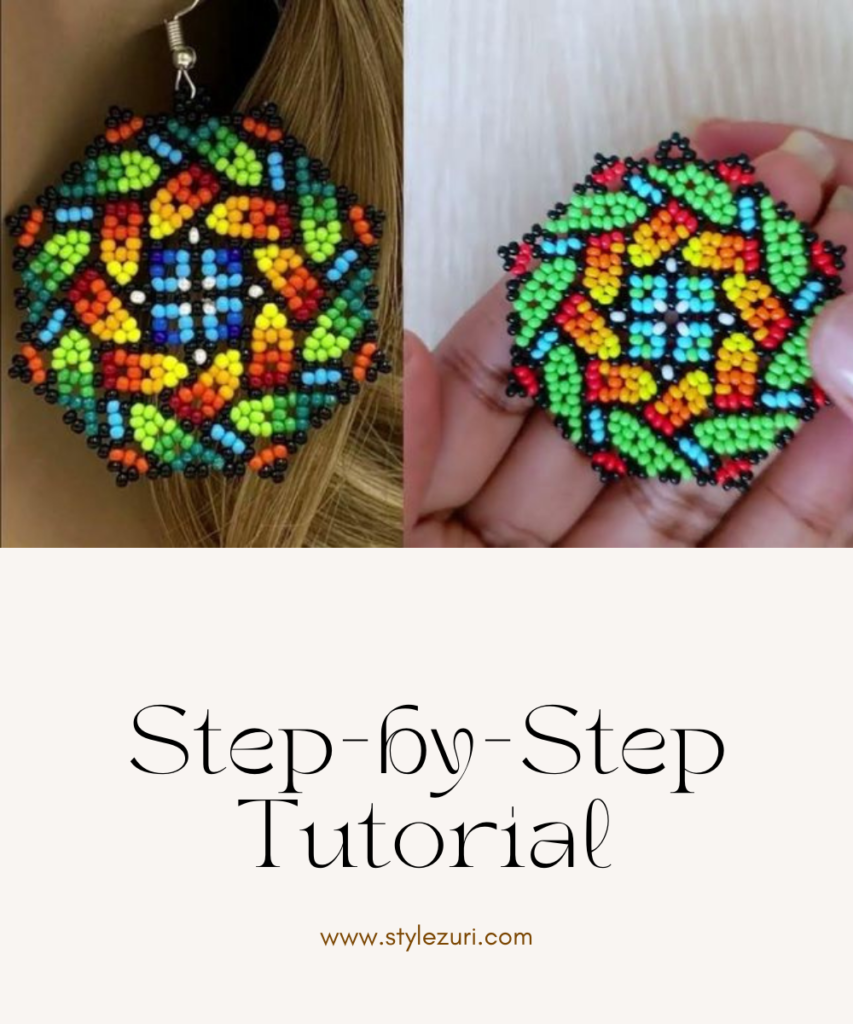
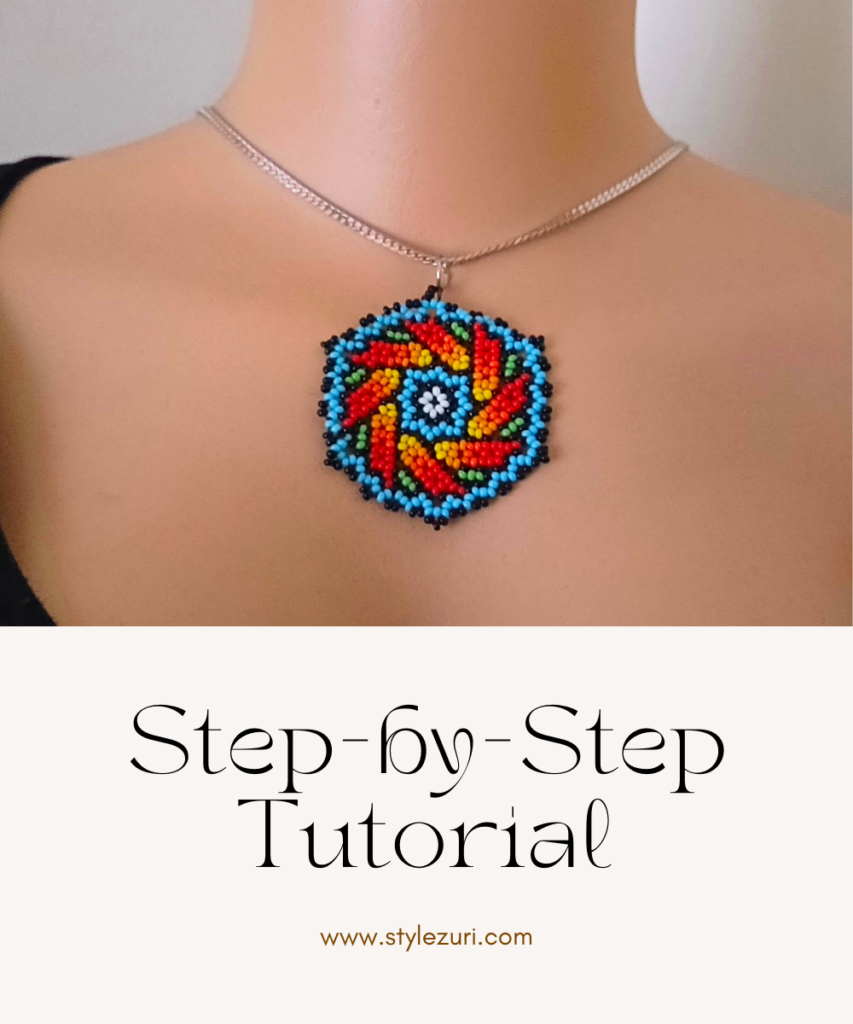
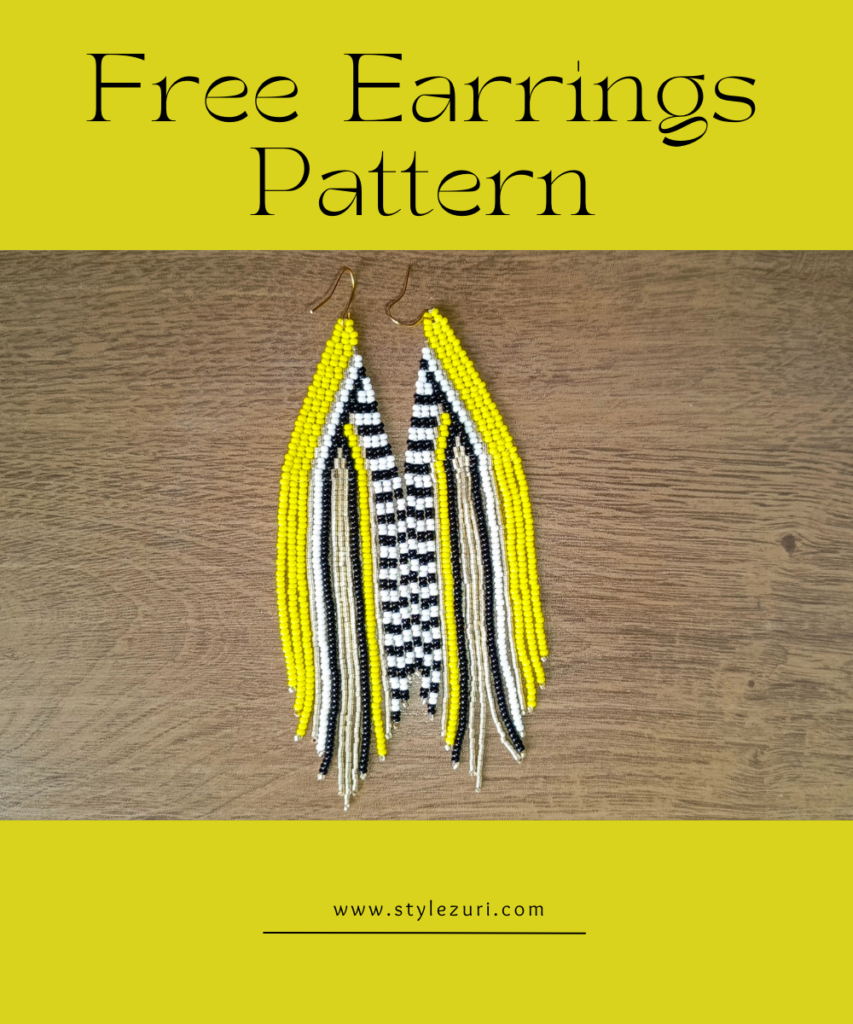
Hey there, bead lovers! If you’re as obsessed with beads as I am, you’re in for a treat. Today, I’m diving into the colorful world of Huichol-style earrings, and trust me, these beauties are a must-have for your jewelry collection. I absolutely love making beaded jewelry, and if you’re anything like me, you’ll find this tutorial super fun and easy to follow.
*This post contains affiliate links and commission may be earned*
Now, if you’re more of a visual learner (because who isn’t, right?), I’ve got you covered! I make video tutorials too, so go ahead and press play if you’d rather watch me work my magic in real-time.
Table of Contents
STEP 1
I used size 10 seed beads for this project, but feel free to use whatever size you like. Just keep in mind that the size of the beads will determine the size of your earrings—the larger the bead number, the smaller the bead. For example, size 11 beads are actually smaller than size 10.
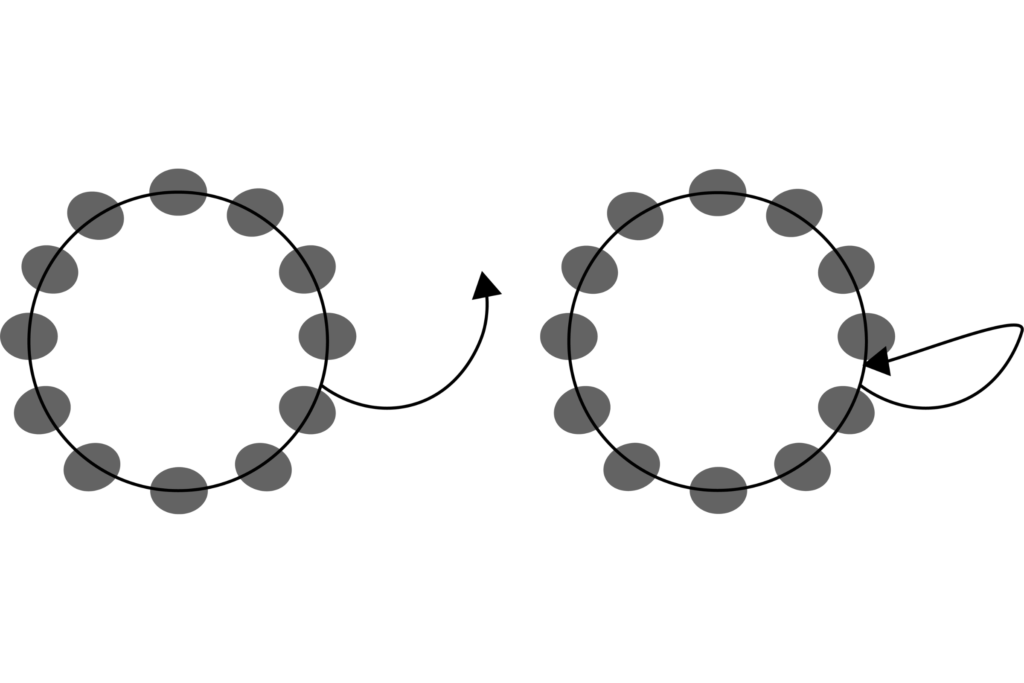
I went with a bold color palette of black, yellow, yellow-orange, orange, and red for this design. Ready to dive in? Start by picking up 12 black beads with your threaded needle, then tie a double knot to form a circle. Once that’s done, pass the needle through one of the beads.
Now pick 5 yellow beads.
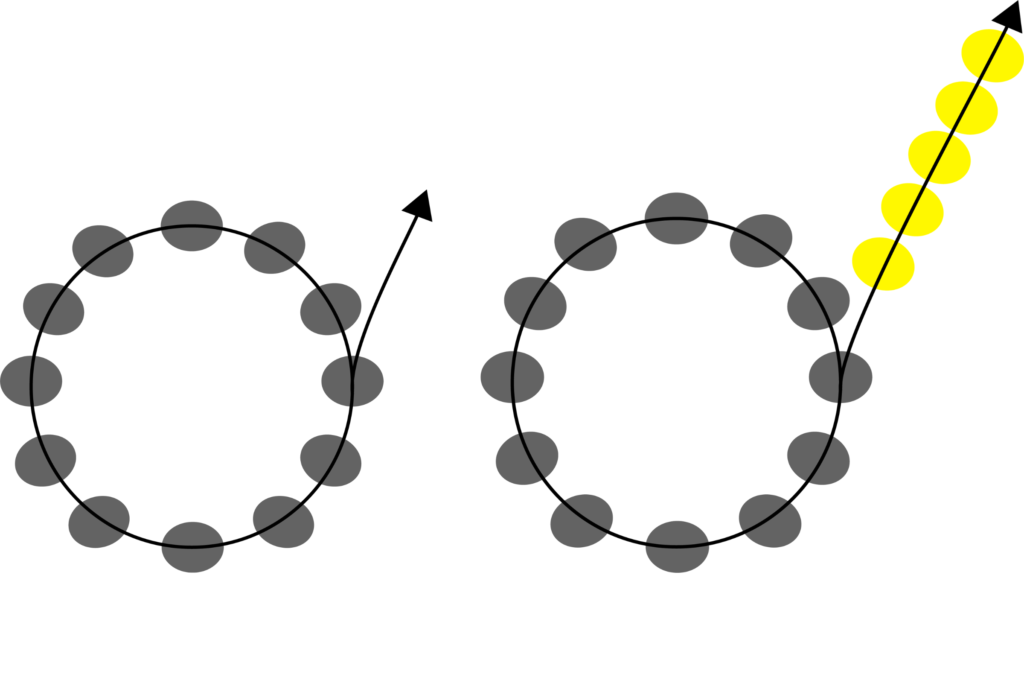
Now, skip one black bead and pass the needle through the next one. Repeat this process by picking up 5 yellow beads, skipping one black bead, and then passing the needle through the next bead.
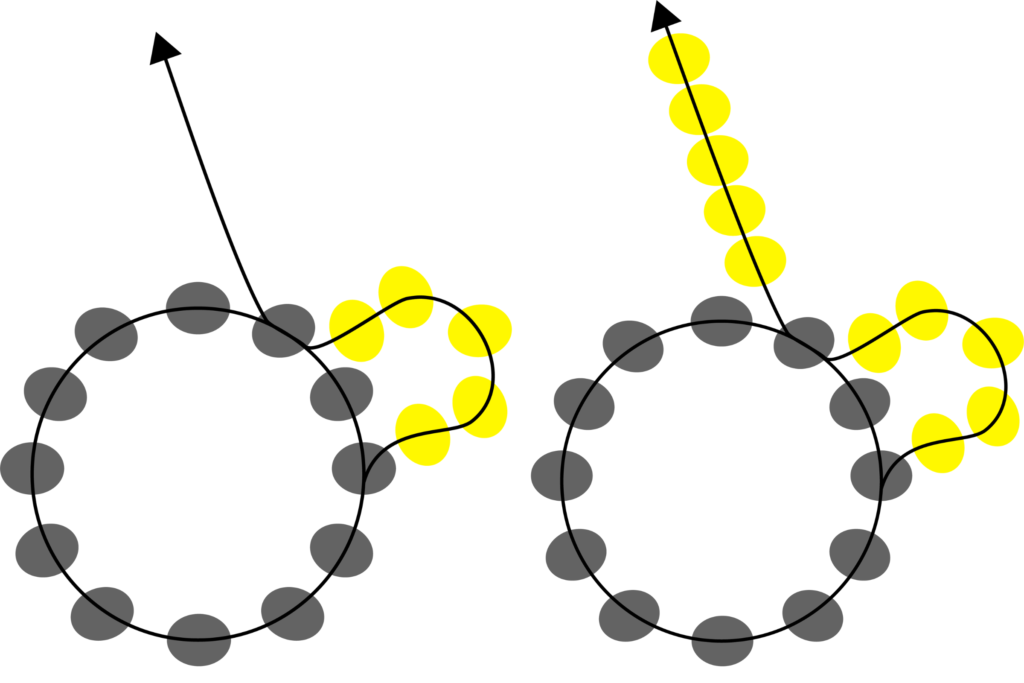
That wraps up our first step! Here’s what we’ve got so far, and now we’re all set to move on to the next step.
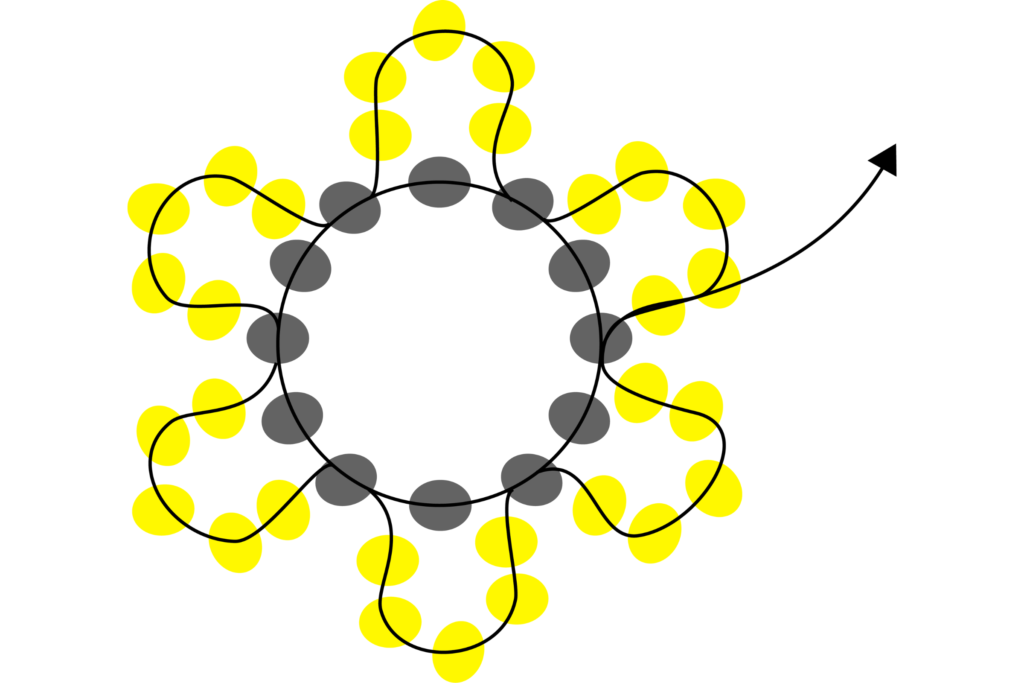
STEP 2
Alright, for the second step, you’ll need to pick up 5 yellow beads.
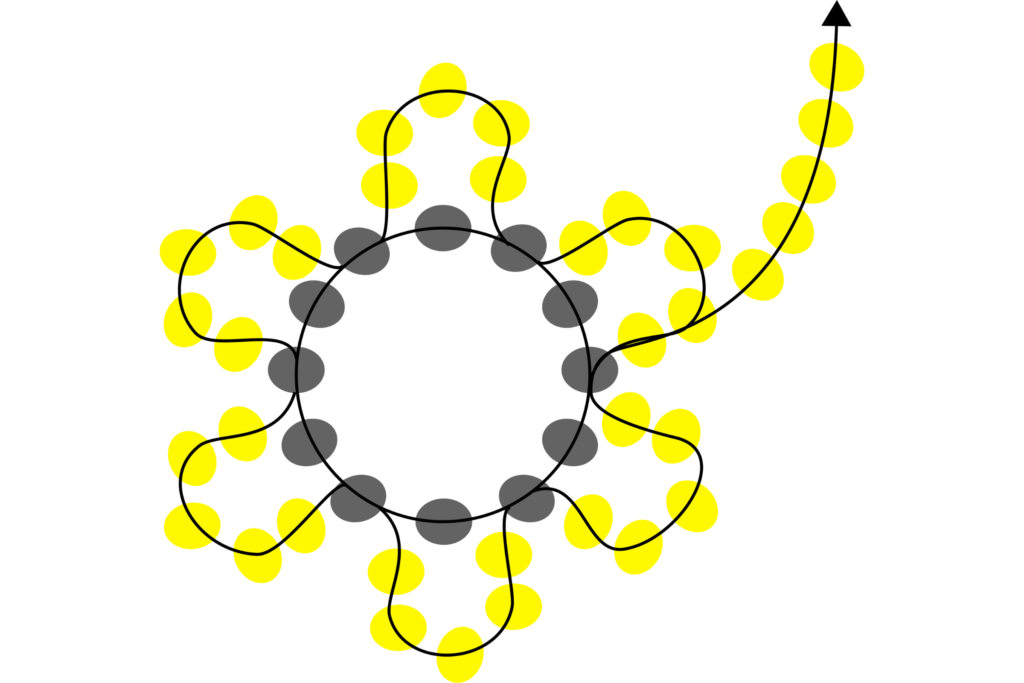
Skip one yellow bead and pass the needle through the next yellow bead.
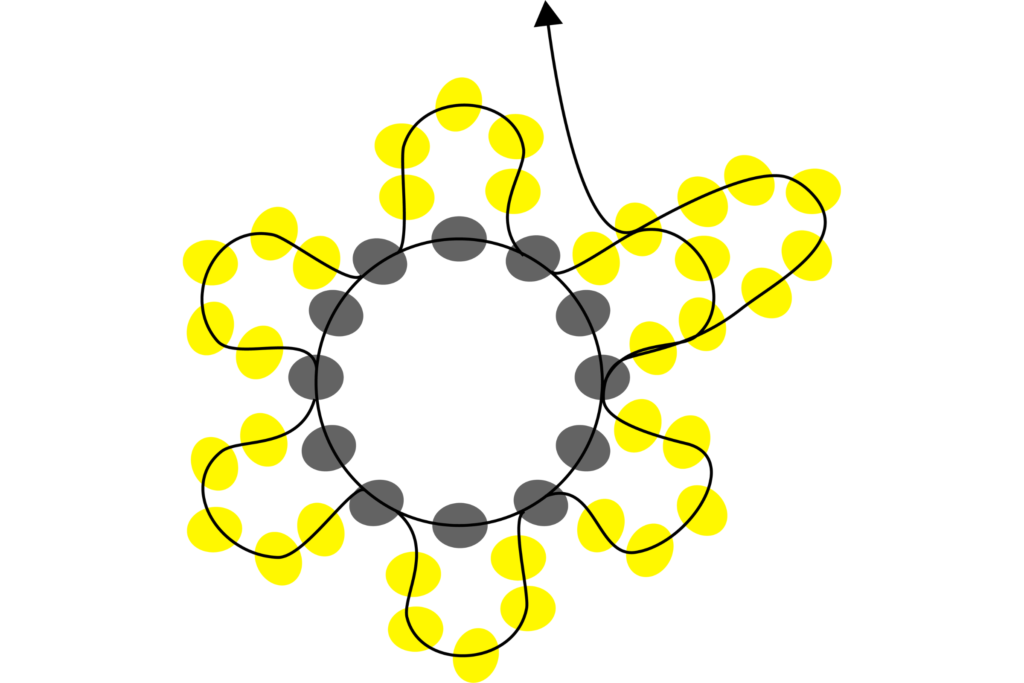
Now pick one black bead.
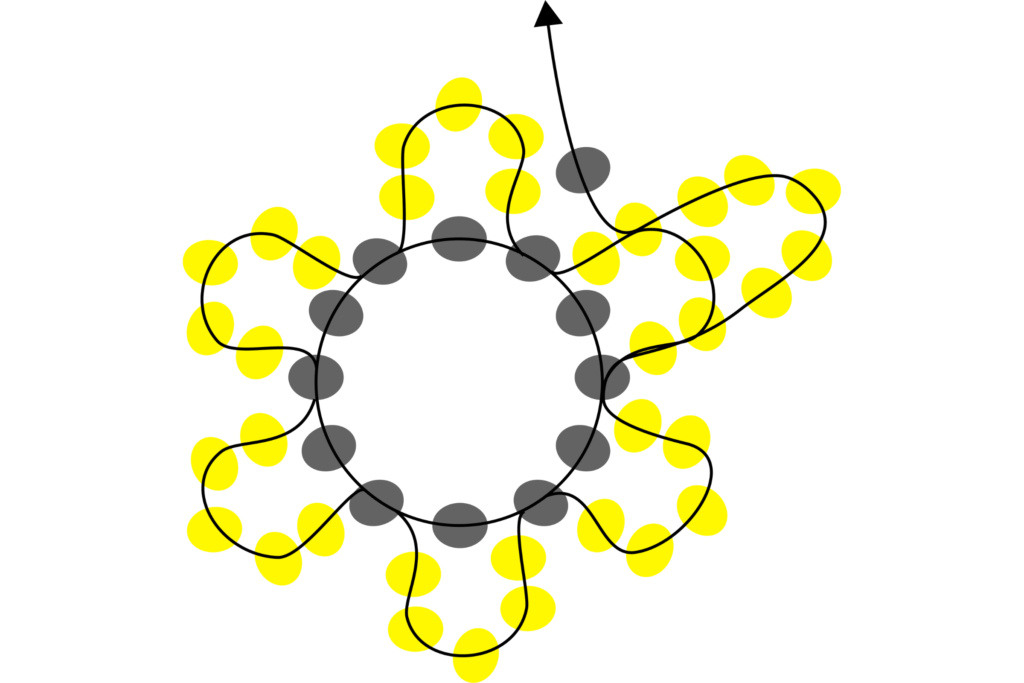
Pass the needle through the second yellow bead.
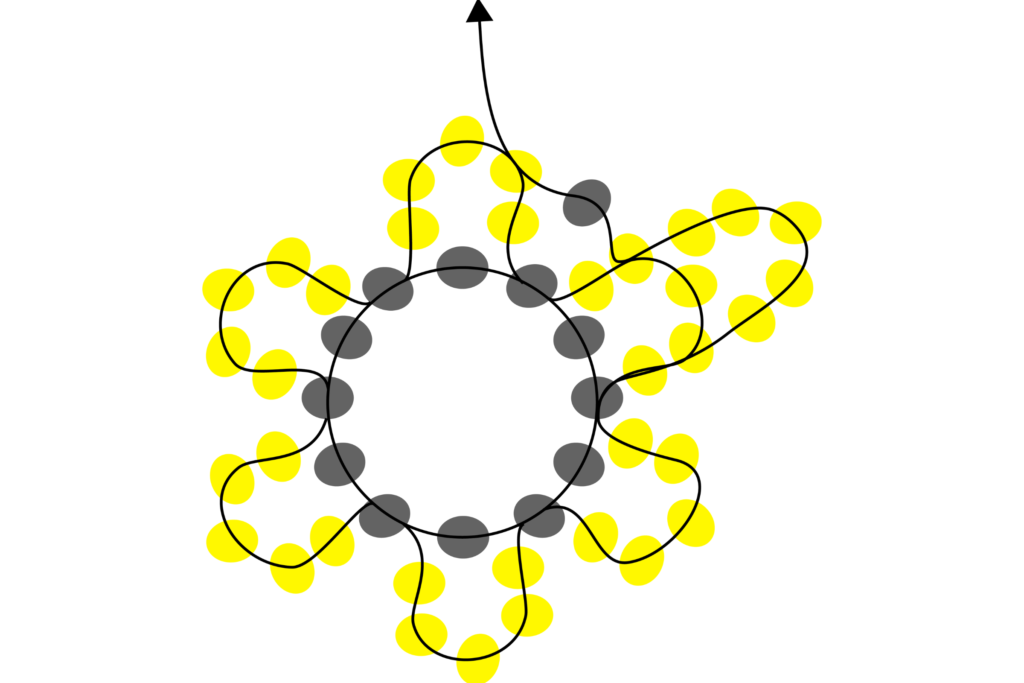
Pick 5 yellow beads.
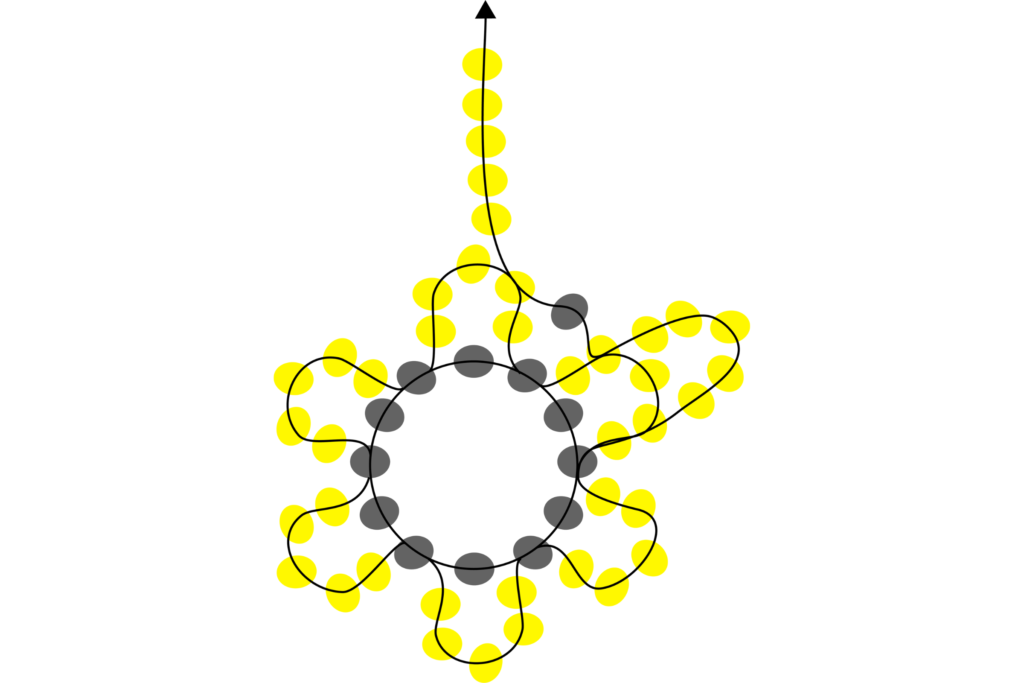
Skip one yellow bead and pass the needle through the next.
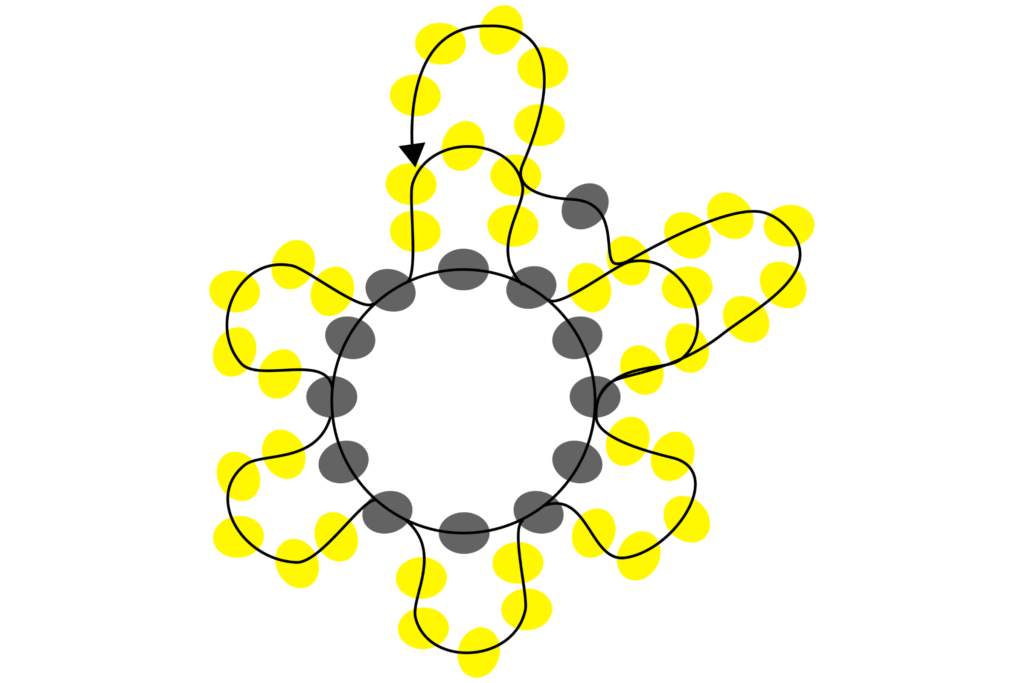
Pick one black bead.
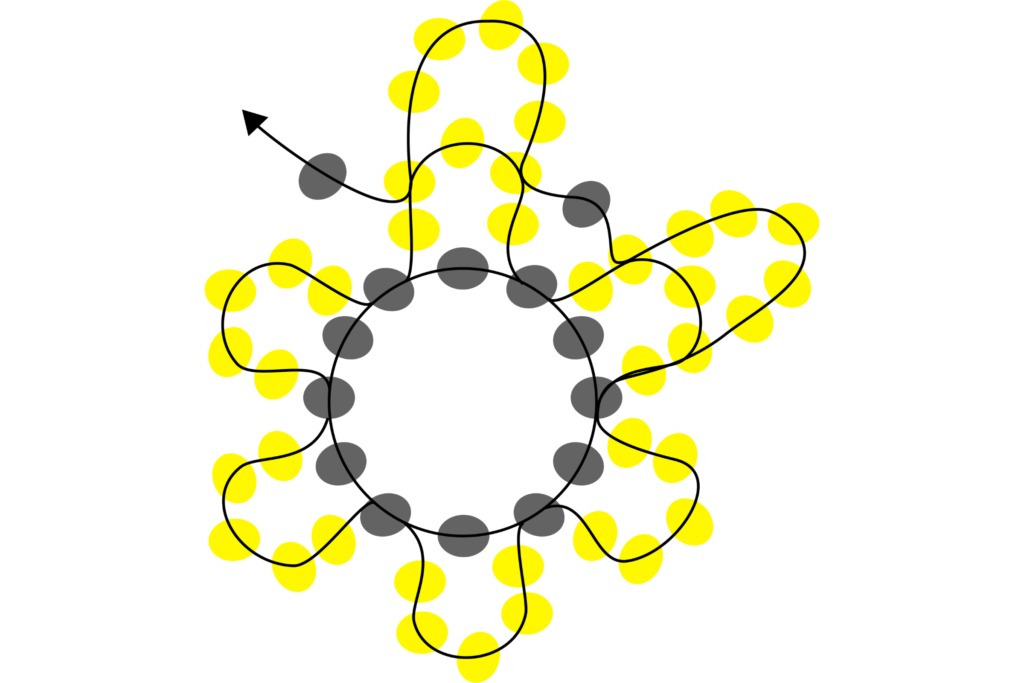
Pass the needle through the second yellow bead, then repeat the process: pick up 5 yellow beads, skip one yellow bead, pass the needle through the next bead, and pick up one black bead. Continue this pattern until you reach the end.
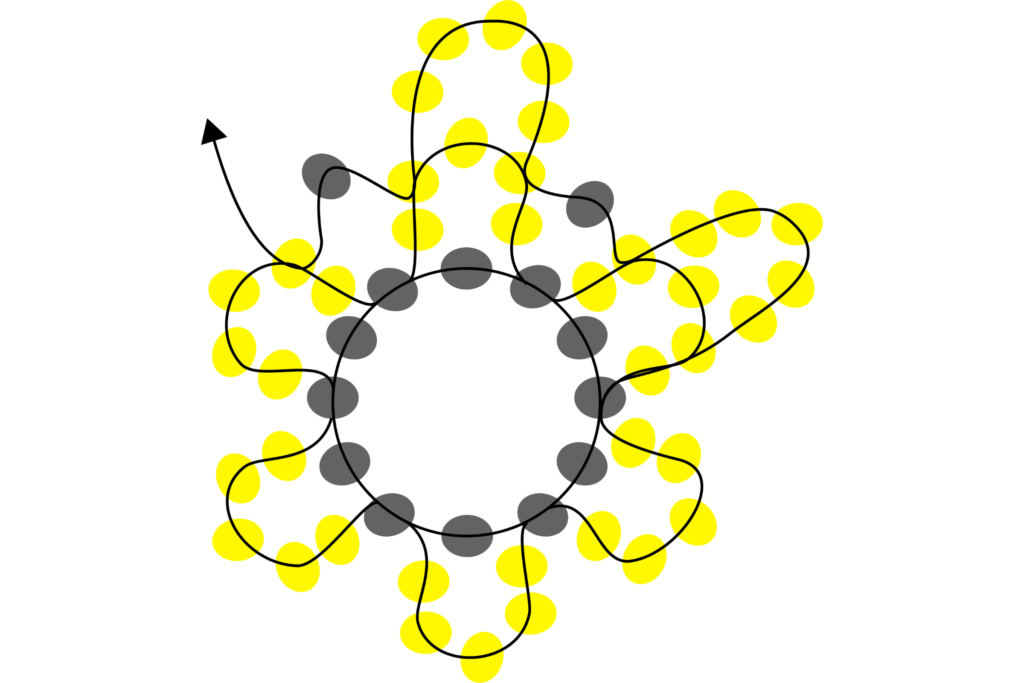
That completes our second step! Here’s what we’ve got so far, and now we’re ready to move on to the next step.
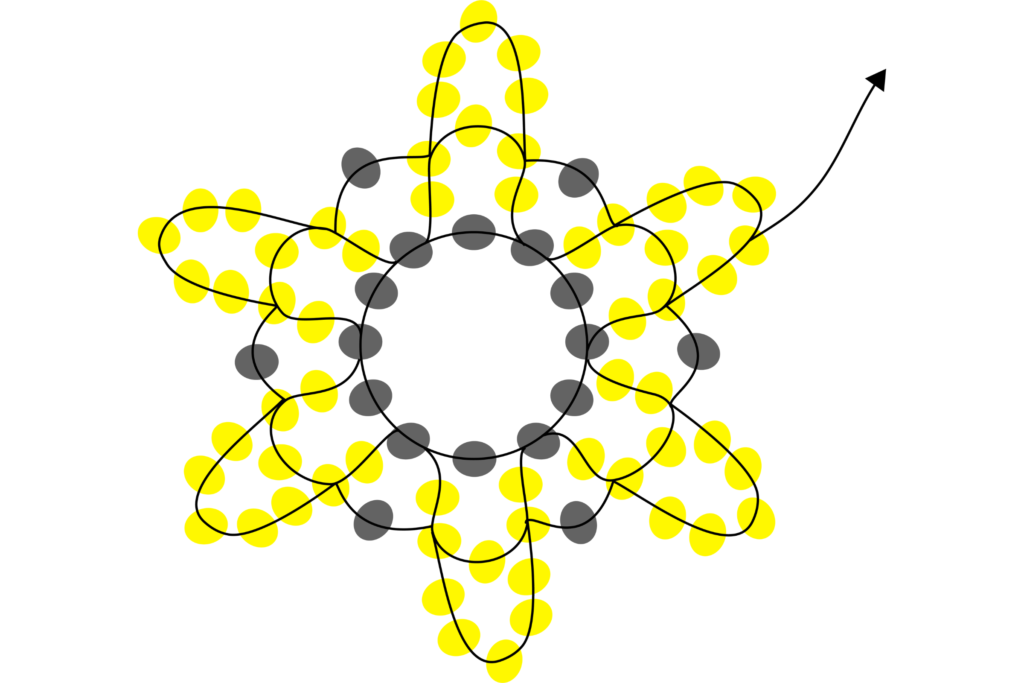
STEP 3
Start by picking up 5 yellow-orange beads.
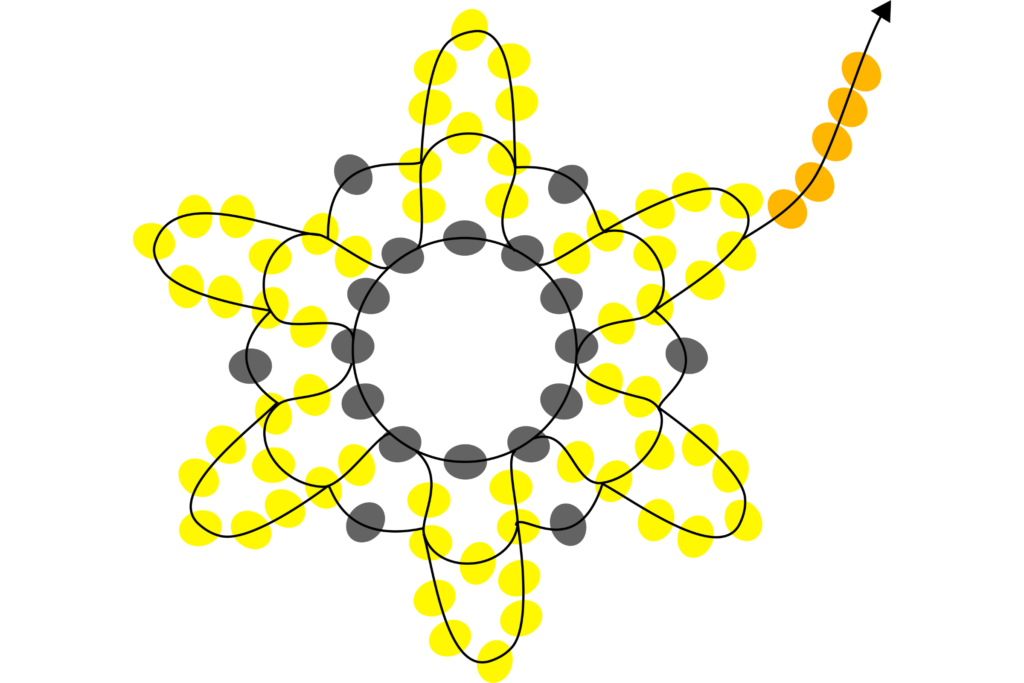
Skip one yellow bead and pass the needle through the next yellow bead.
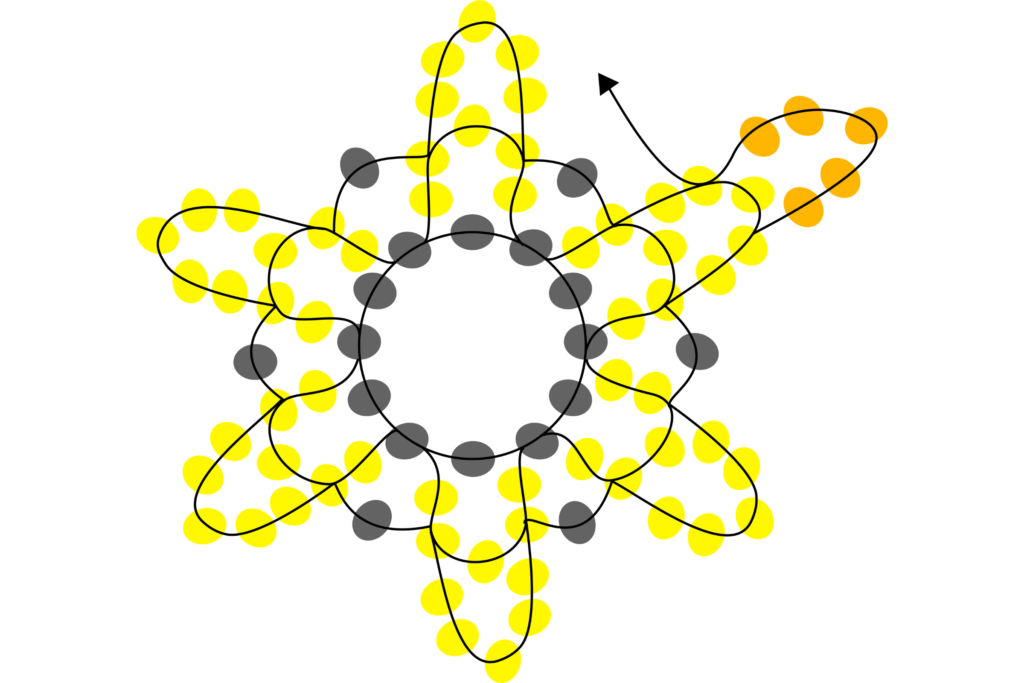
Pick one yellow bead, one black bead and one yellow bead.
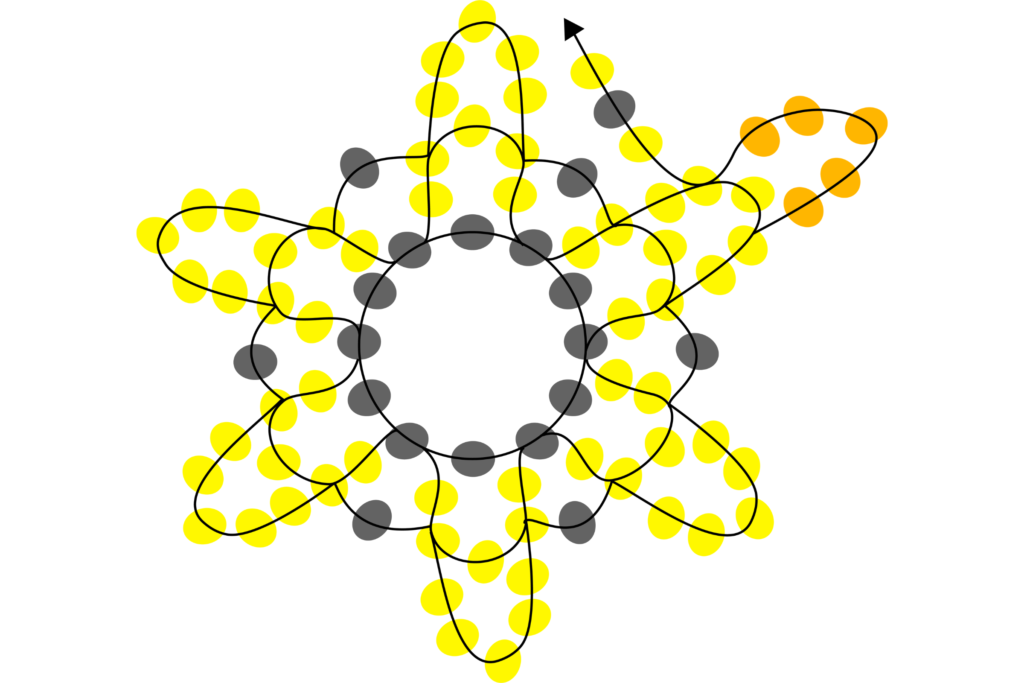
Pass the needle through the second yellow bead.
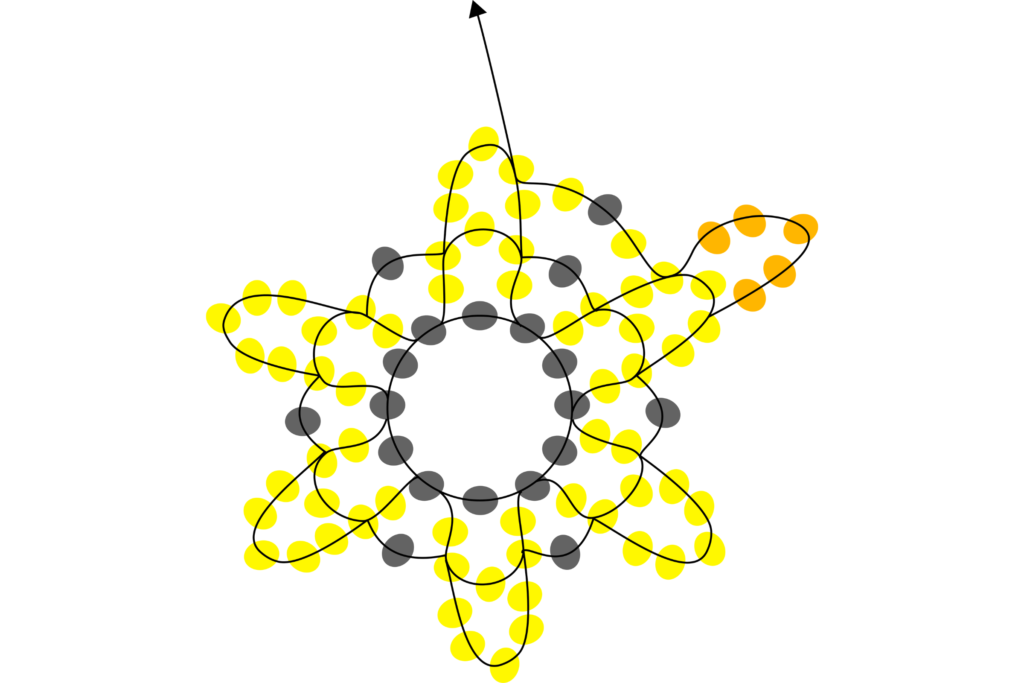
Pick 5 yellow-orange beads.

Skip one yellow bead and pass the needle through the next bead. Then, repeat the pattern by picking up one yellow bead, one black bead, and one yellow bead, and passing the needle through the second yellow bead. Continue this pattern until you reach the end.
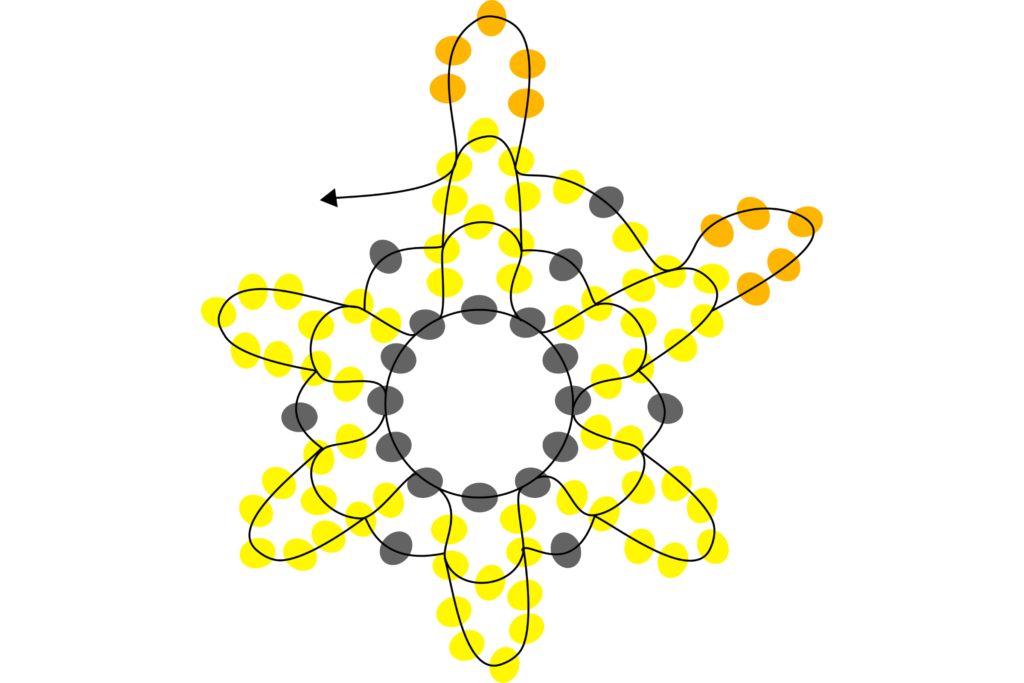
That wraps up our third step! Here’s what we have so far, and now we’re ready to move on to the next step.
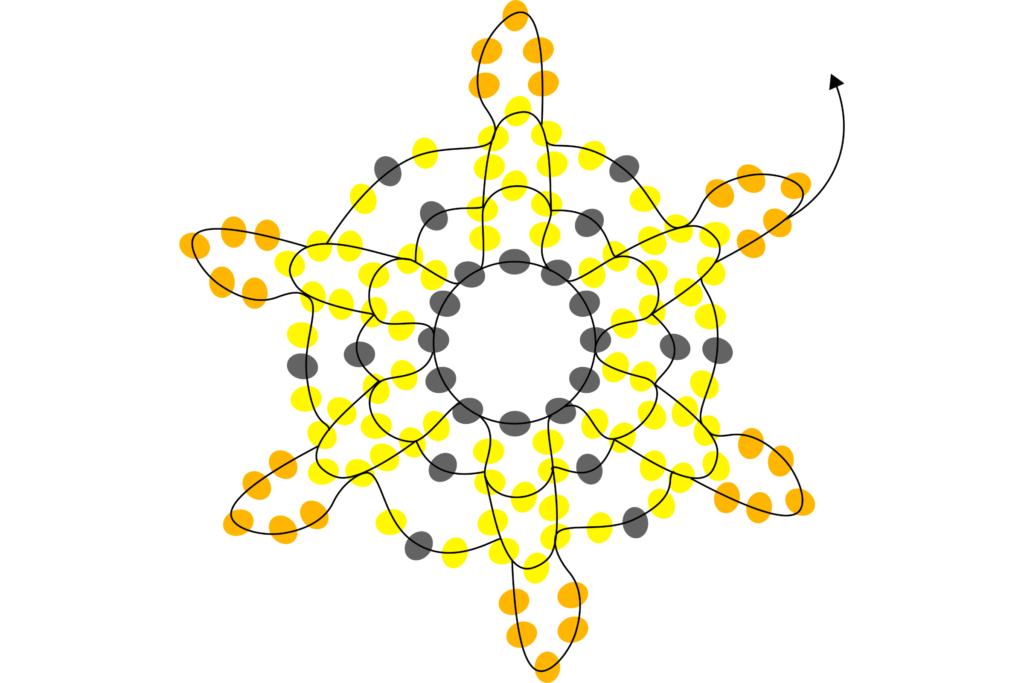
STEP 4
Start by picking 5 orange beads.
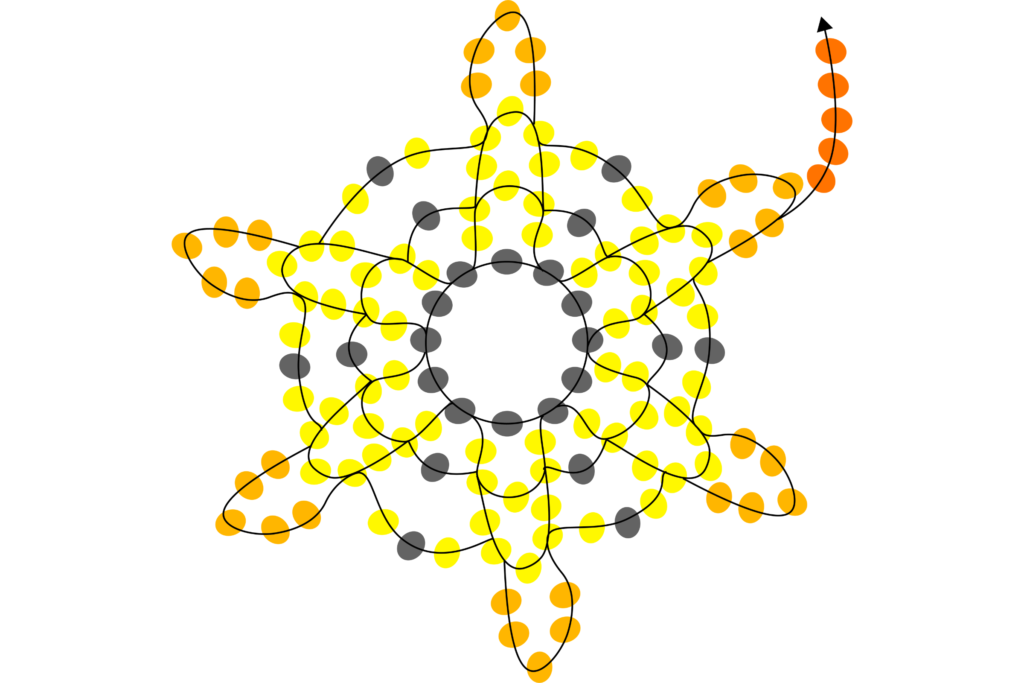
Skip one yellow-orange bead and pass the needle through the next bead.
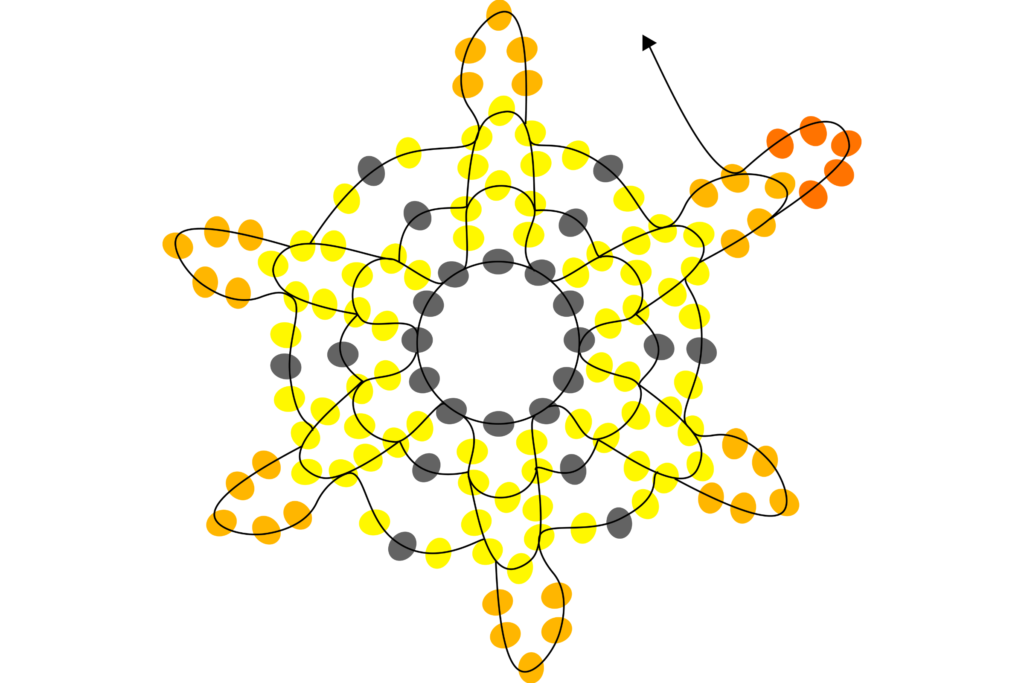
Pick 3 yellow-orange beads.
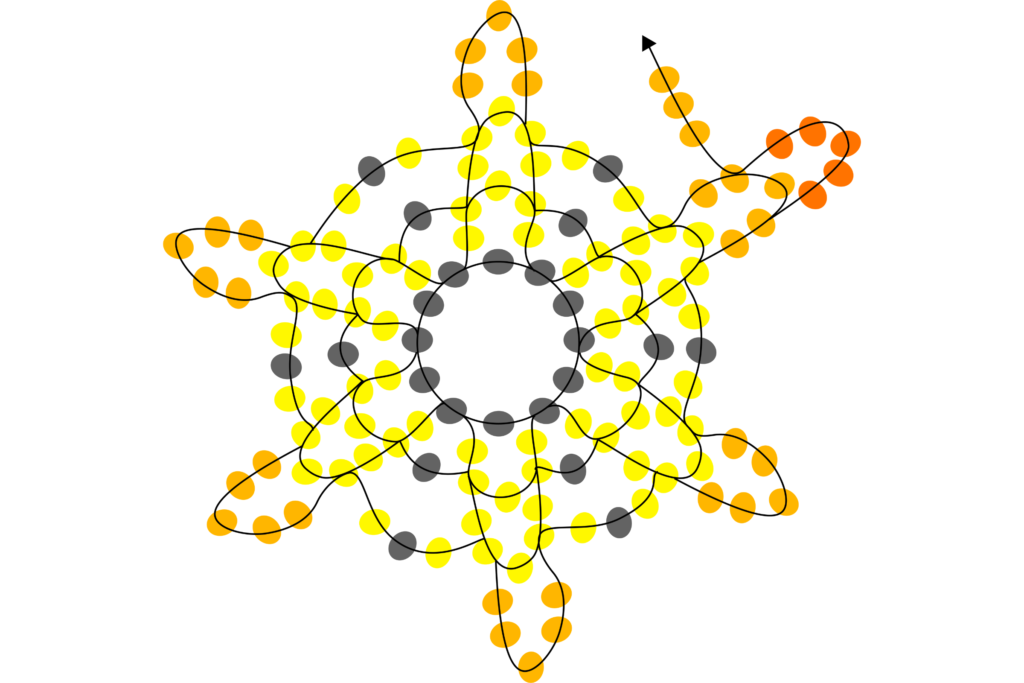
Pass the needle through the middle black bead.
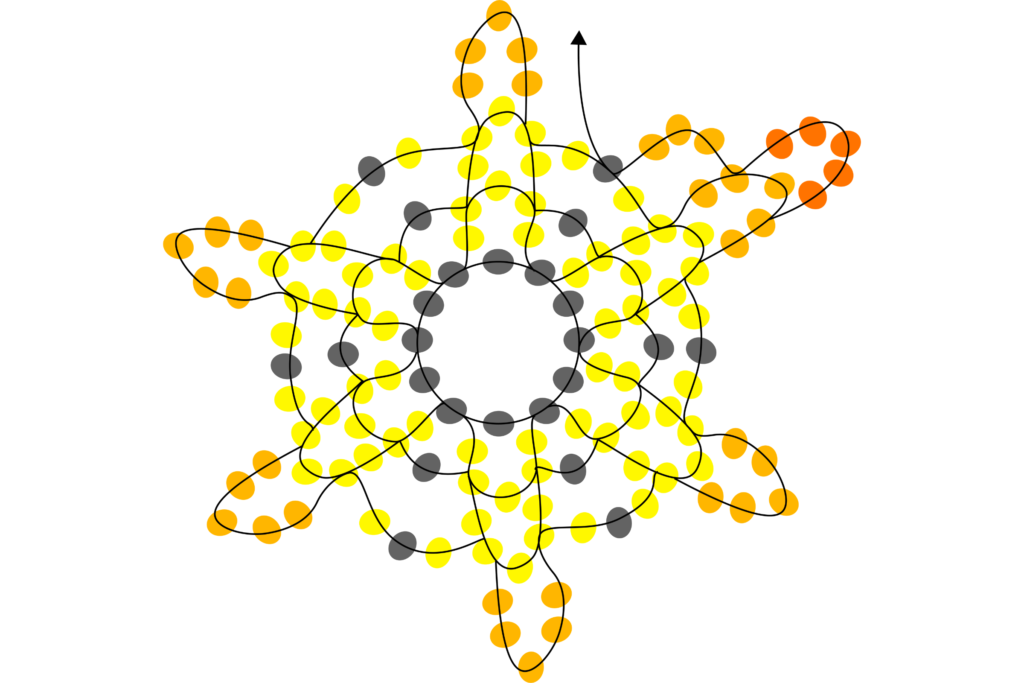
Pick 3 yellow-orange beads.
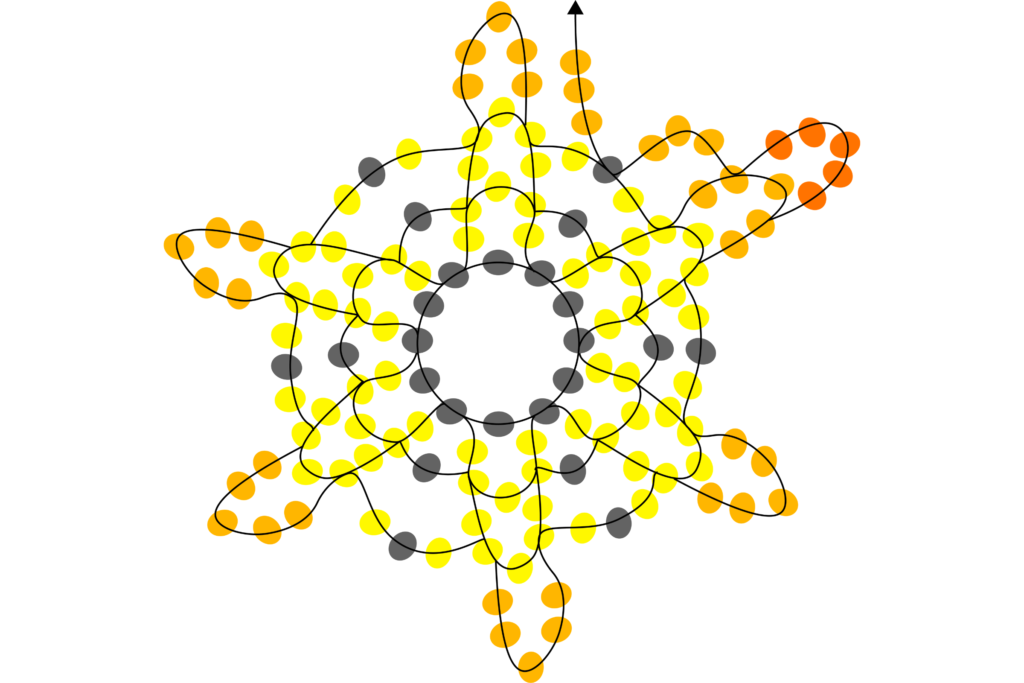
Pass the needle through the second yellow-orange bead.
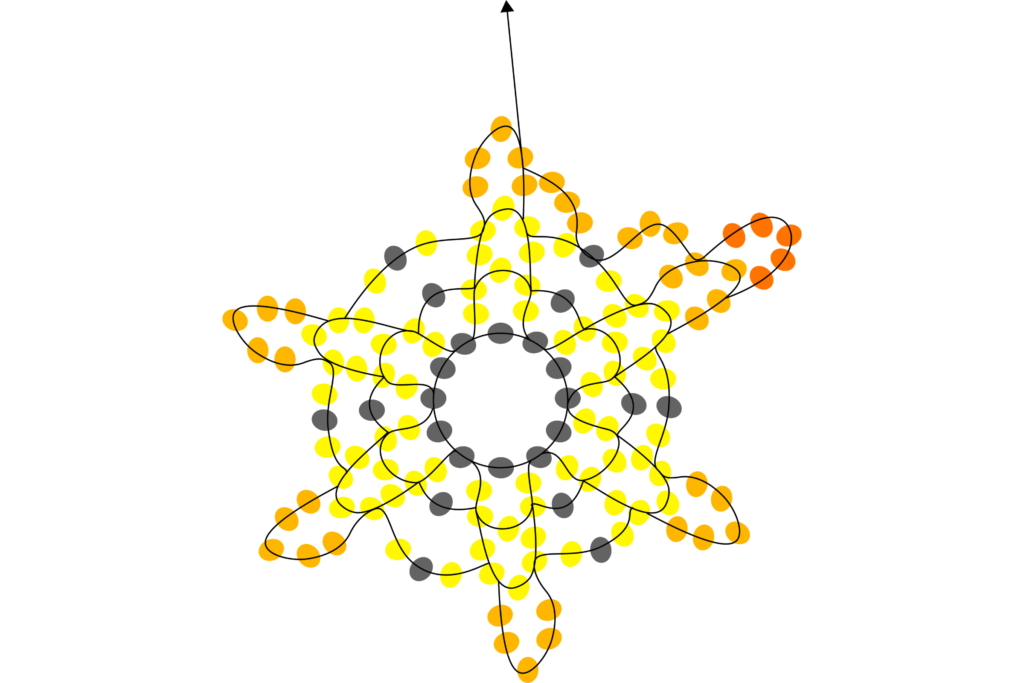
Pick 5 orange beads.

Skip one yellow-orange bead and pass the needle through the next bead. Continue repeating this pattern until you reach the end.

That’s the end of our fourth step! Here’s what we’ve achieved so far, and now we’re ready to move on to the next step.
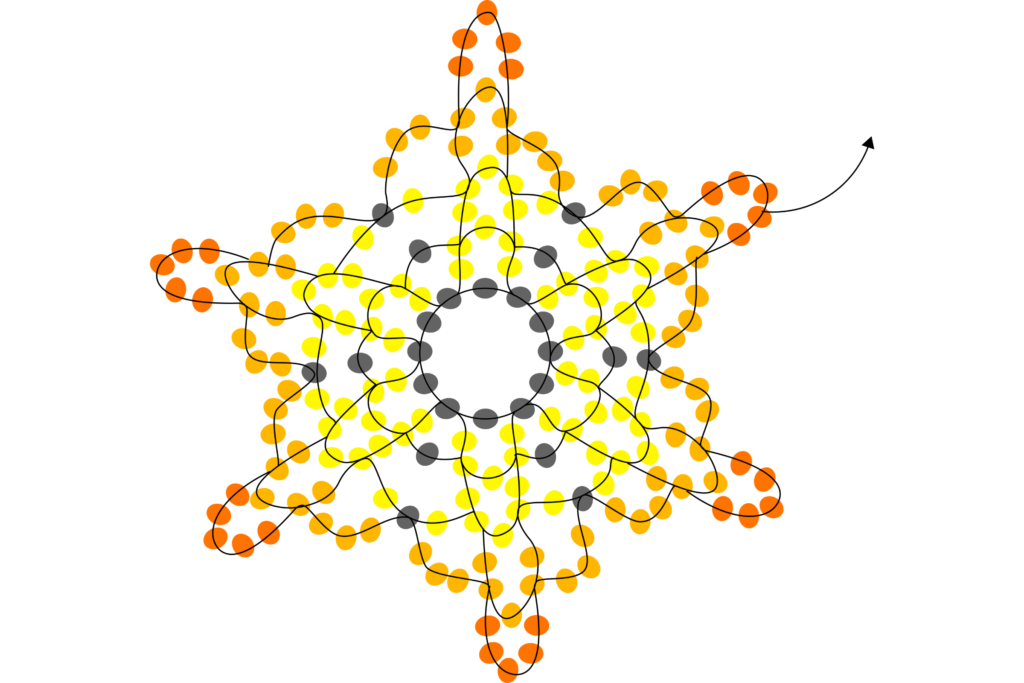
STEP 5
Start by picking 5 red beads.
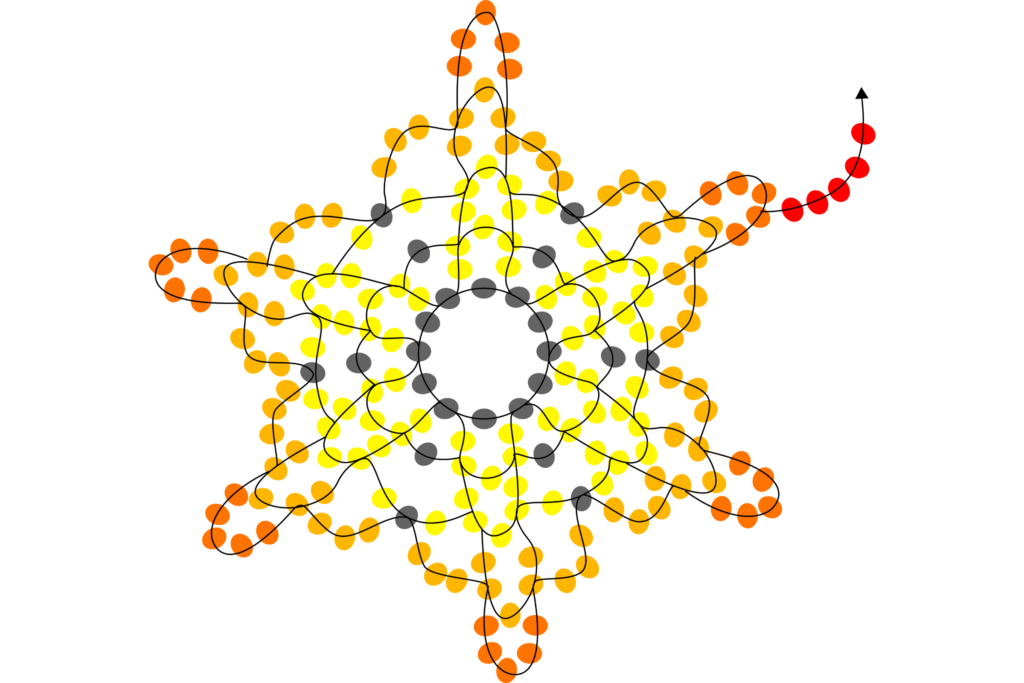
Skip one orange bead and pass the needle through the next orange bead.
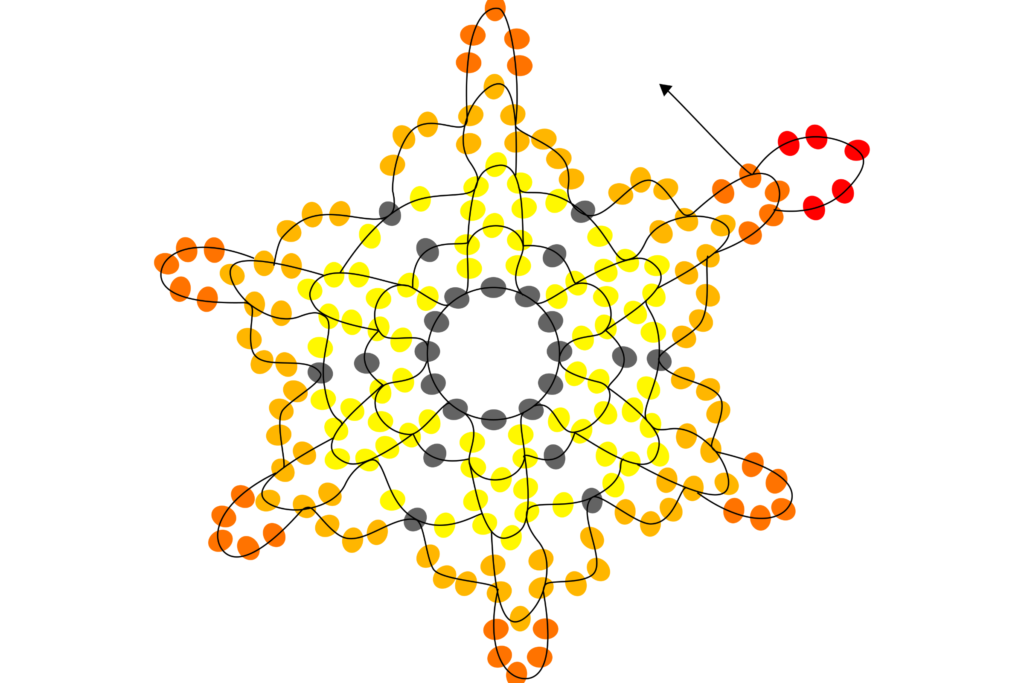
Pick 3 orange beads.
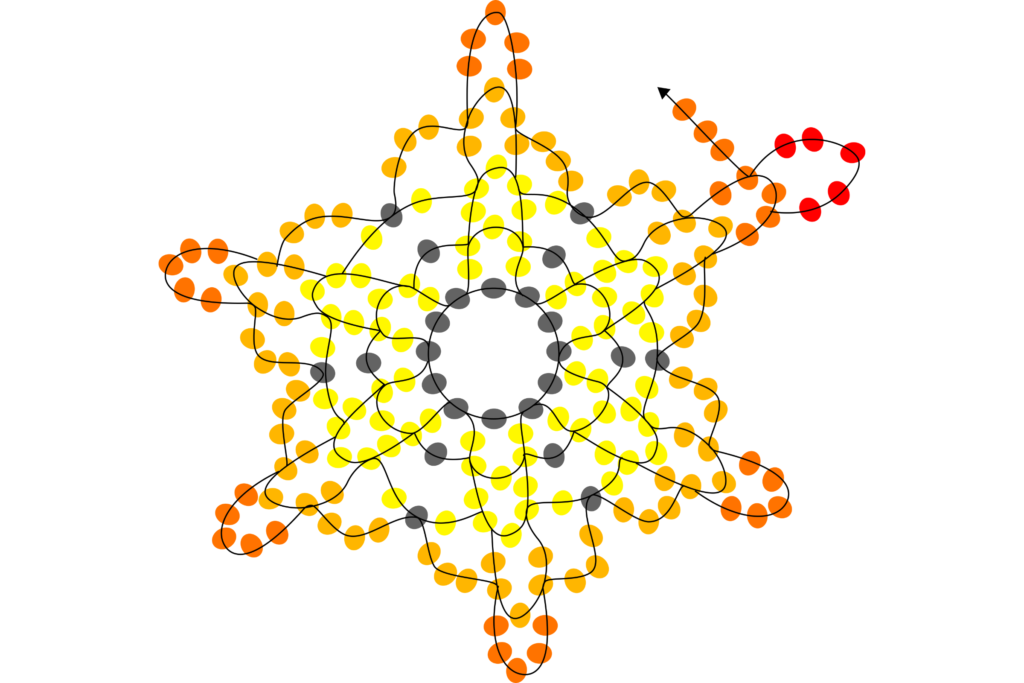
Pass the needle through the middle yellow-orange bead.
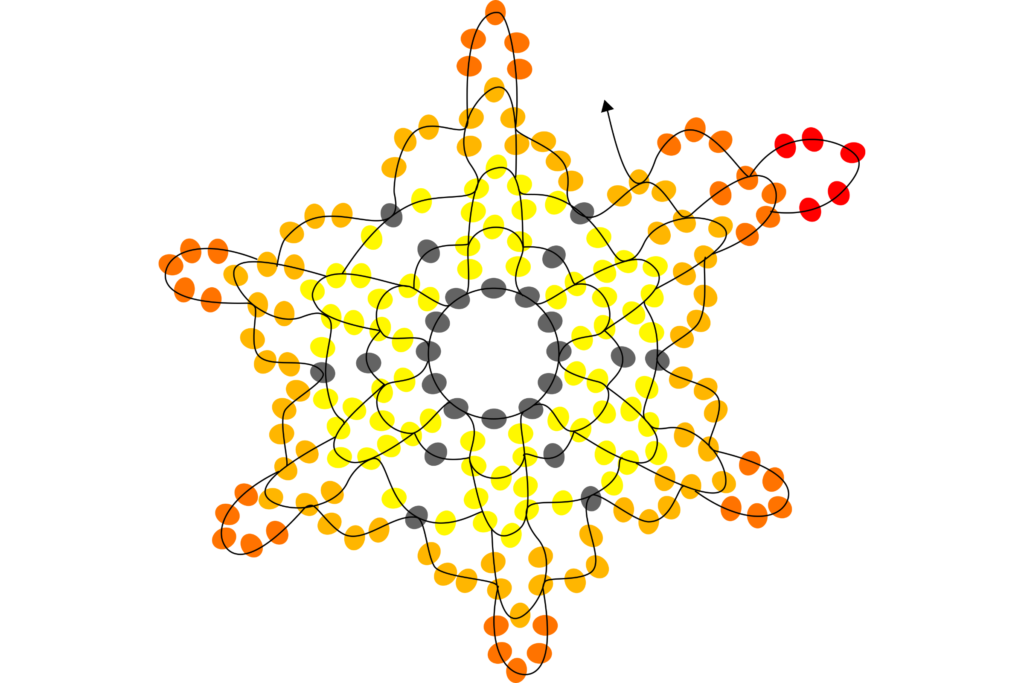
Pick one black bead.
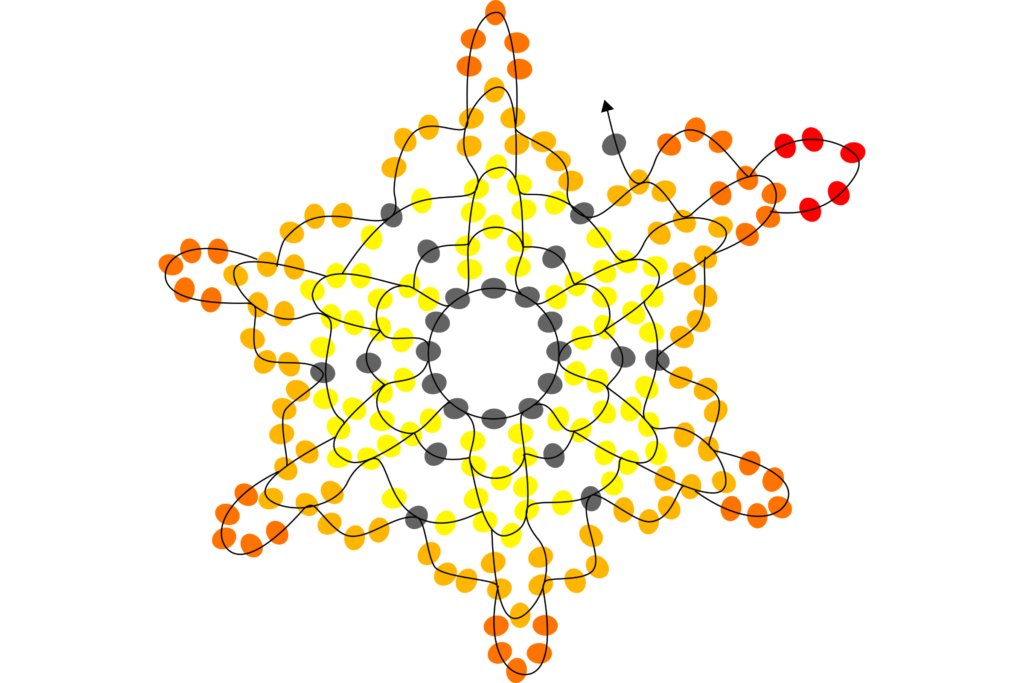
Pass the needle through the middle yellow-orange bead.
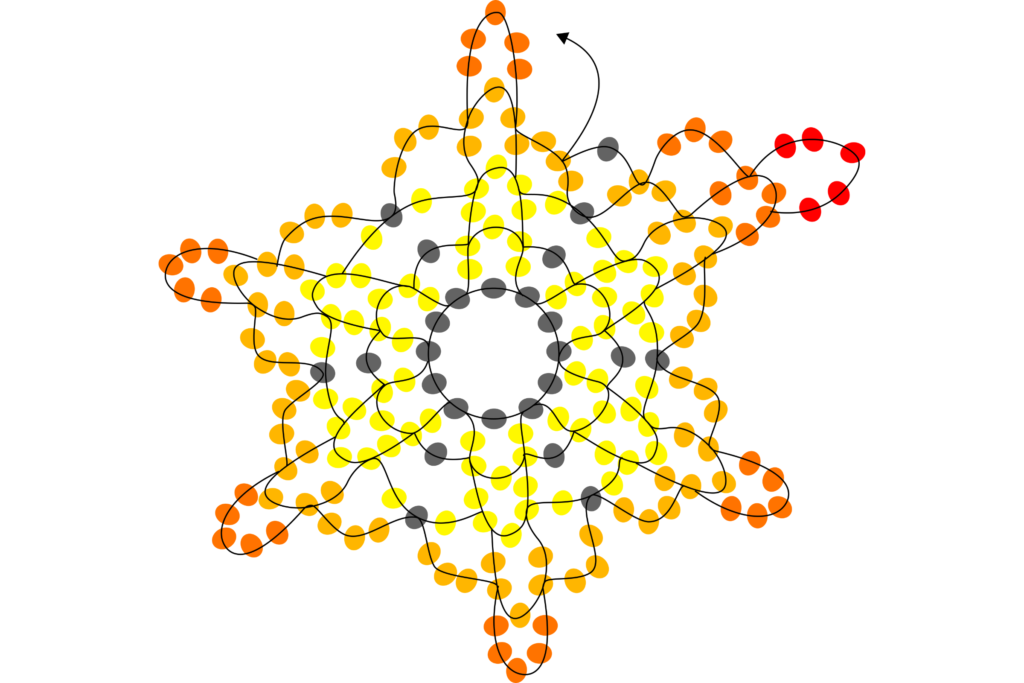
Pick 3 orange beads.
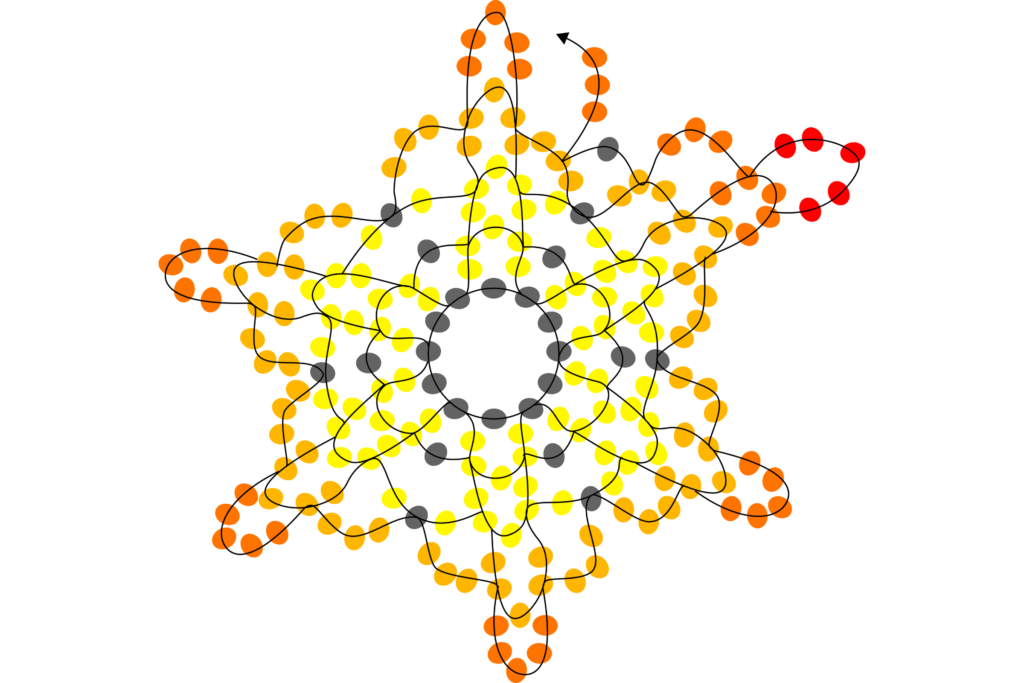
Pass the needle through the second orange bead.
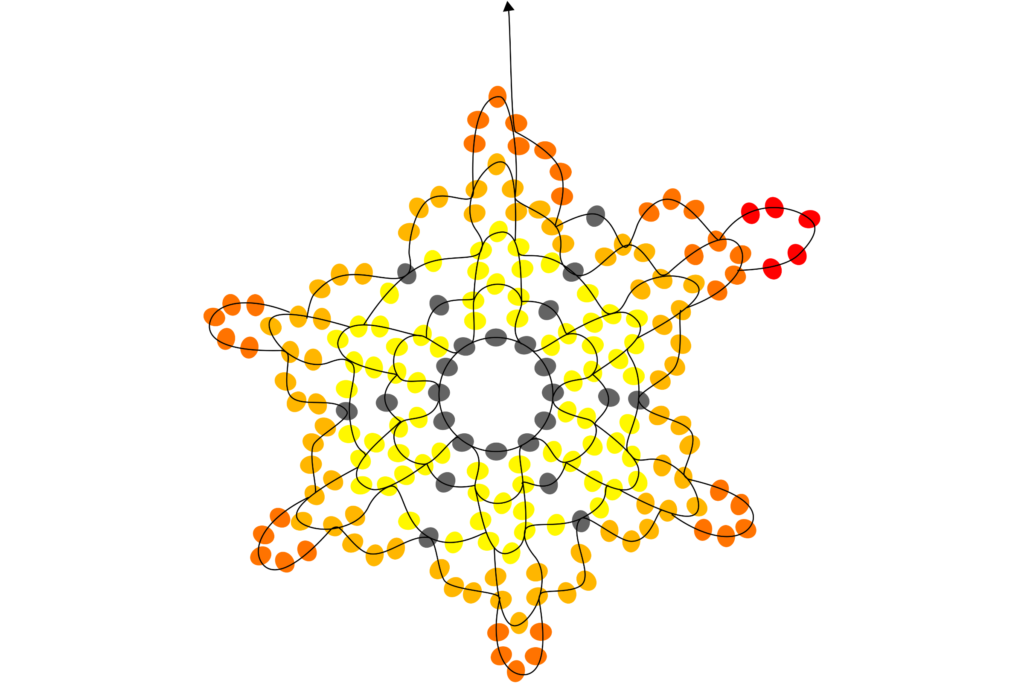
Pick 5 red beads.
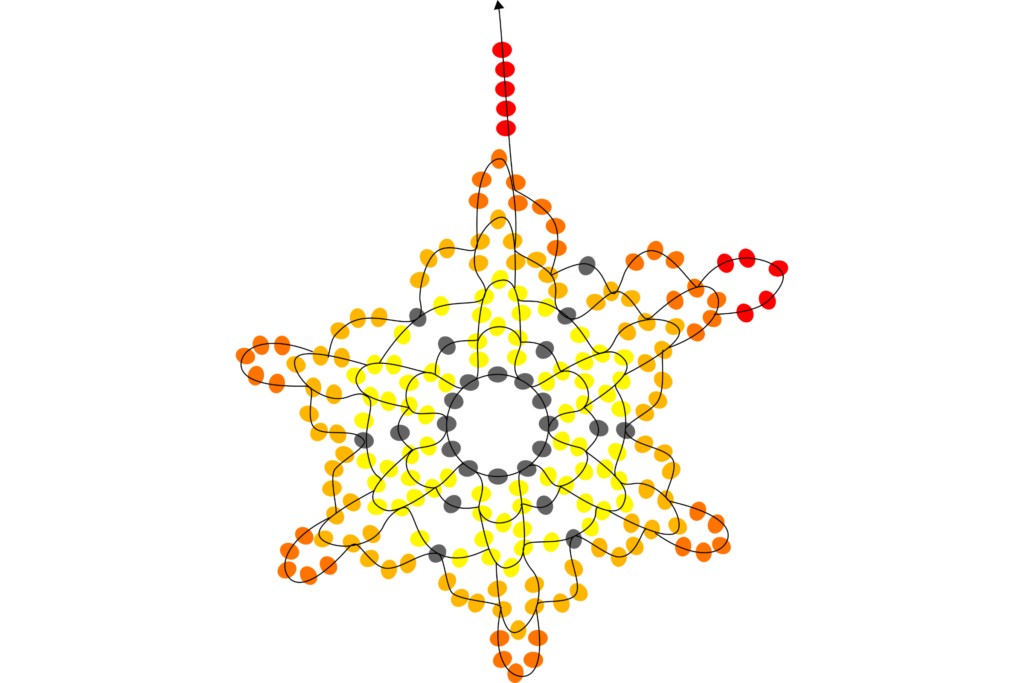
Skip one orange bead and pass the needle through the next orange bead.
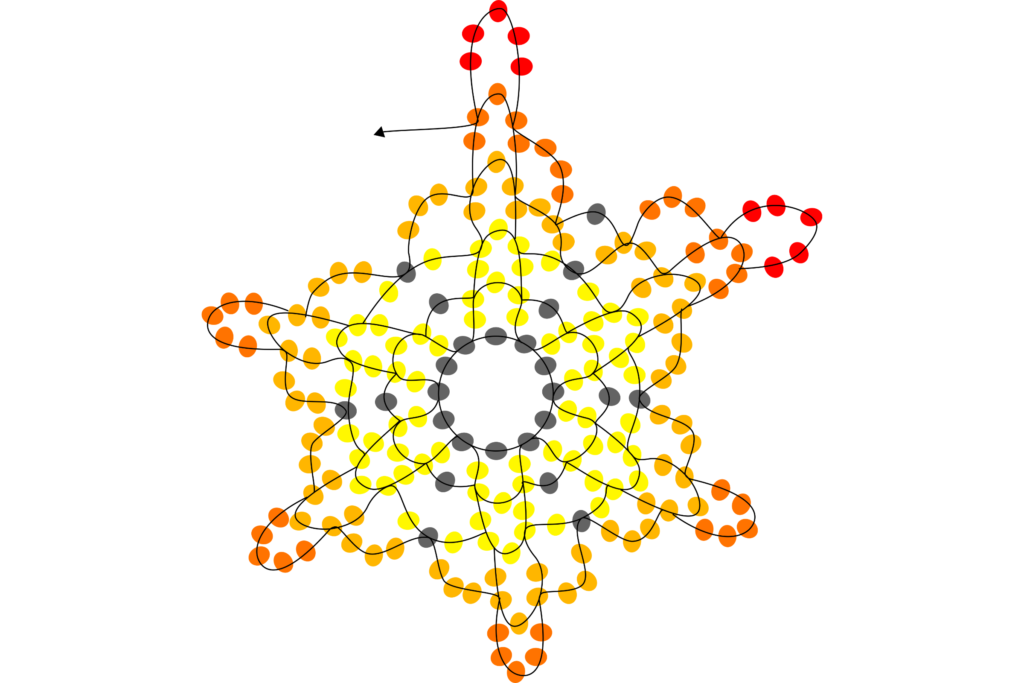
Pick 3 orange beads.
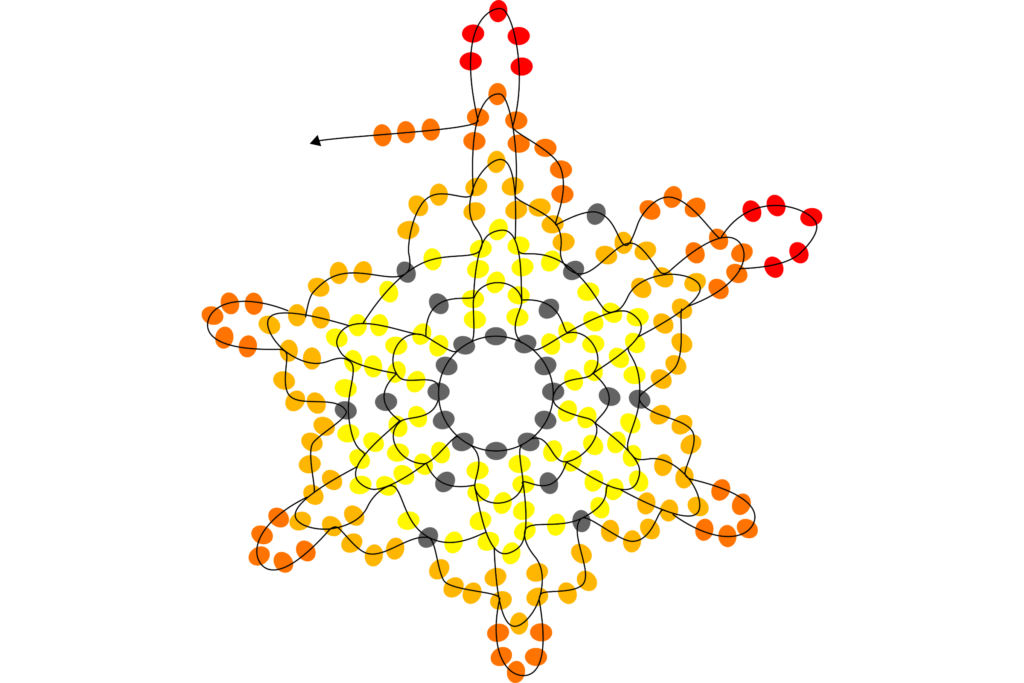
Pass the needle through the middle yellow-orange bead. Then, repeat the previous steps until you reach the end.
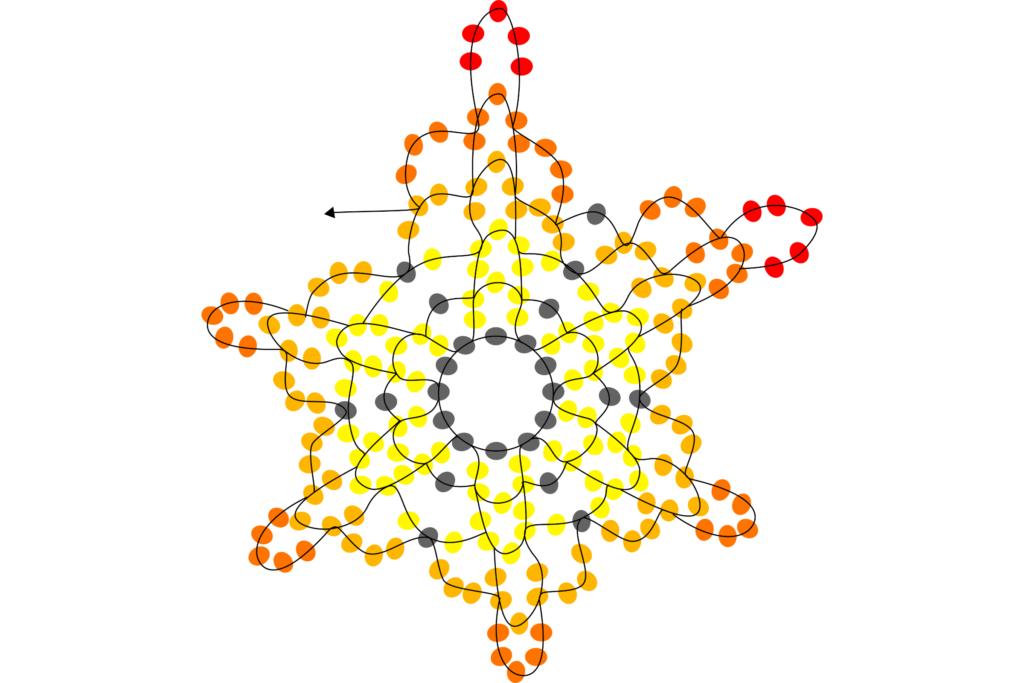
That’s the end of our fifth step! Here’s what we’ve accomplished so far, and now we’re ready to move on to the next step.
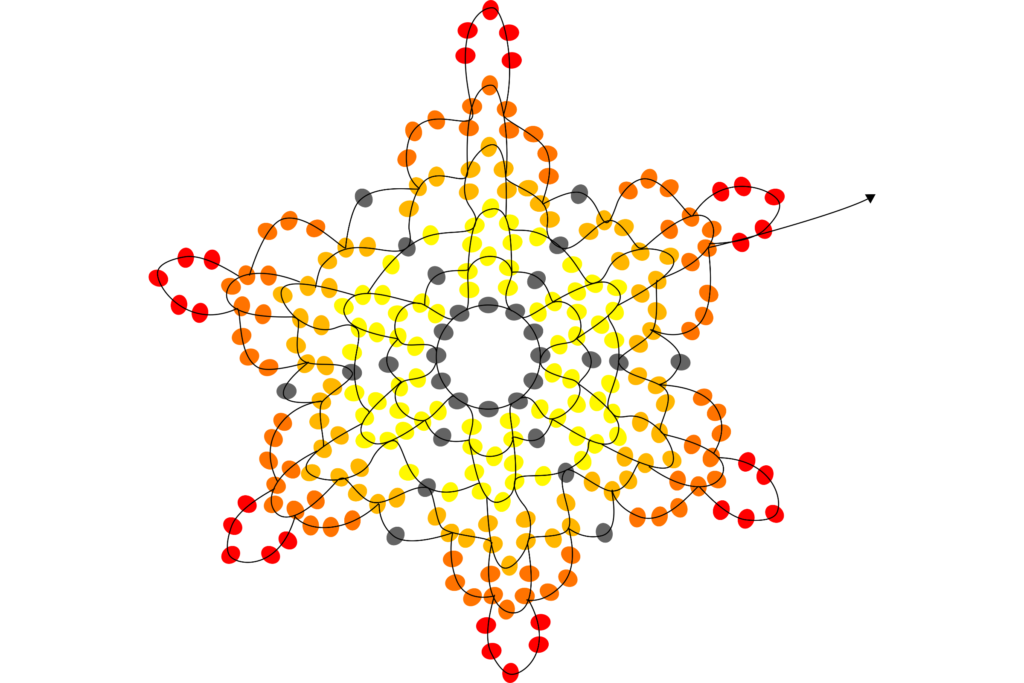
STEP 6
Start by picking 3 red beads.
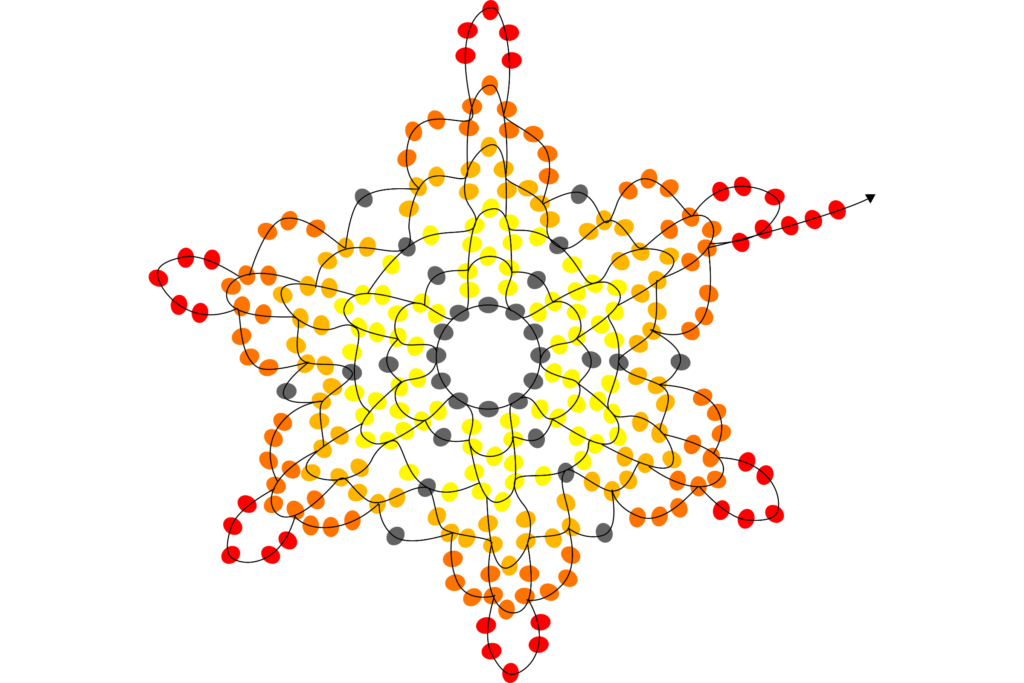
Skip one red bead and pass the needle through the next red bead.
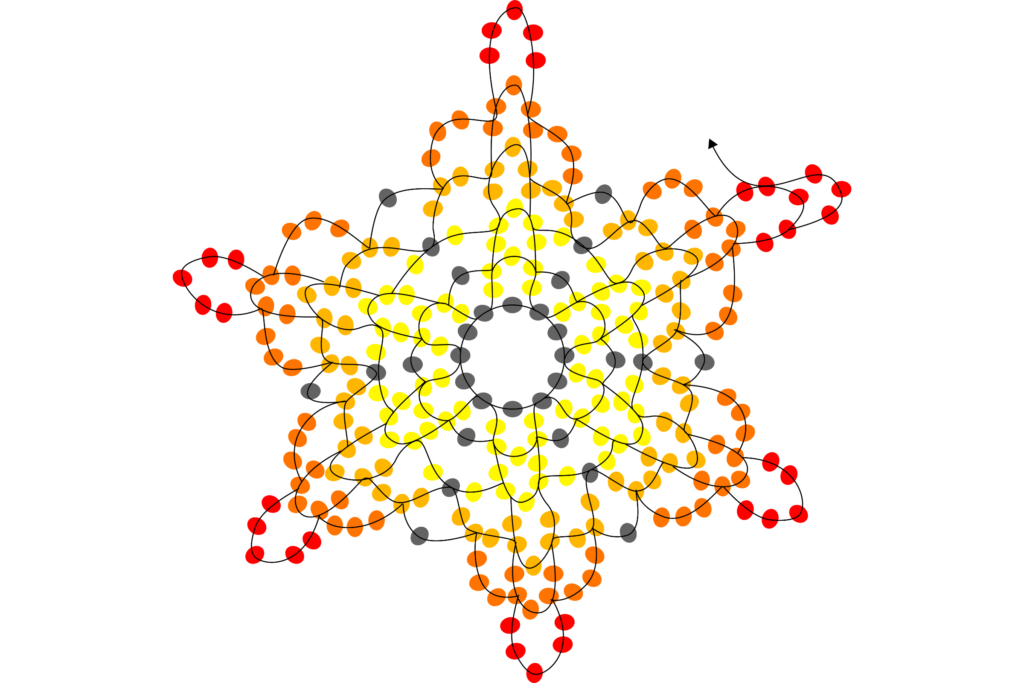
Pick 3 black beads.
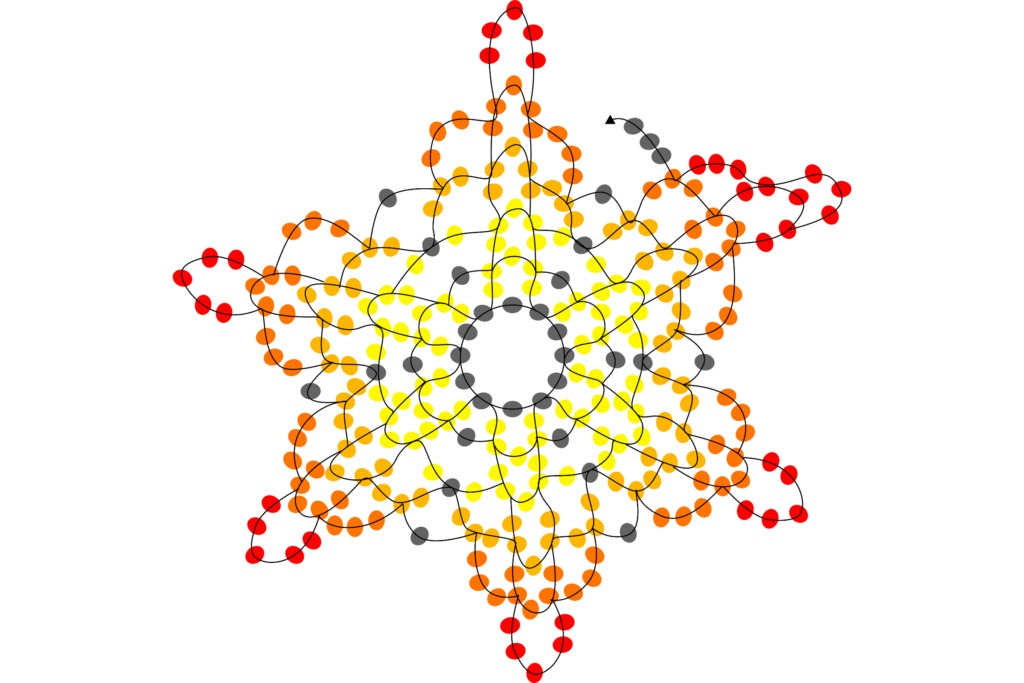
Pass the needle through the middle orange bead.
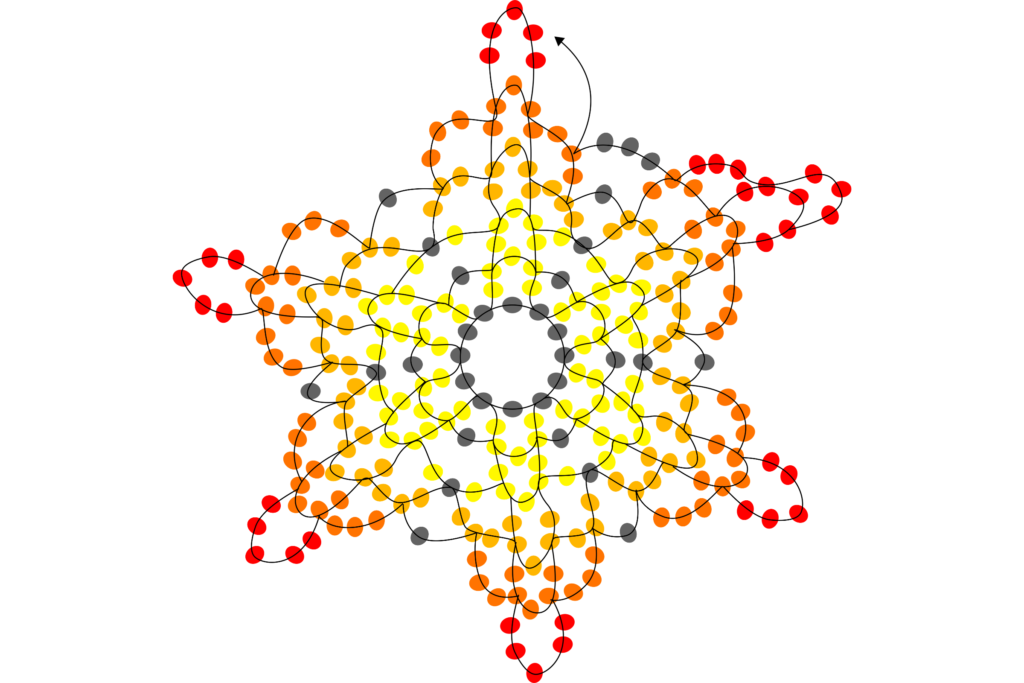
Pick 3 red beads and pass the needle through the second red bead.
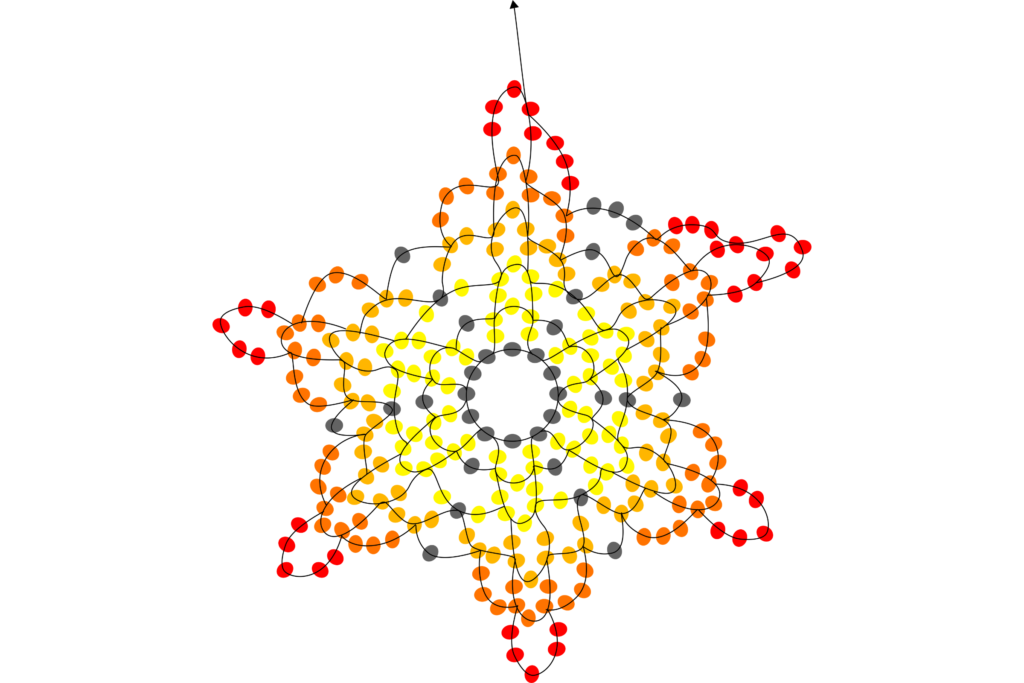
Pick 3 red beads.
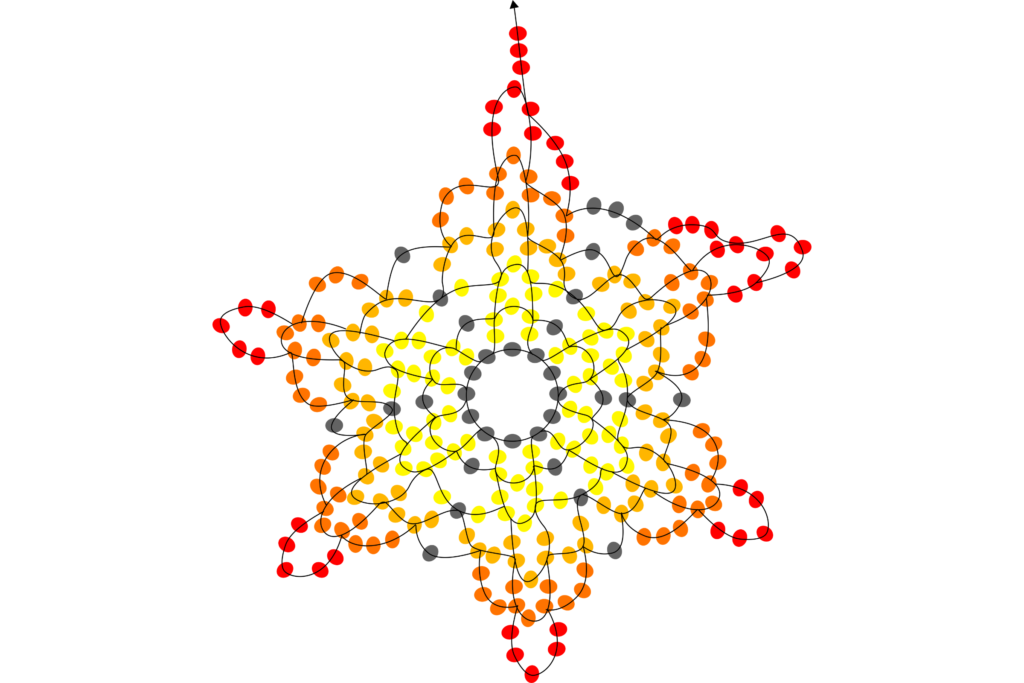
Skip one red bead and pass the needle through the next red bead.
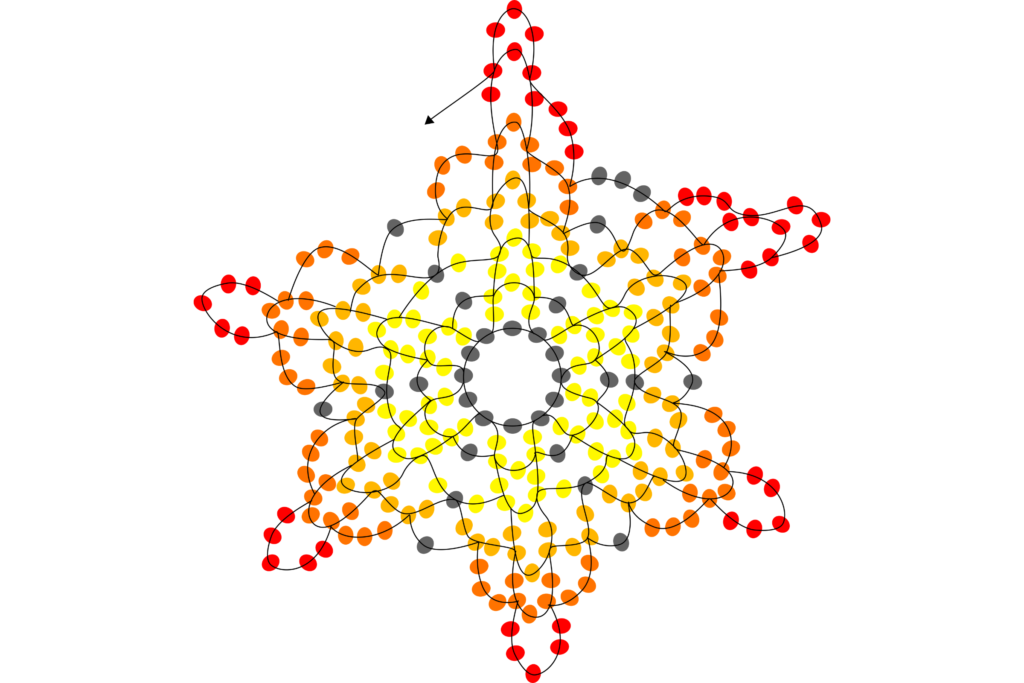
Pick up 3 red beads and pass the needle through the middle orange bead. Then, repeat the previous steps until you reach the end. This is the final step!
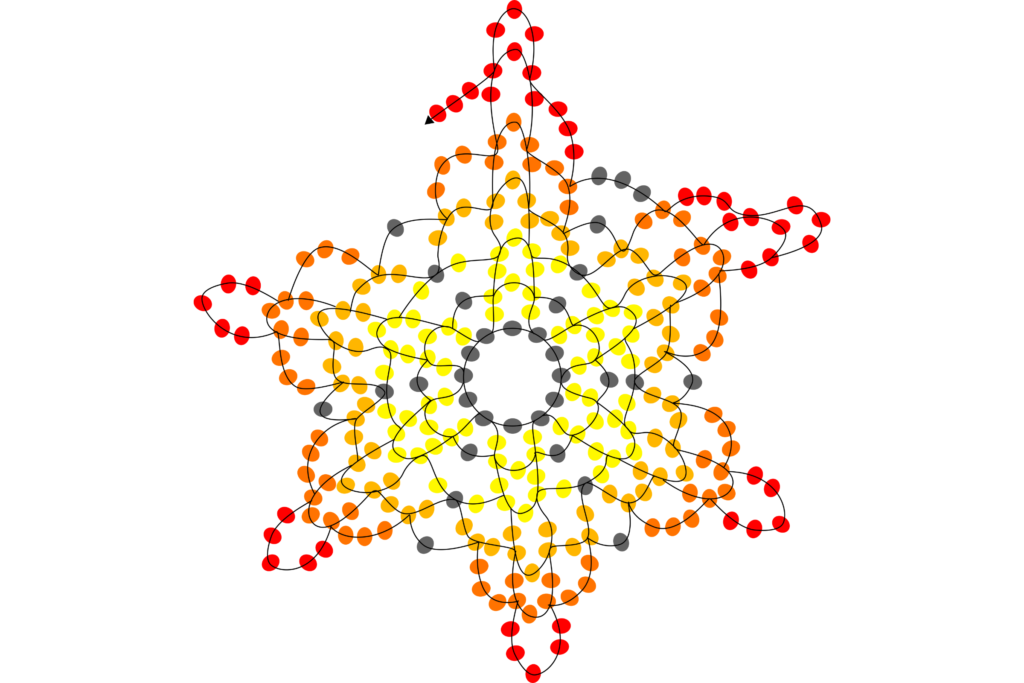
And that’s a wrap! If you’d like, you can add some fringe to your earrings to give them an extra flair.
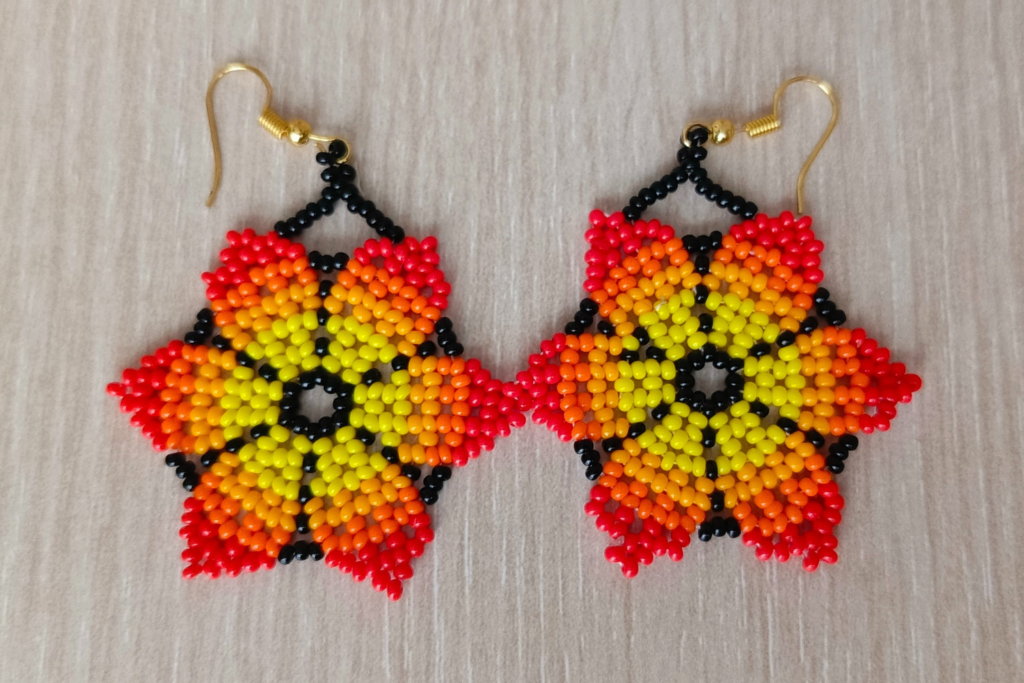
With fringe.
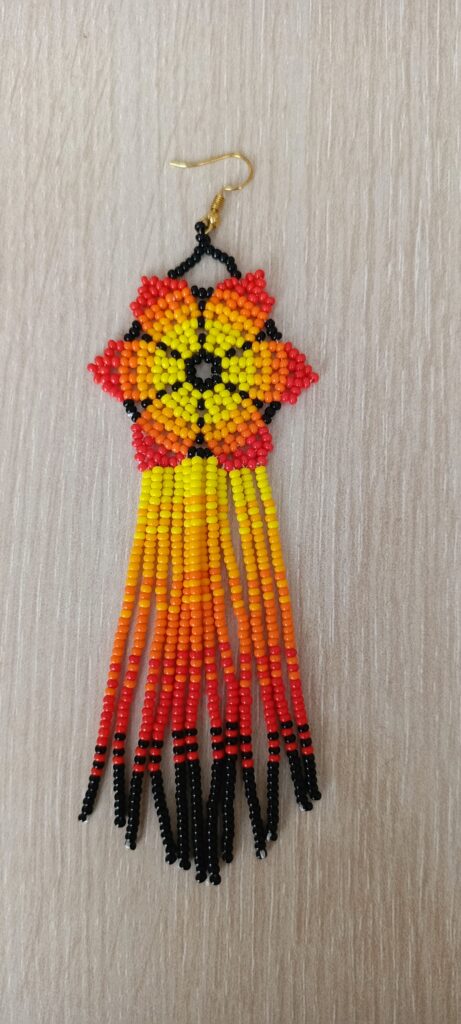
I hope you enjoyed this tutorial and found it easy to follow. Don’t forget to subscribe to my YouTube channel for more visual tutorials and tips. I’d love to see your creations, so feel free to share them with me. Thanks for crafting with me today, and happy beading!

