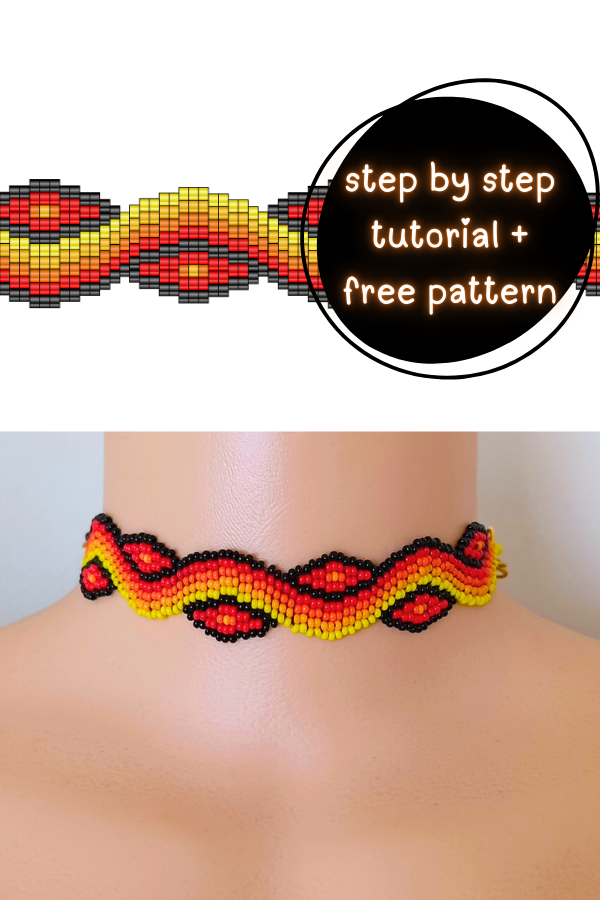
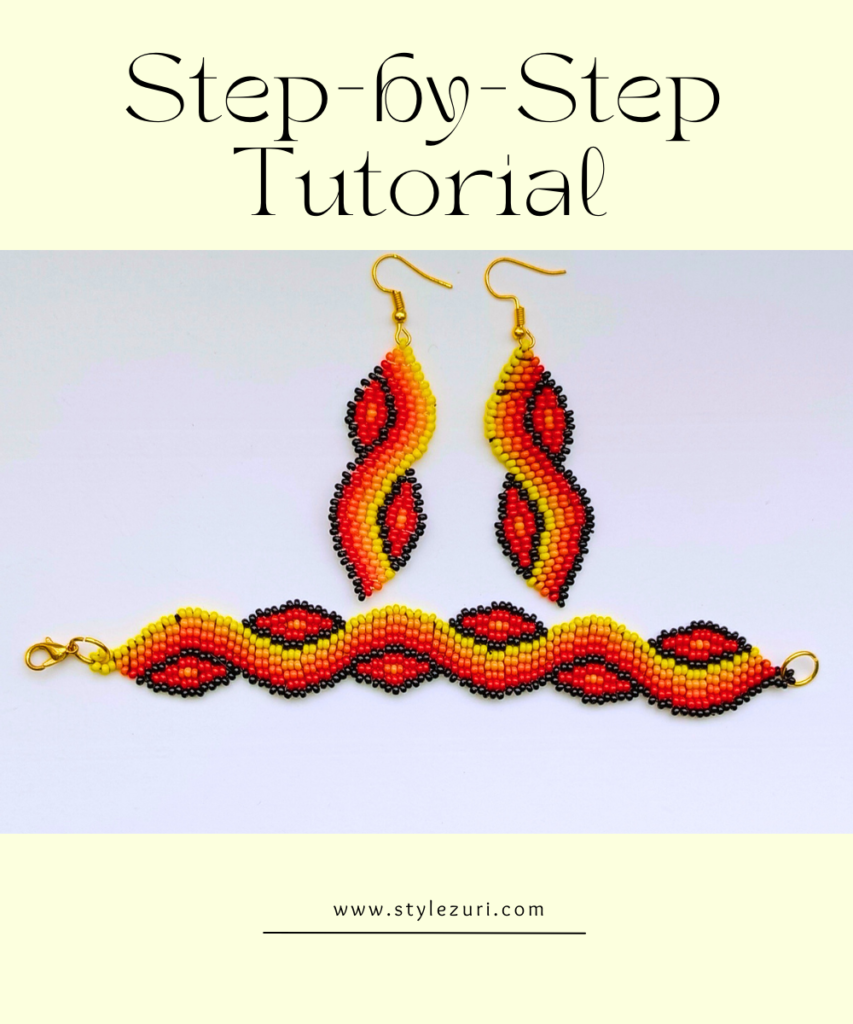
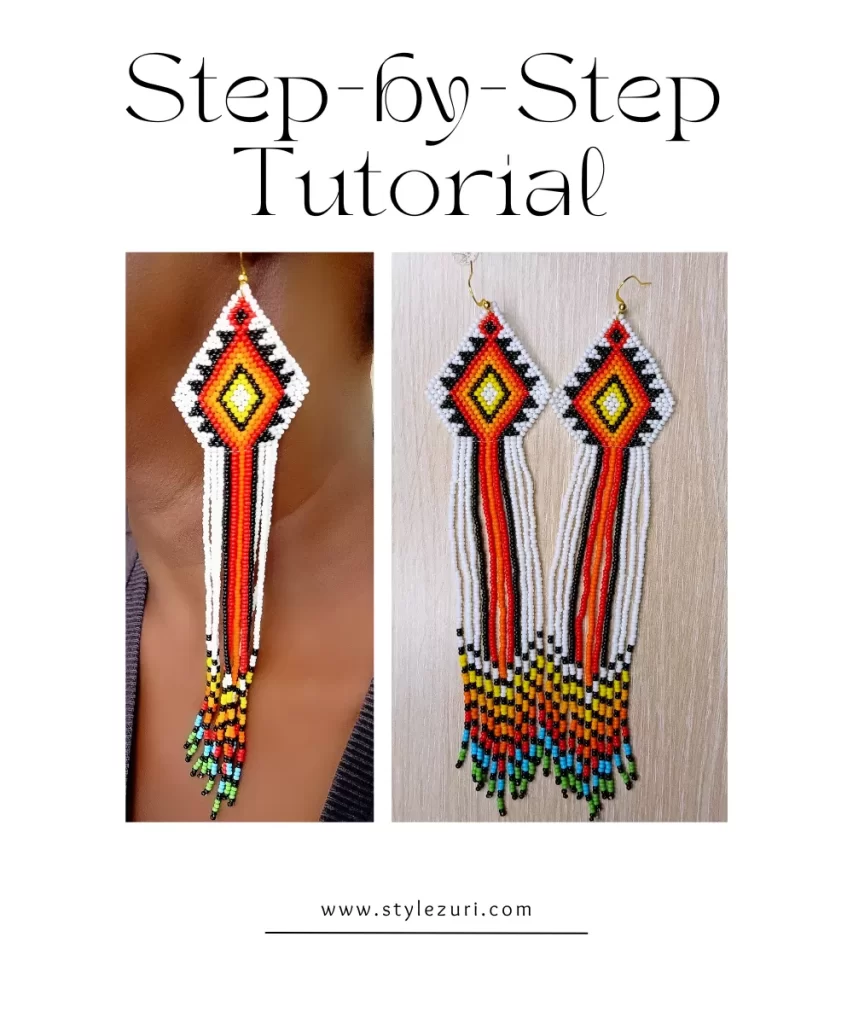
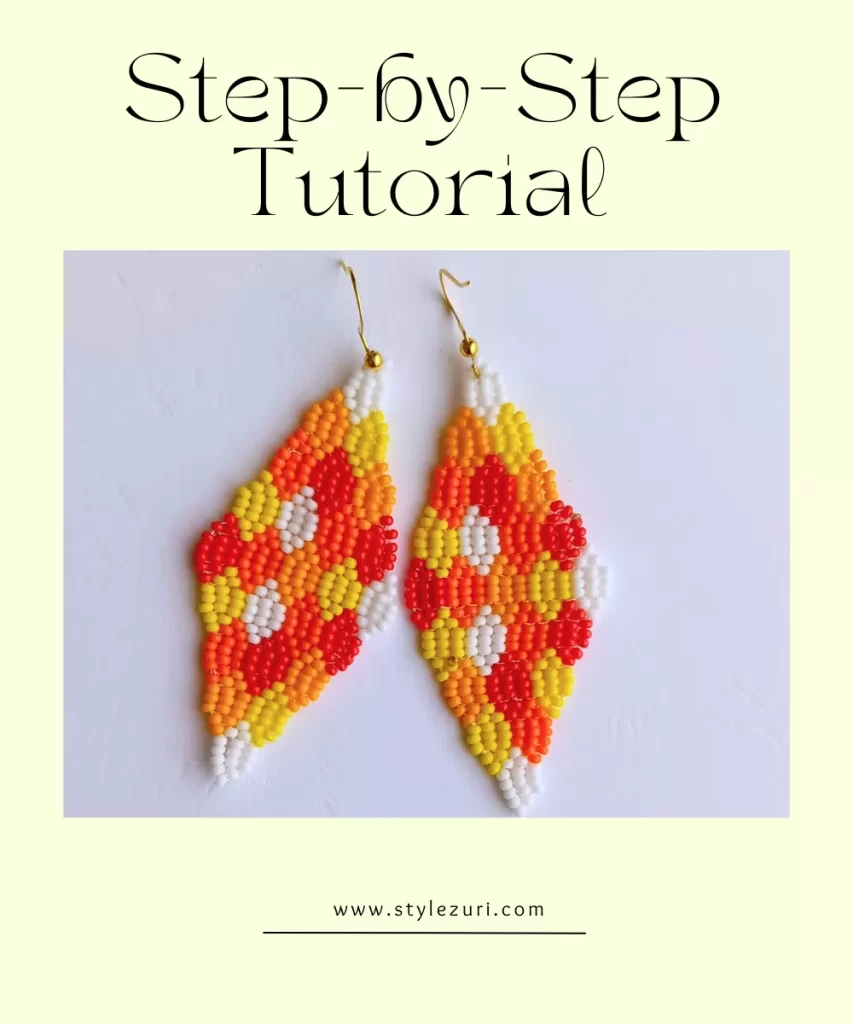
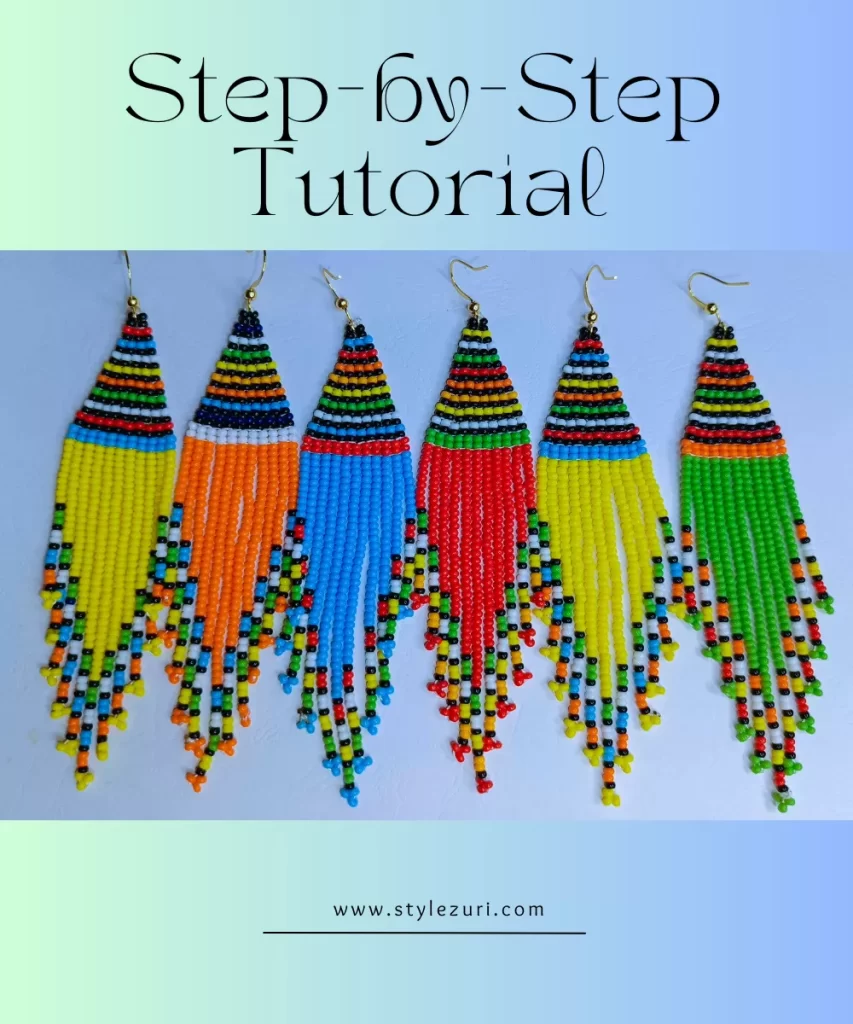
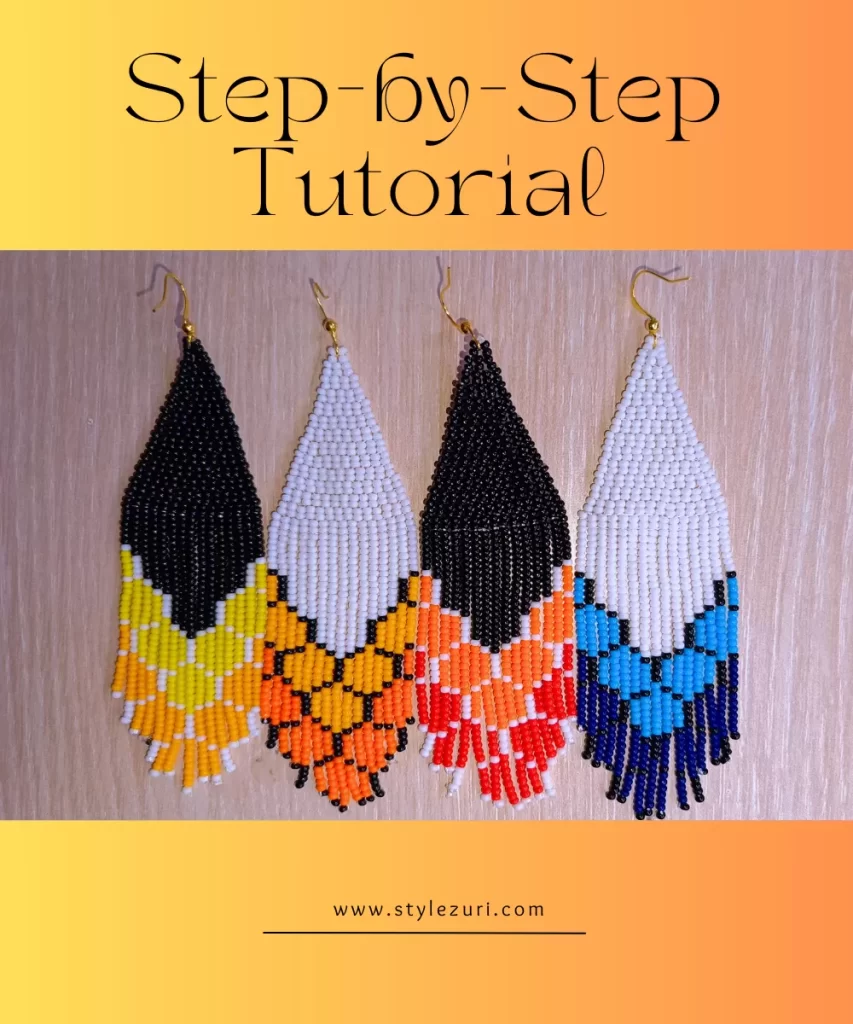
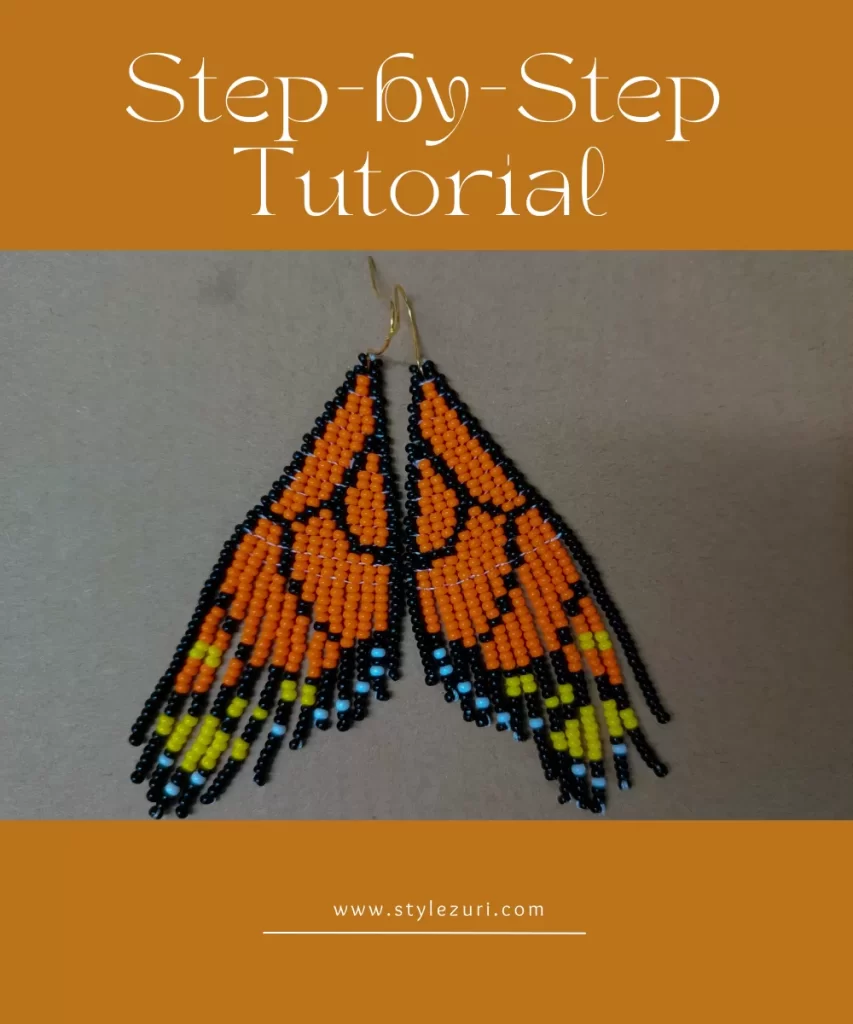
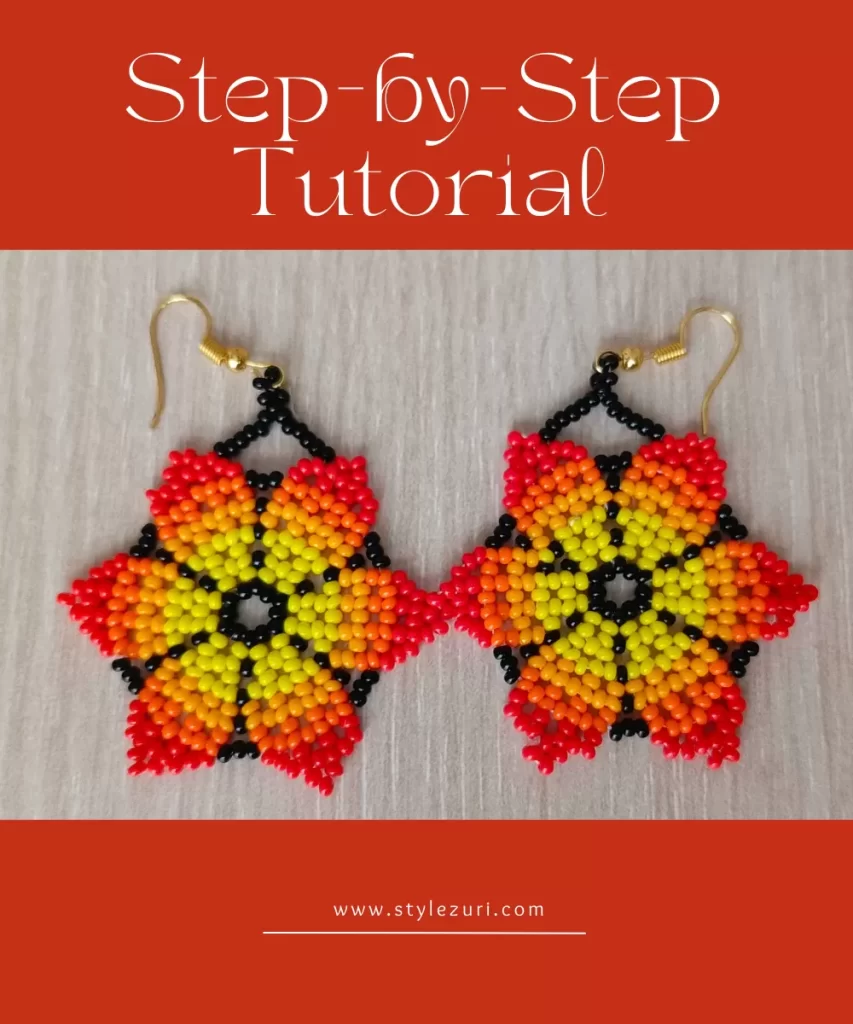
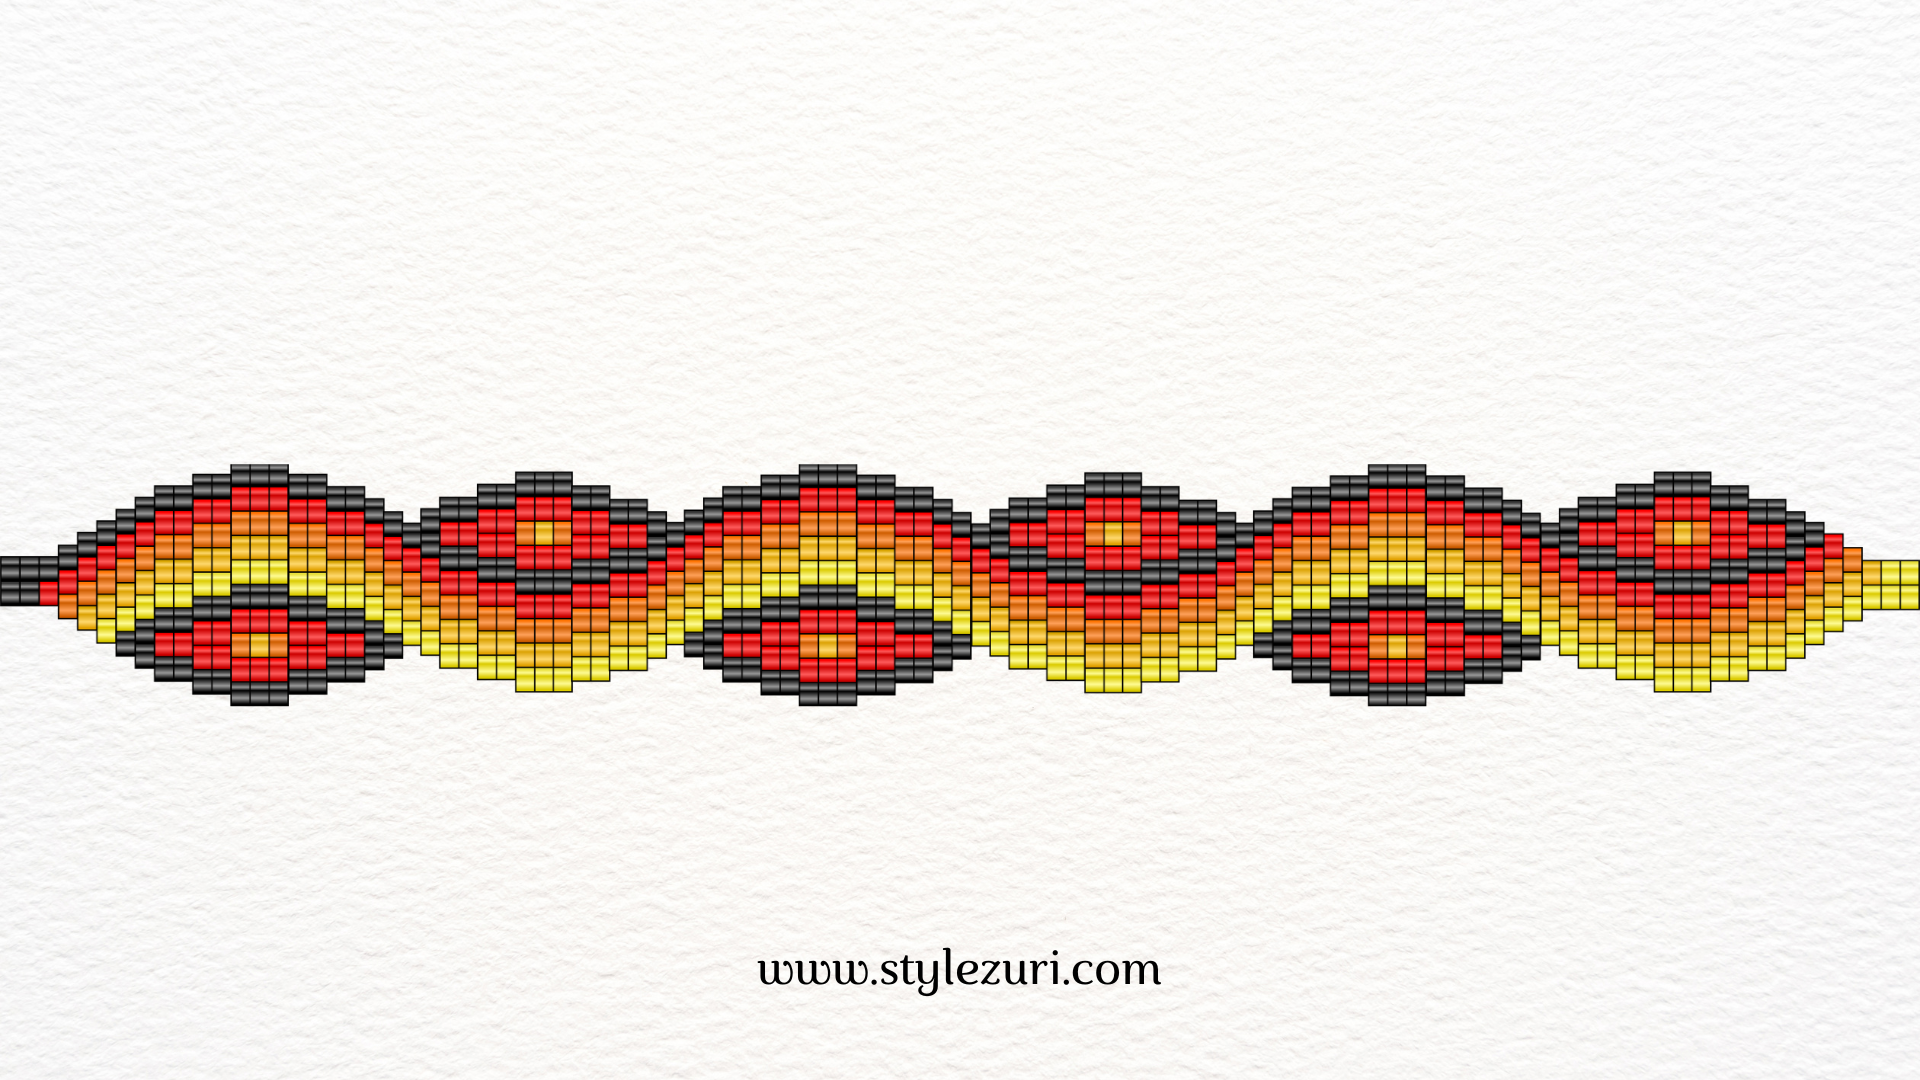
This wave-inspired beaded bracelet/necklace might look difficult to execute, but it’s actually quite easy! We’ll be using the brick stitch technique, incorporating a combination of increase and decrease stitches. If you’re new to brick stitching, make sure to master the techniques by referring to our comprehensive article for beginners. As always, feel free to use any colors you prefer for your beads, but in this tutorial, I’ll be using a total of 5 size 10 seed bead colors: black, red, light orange, dark orange, and yellow. You will also need a beading needle, thread, a lobster claw clasp, and jump rings. If you wish to create matching earrings, don’t forget to grab some earring hooks!
You can get the size 10 seed beads from www.craftsupplydepot.com
For those who love a more hands-on approach, I’ve got you covered! Scroll down to the end of the blog for a real-time video tutorial where you can watch me create this step-by-step!
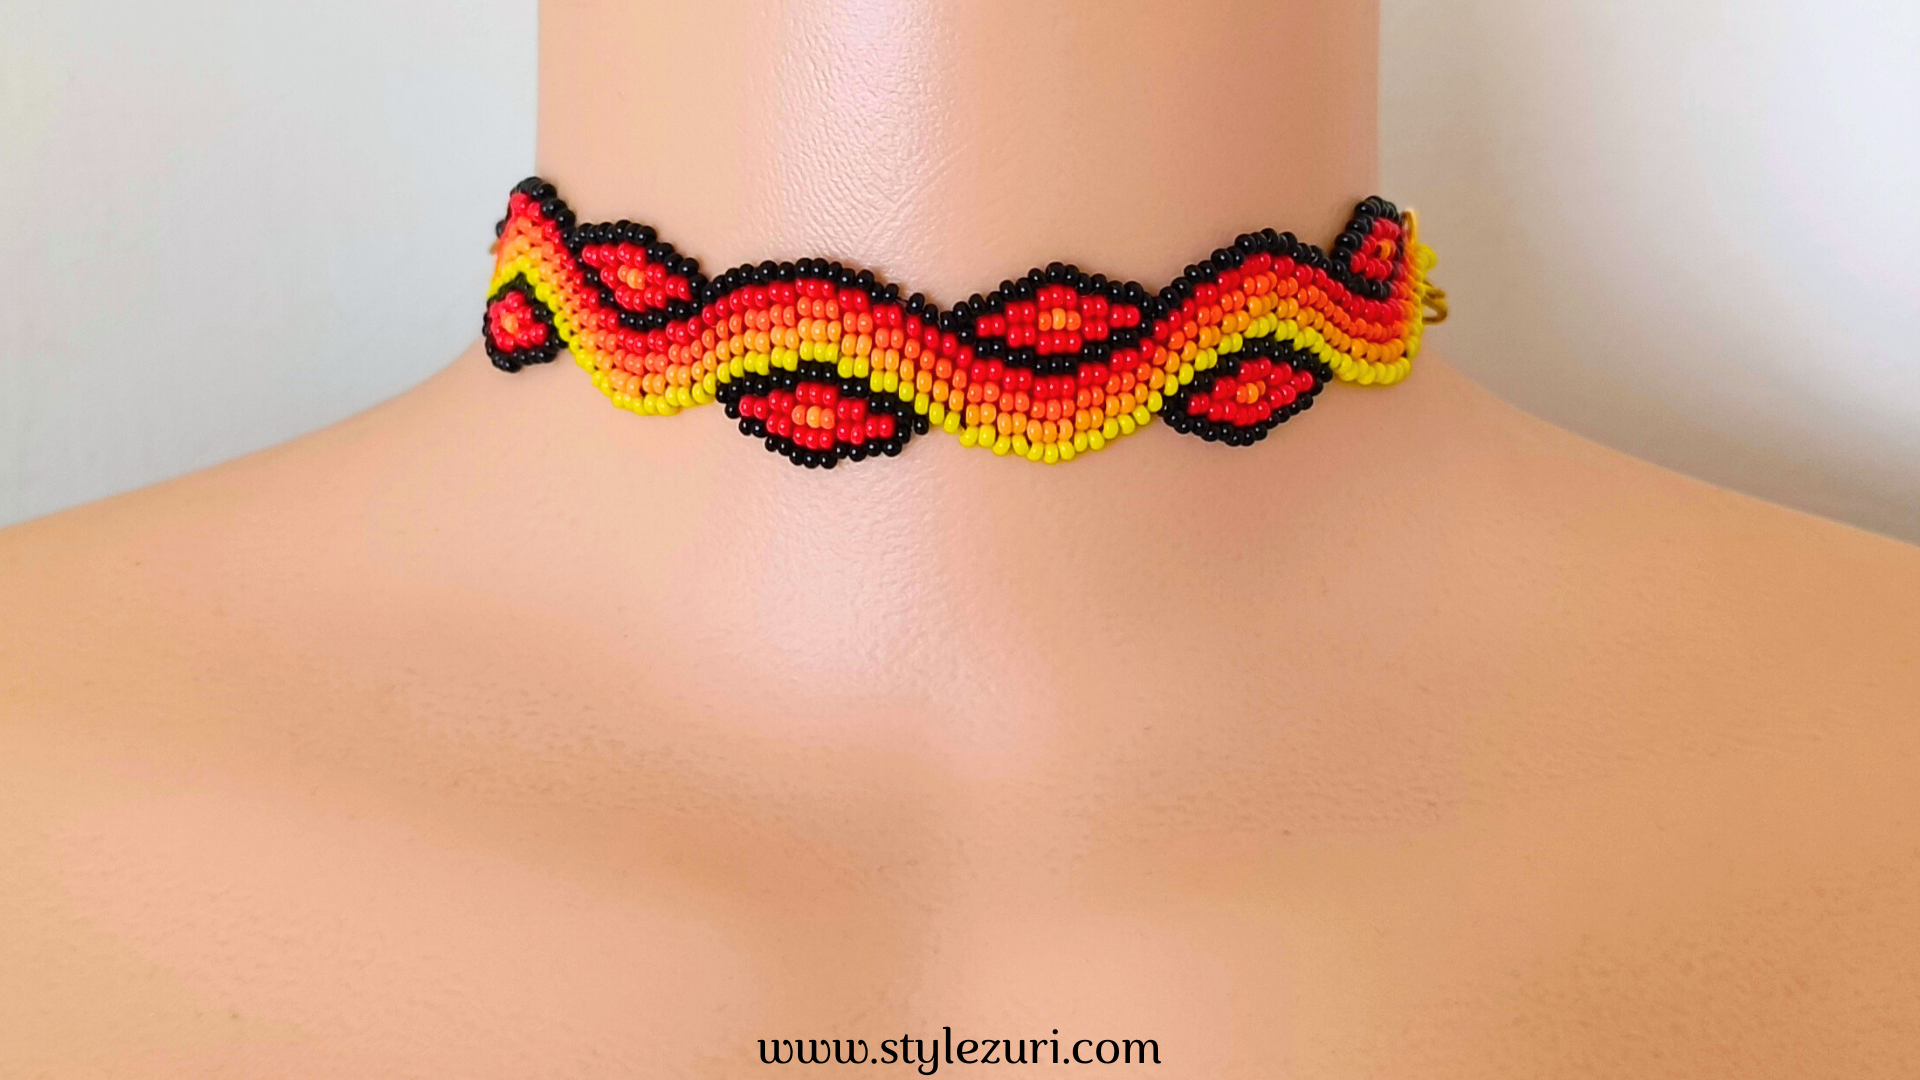
And if you’re looking to expand your collection, this pattern works beautifully as a necklace, just like in the image provided. Let’s dive into this fun and colorful project!
Step 1
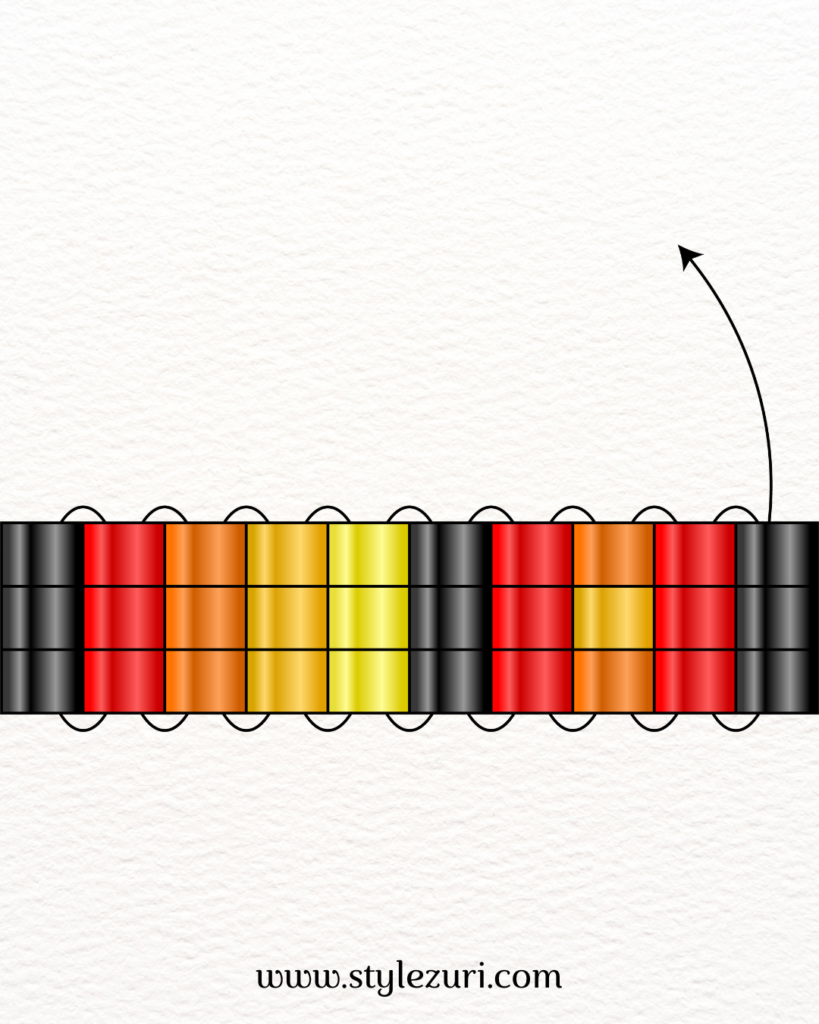
For the base row, we’ll begin with the ladder stitch, using 3 beads in each column. If you’re a beginner and unsure how to execute the ladder stitch, please refer to our tutorial for guidance. This row will consist of 10 columns, each with 3 beads, so be sure to follow the pattern as illustrated in the image. It’s important to maintain this structure to create the overall wavy design.
Step 2
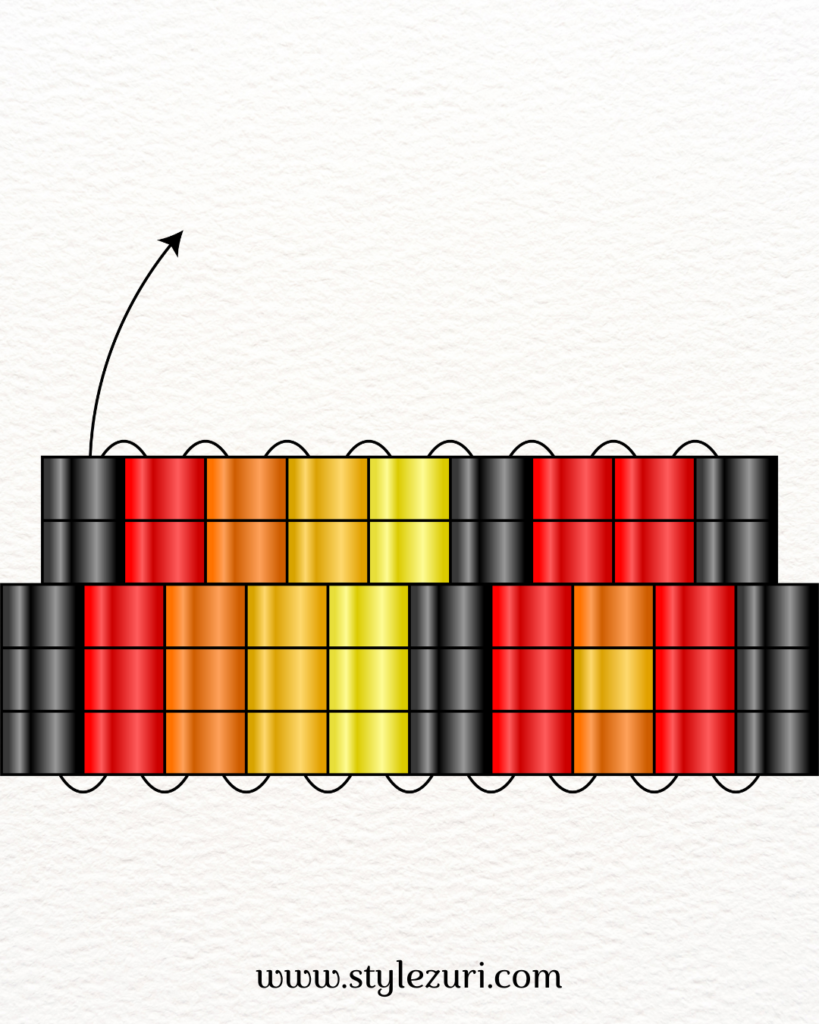
For row 2, we’ll apply the decrease brick stitch technique using a double brick stitch, working with 2 beads at a time. Since we are decreasing, start by picking up 4 beads and skip the first loop, then pass the needle through the second loop. For detailed instructions on the decrease brick stitch technique, please refer to our guide.
Step 3
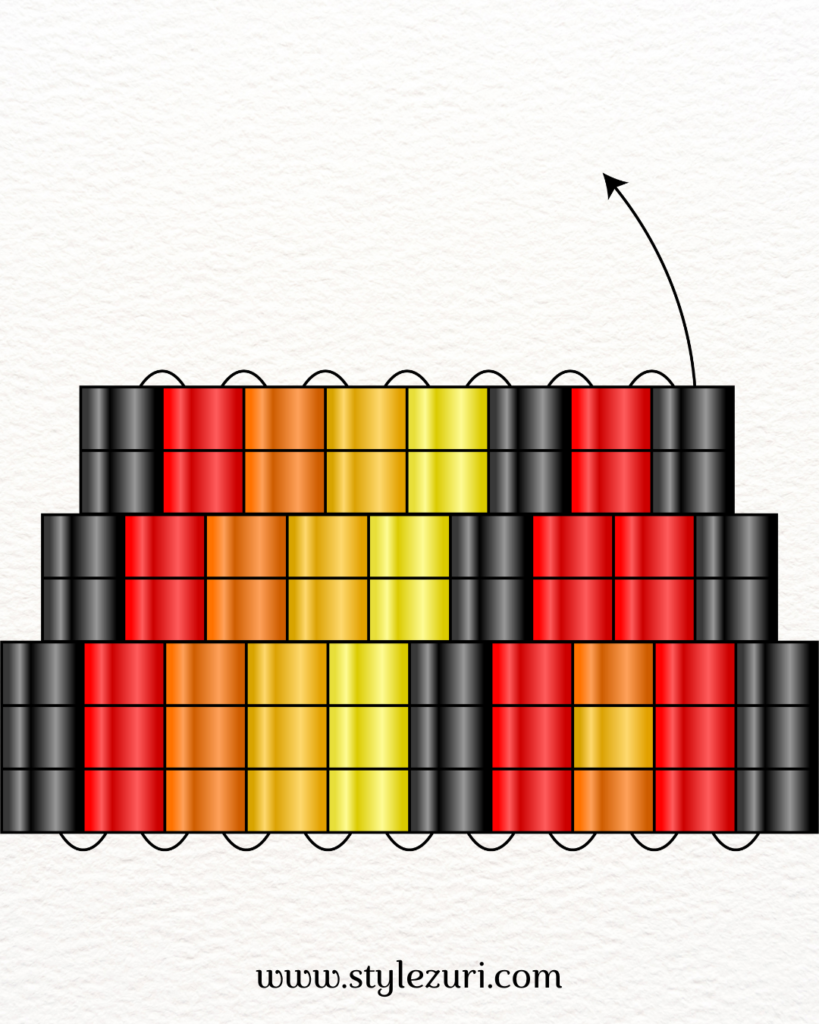
For row 3, continue using the same decrease brick stitch technique as in row 2. Pick up 4 beads, skip the first loop, and pass the needle through the second loop. Be sure to follow the pattern in the illustration to maintain the wavy design.
Step 4
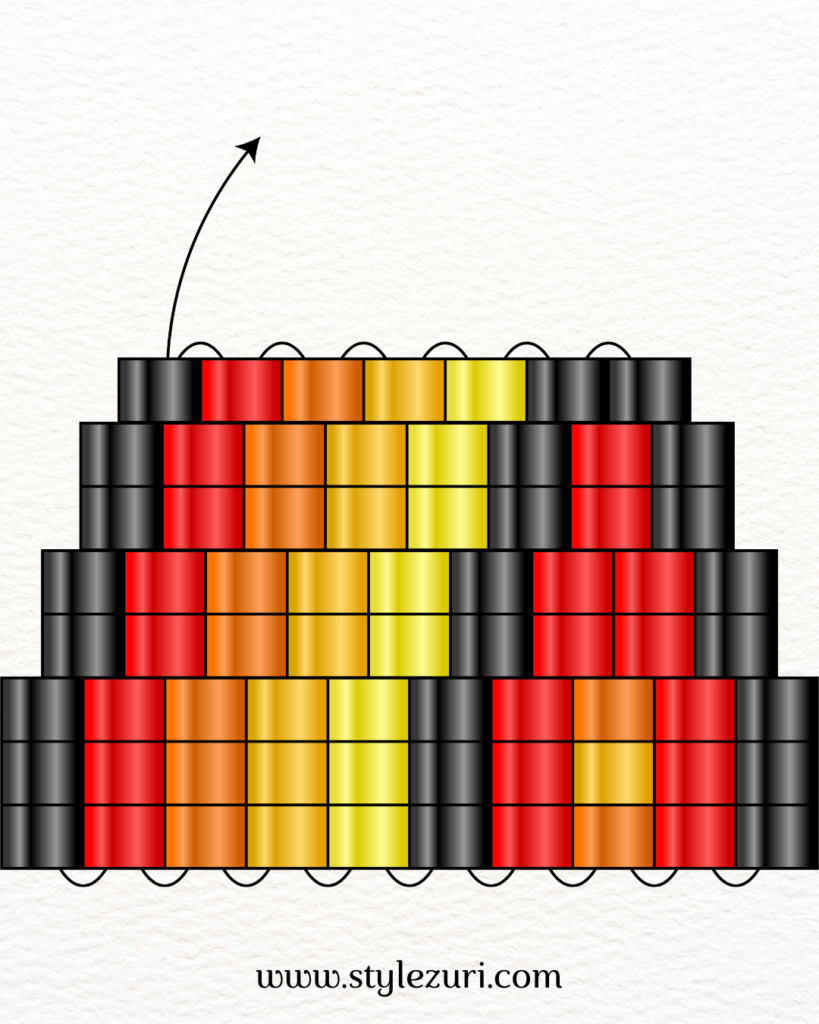
In row 4, we will continue with the decrease technique, but this time we will be working with single beads. Start by picking up 2 beads at the beginning of the row, and then for the remaining stitches, pick up 1 bead at a time. Be sure to follow the pattern as illustrated to maintain the wavy design.
Step 5
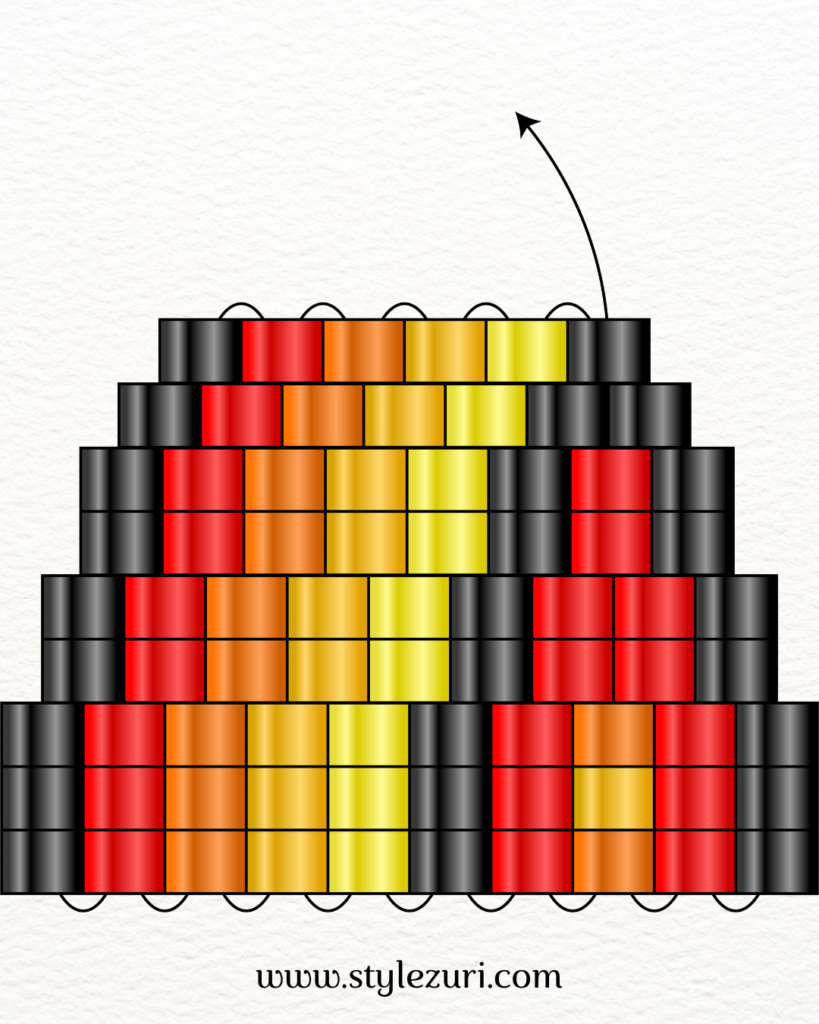
For rows 5 through 9, repeat the same process as in row 4, continuing with the decrease technique using single brick stitches. Start each row by picking up 2 beads at the beginning, and then pick up 1 bead for the remaining stitches as you progress. Remember to follow the pattern illustrated to maintain the wavy design throughout these rows.
Step 6
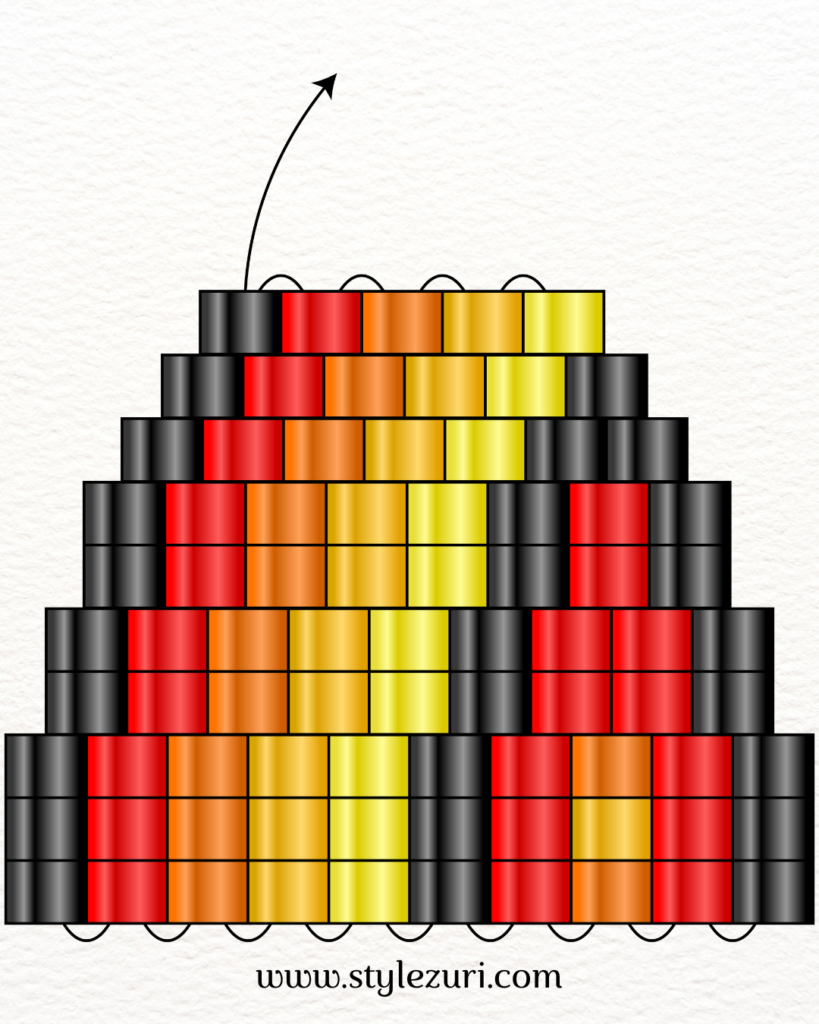
Step 7
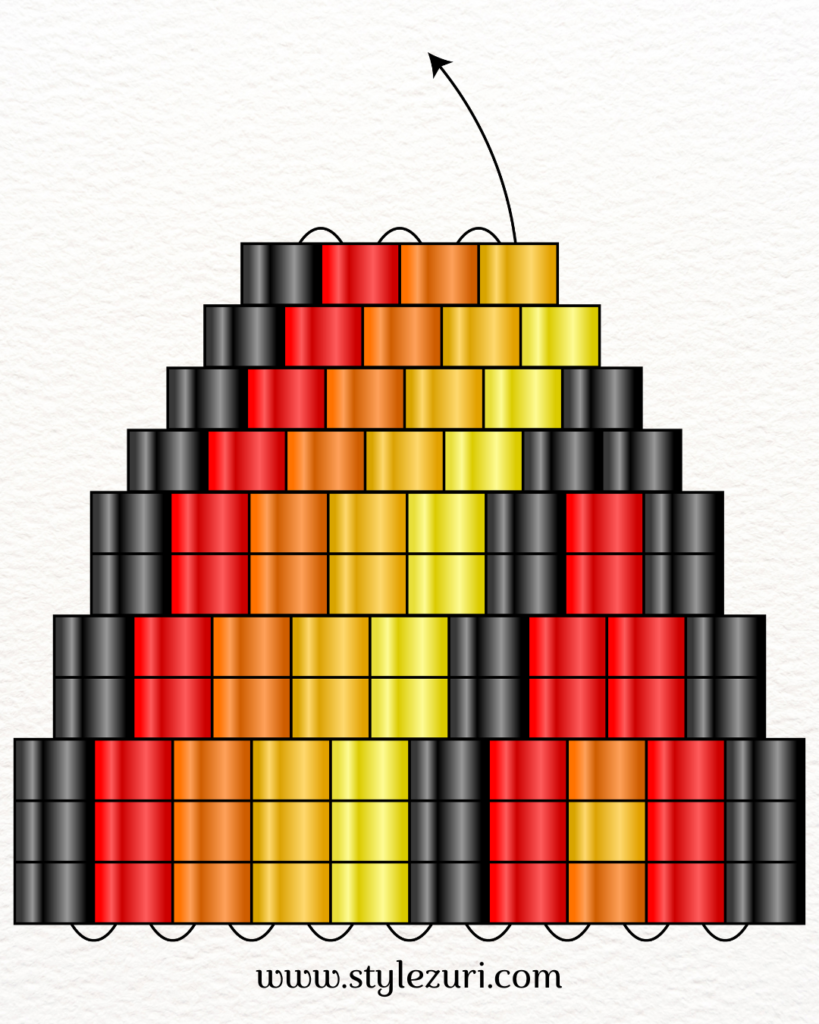
Step 8
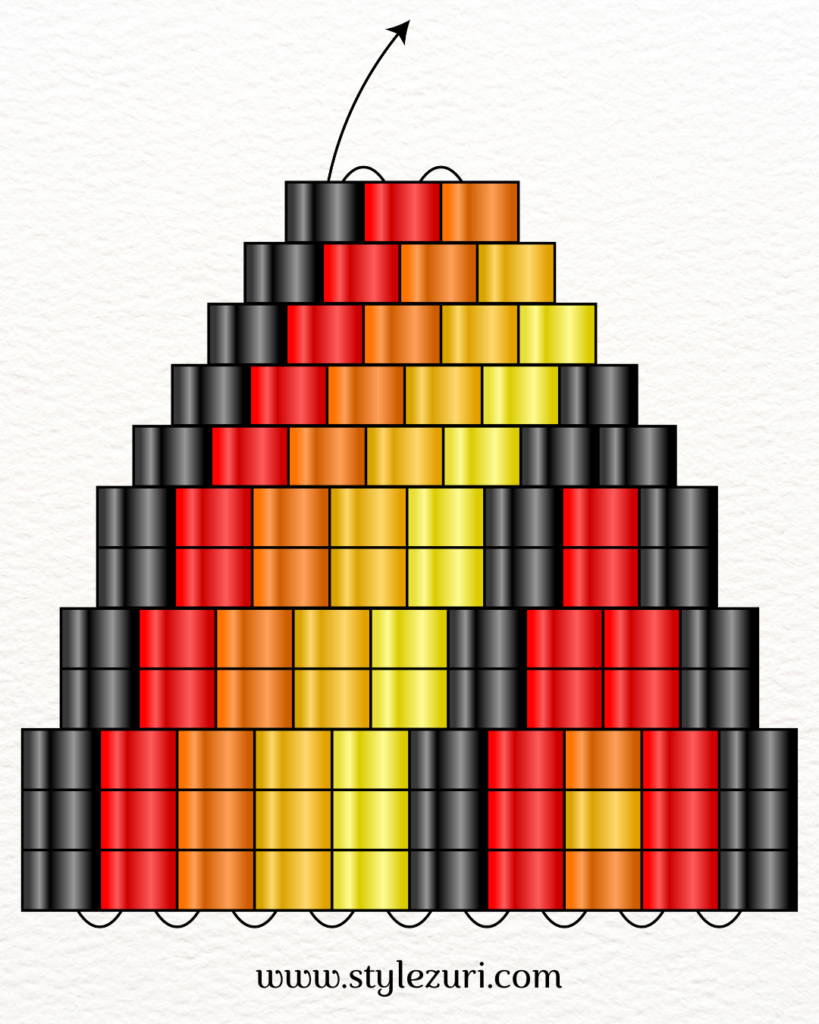
Step 9
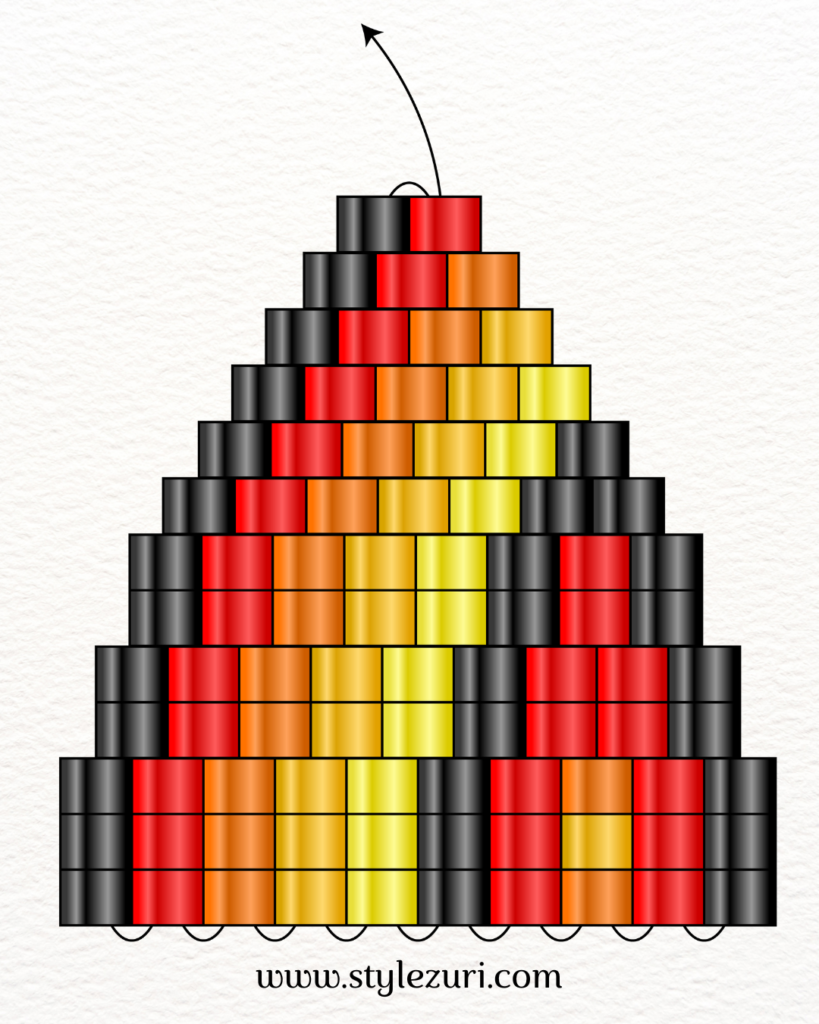
Step 10
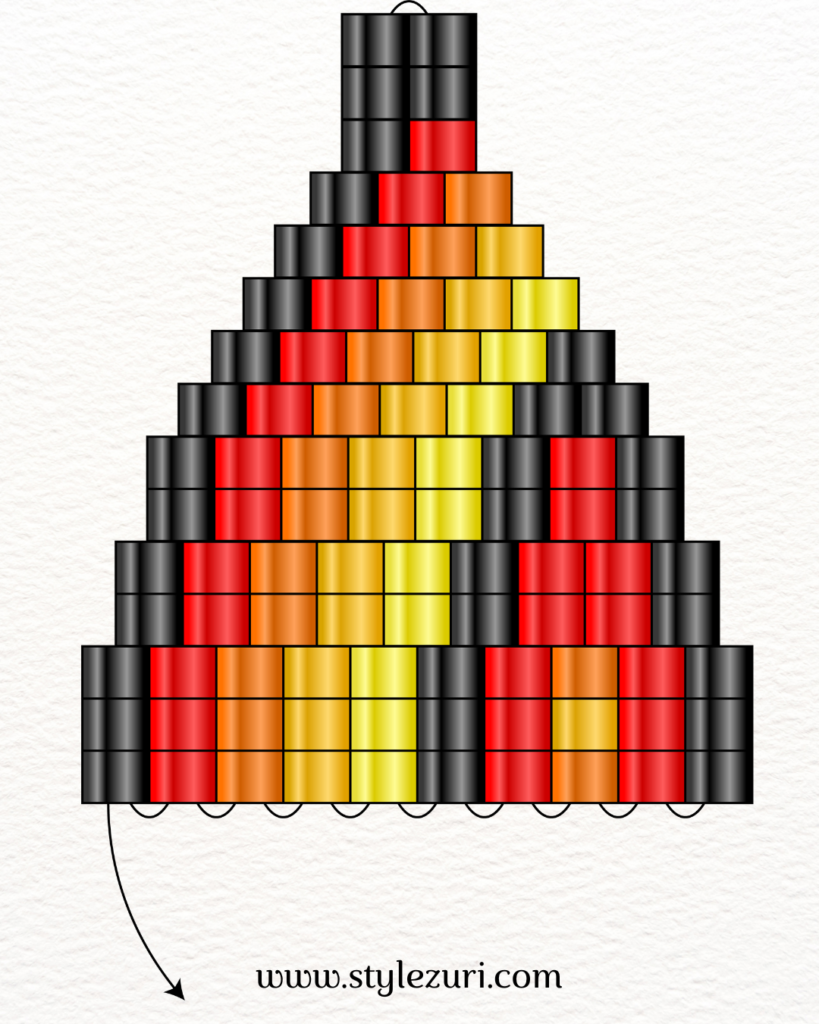
For the last row, pick up 4 or 6 beads to create a loop, which will be used to insert the jump ring. If you’re making earrings, this is the point where you can attach the earring hooks. Ensure that the loop is secure to provide a sturdy attachment for your jewelry piece.
Step 11
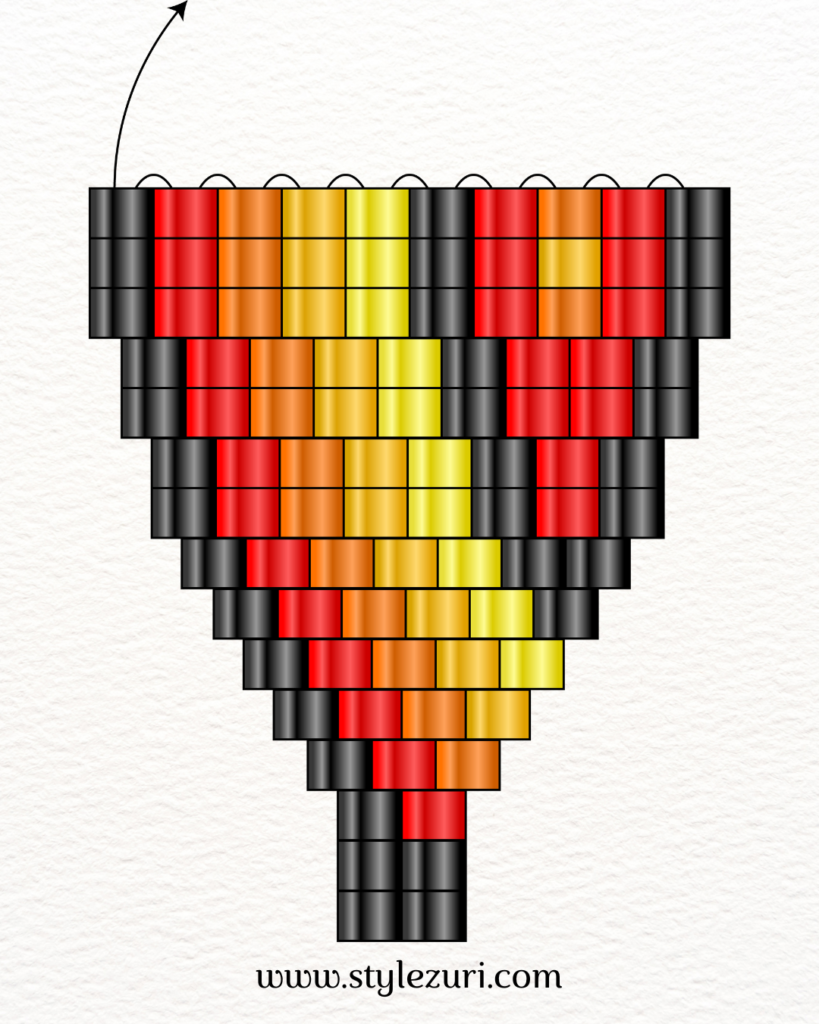
Now that we’ve completed the first part, pass the needle all the way down to the bottom where we started with the first row. This is where we will begin working on the pattern again
Step 12
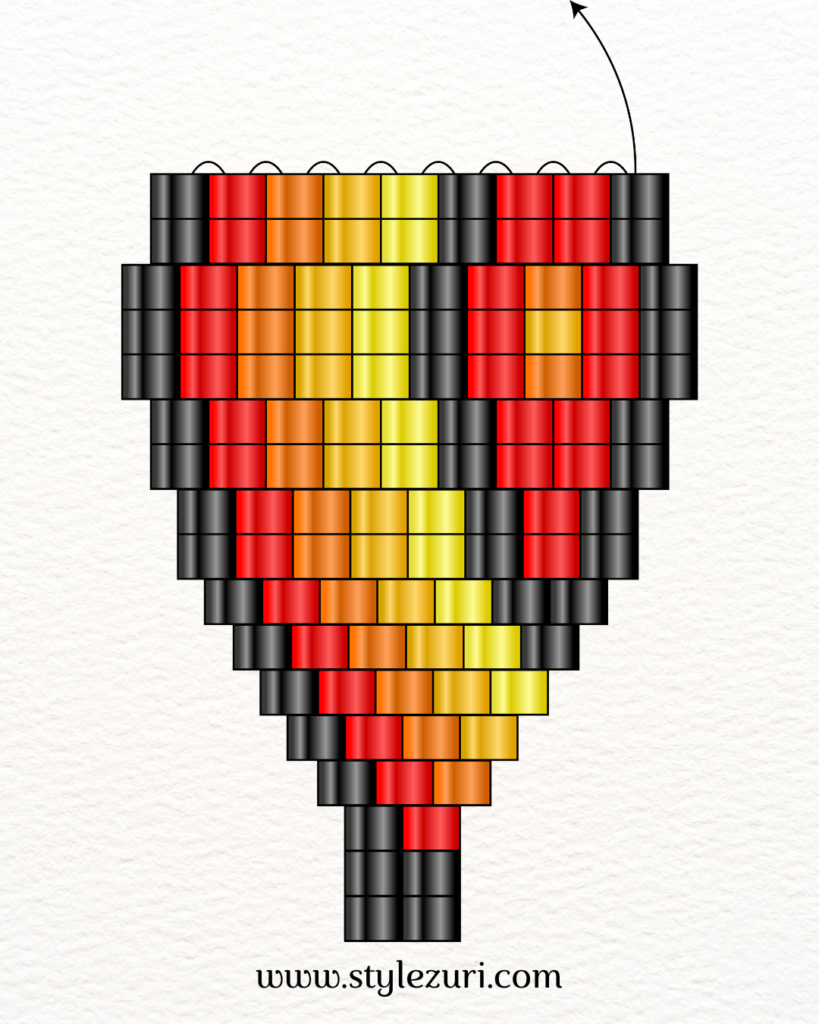
From here, we will repeat the same process we used in the first part, starting from row 2 up to row 6. Begin by applying the decrease double brick stitch technique for rows 2 through 3, then switch to the single brick stitch for rows 4 to 6, picking up 2 beads at the start of each row and 1 bead for the remaining stitches. Be sure to follow the pattern as illustrated to maintain the wavy design throughout these rows.
Step 13
Step 14
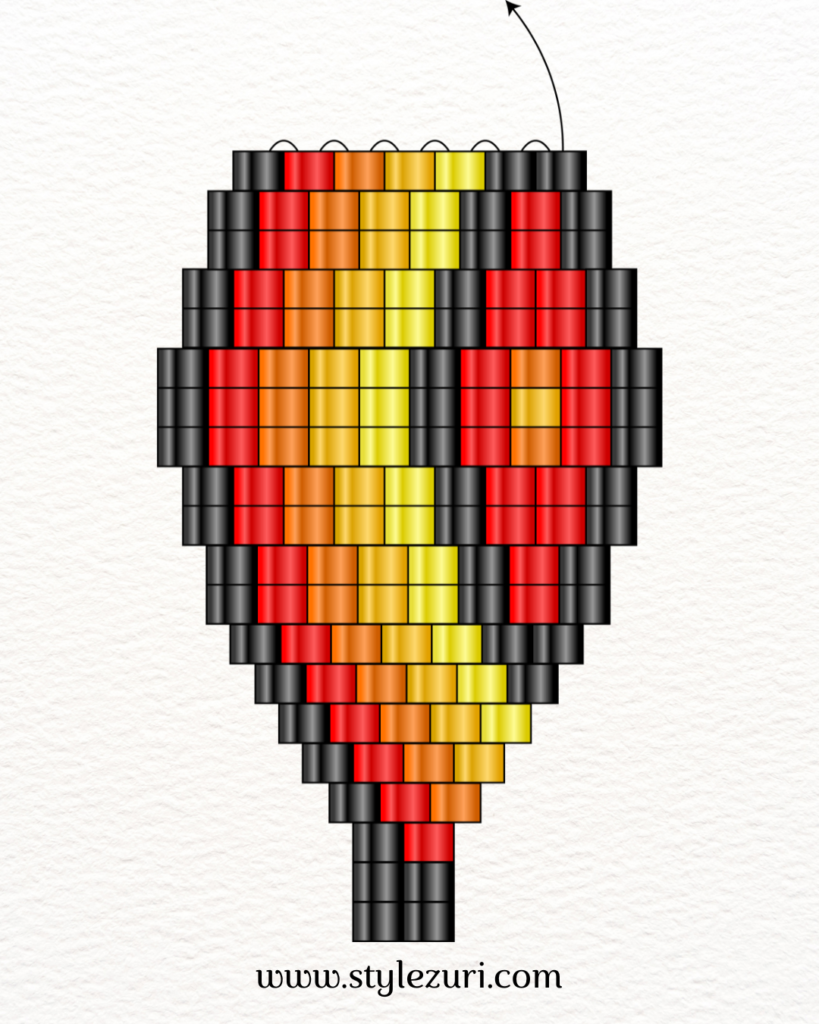
Step 15
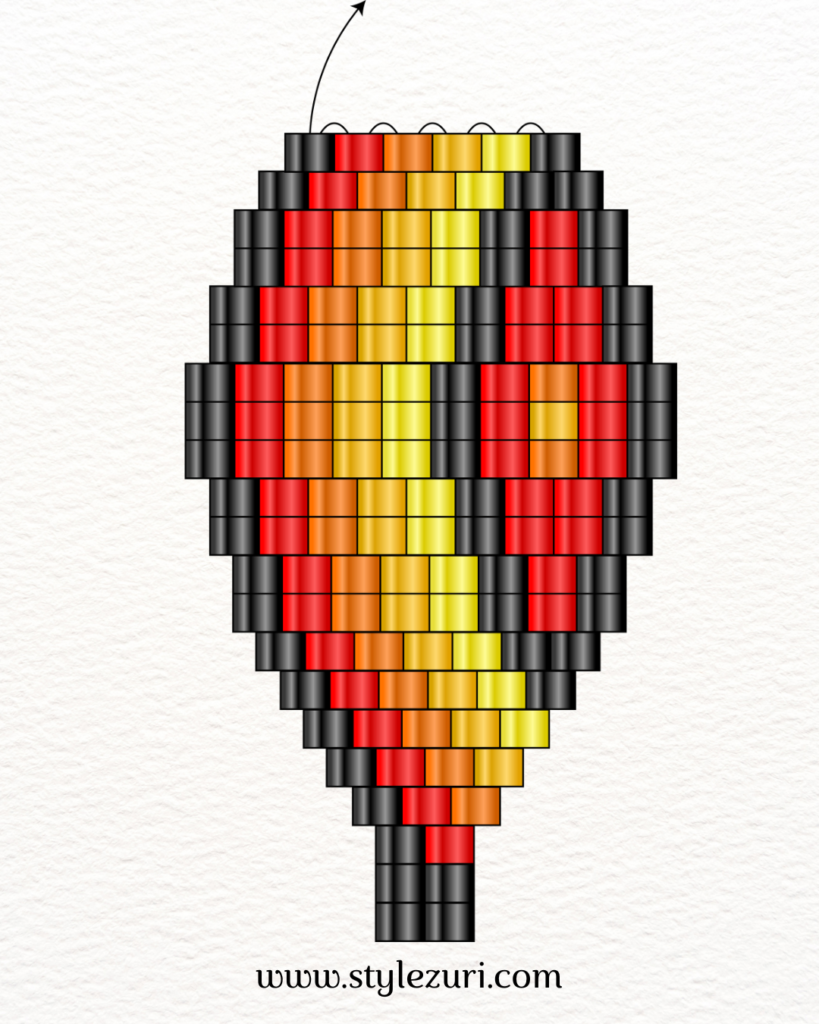
Step 16
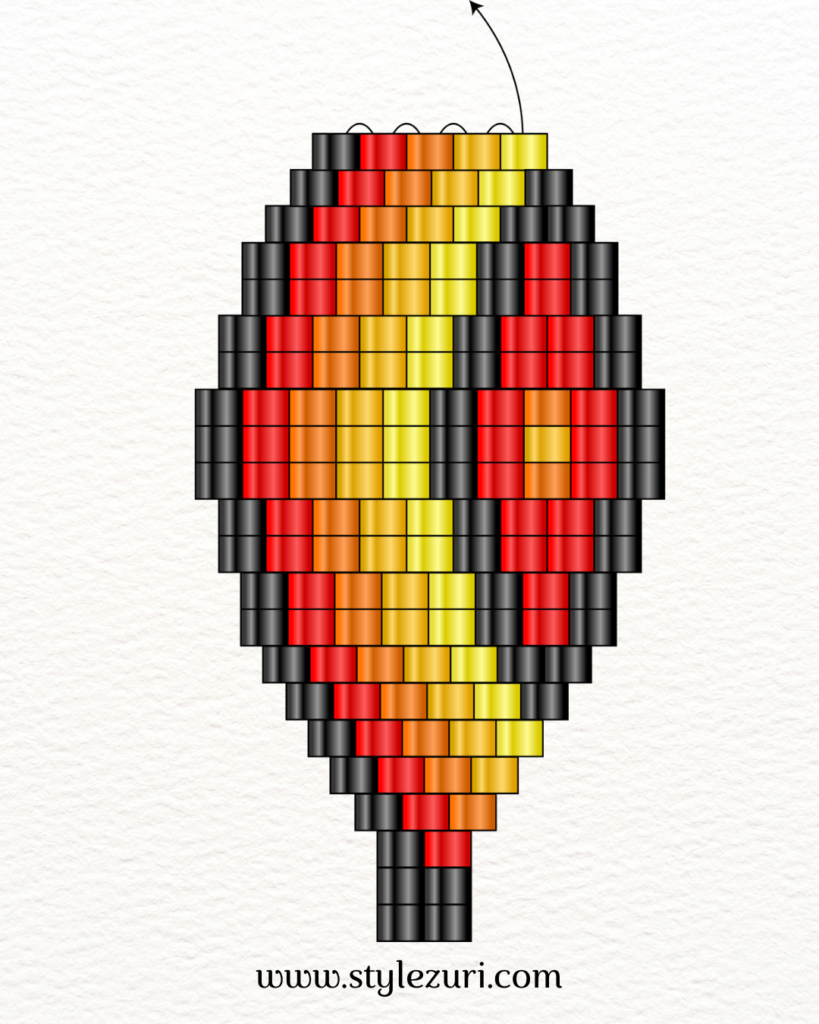
Step 17
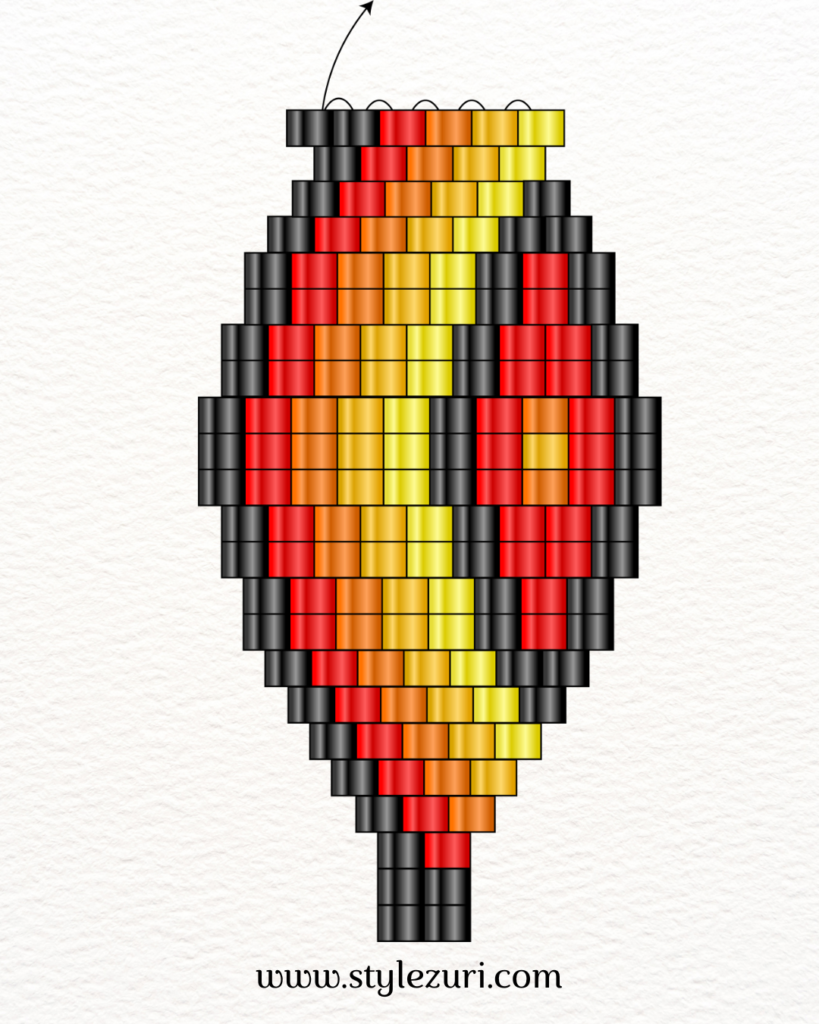
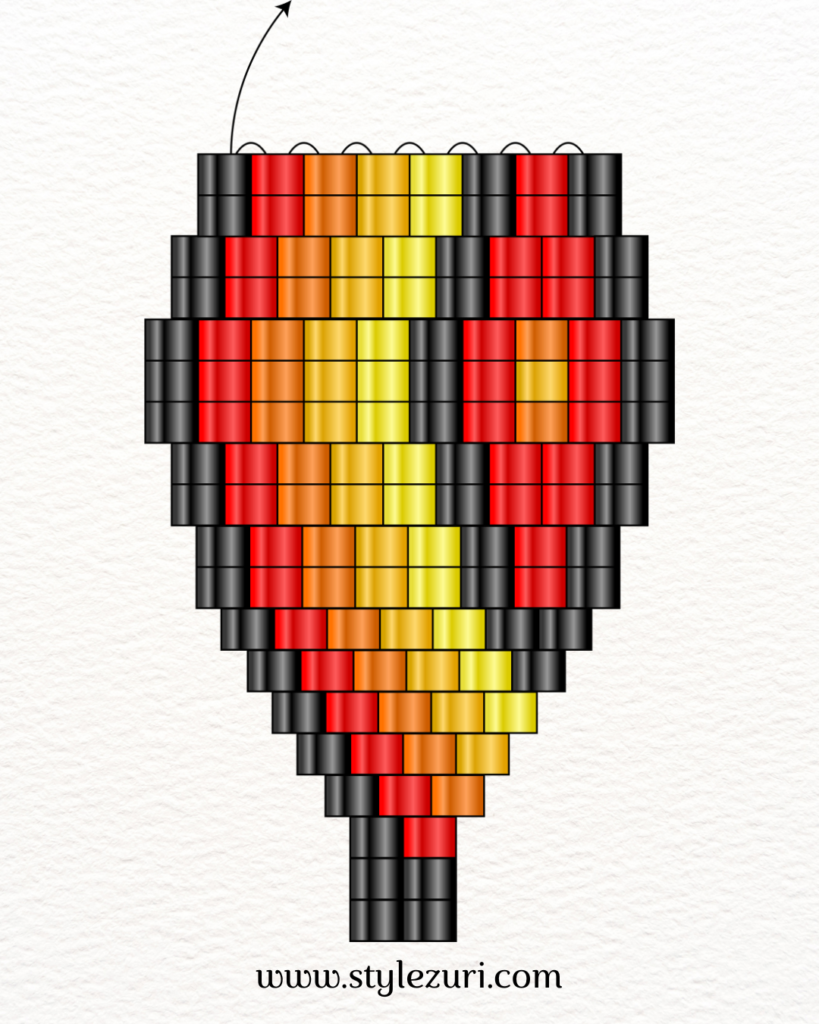
For this row, we will apply the increase technique using the single brick stitch. Start by picking up 2 beads, and instead of skipping the first loop, pass the needle through it. Continue with the brick stitch, and when you reach the last loop, pick up 1 new bead and pass the needle through the same last loop. Be sure to follow the pattern to maintain the wavy design.
Step 18
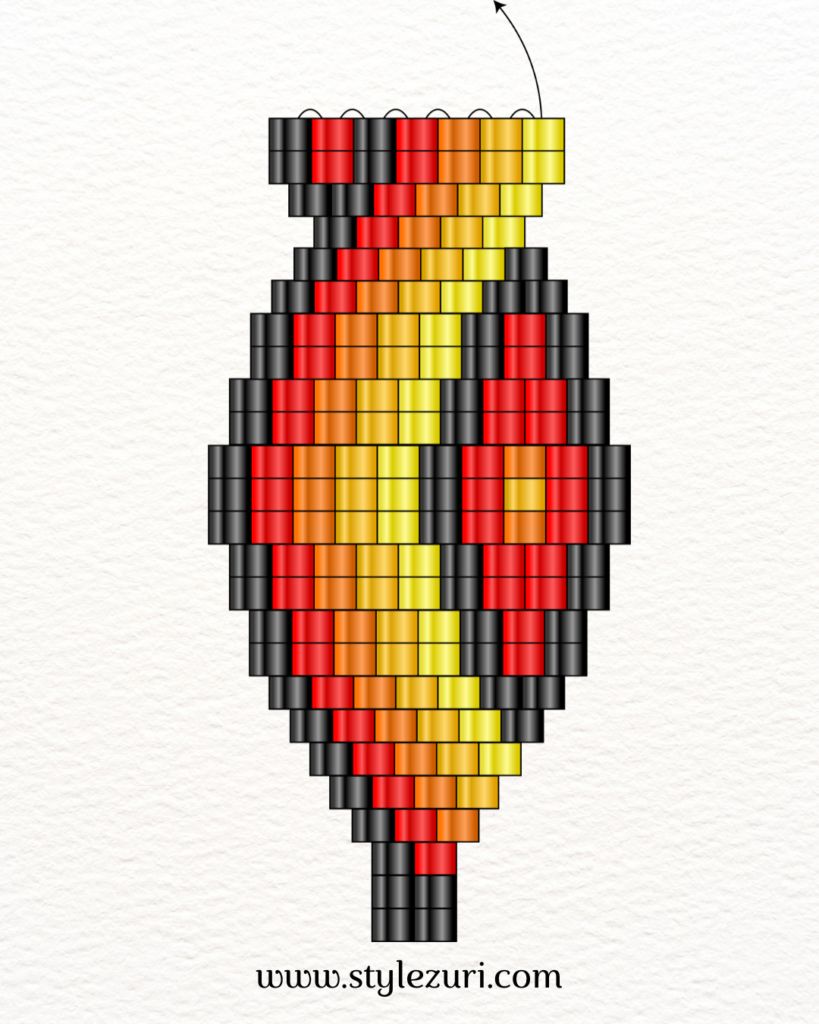
Next, you will apply the increase technique using a double brick stitch. Start by picking up 4 beads, and pass the needle through the first loop instead of skipping it. Continue with the brick stitch, and when you reach the last loop, pick up 2 extra beads and pass the needle through the same last loop. This will create a beautiful increase while maintaining the overall wavy design.
Step 19
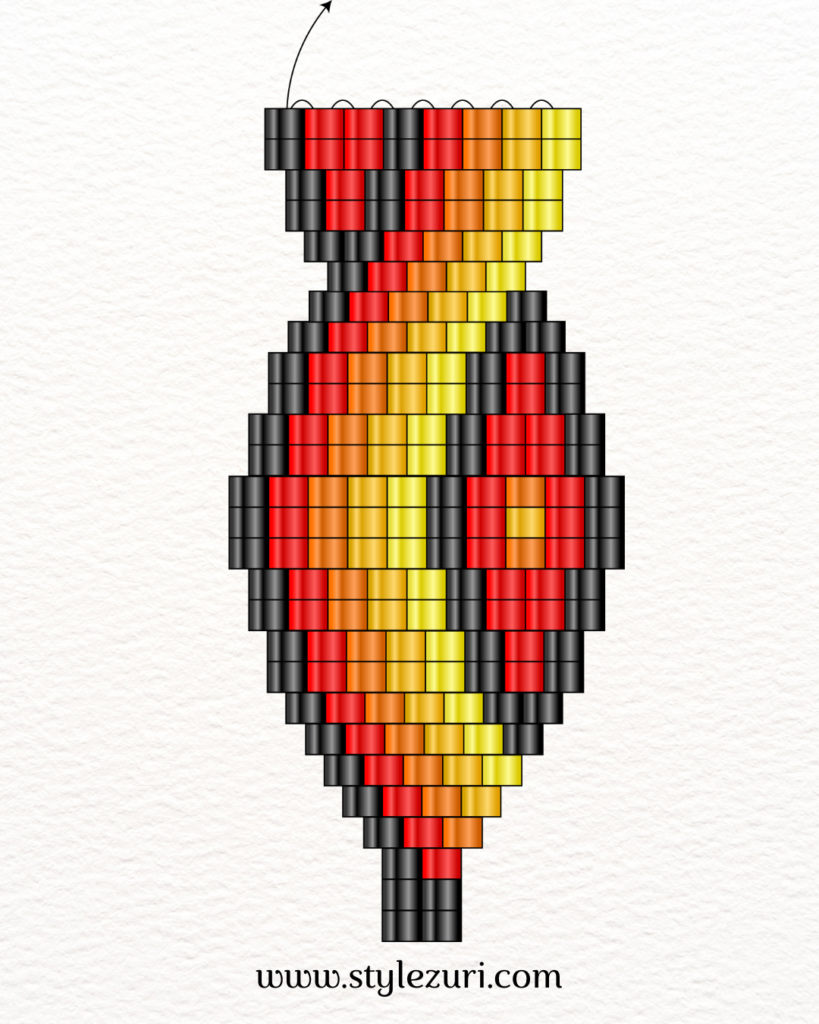
For this row, repeat the same process as the previous one, continuing with the increase technique using a double brick stitch. Start by picking up 4 beads and pass the needle through the first loop. Continue with the brick stitch, and when you reach the last loop, pick up 2 extra beads and pass the needle through the same last loop.
Step 20
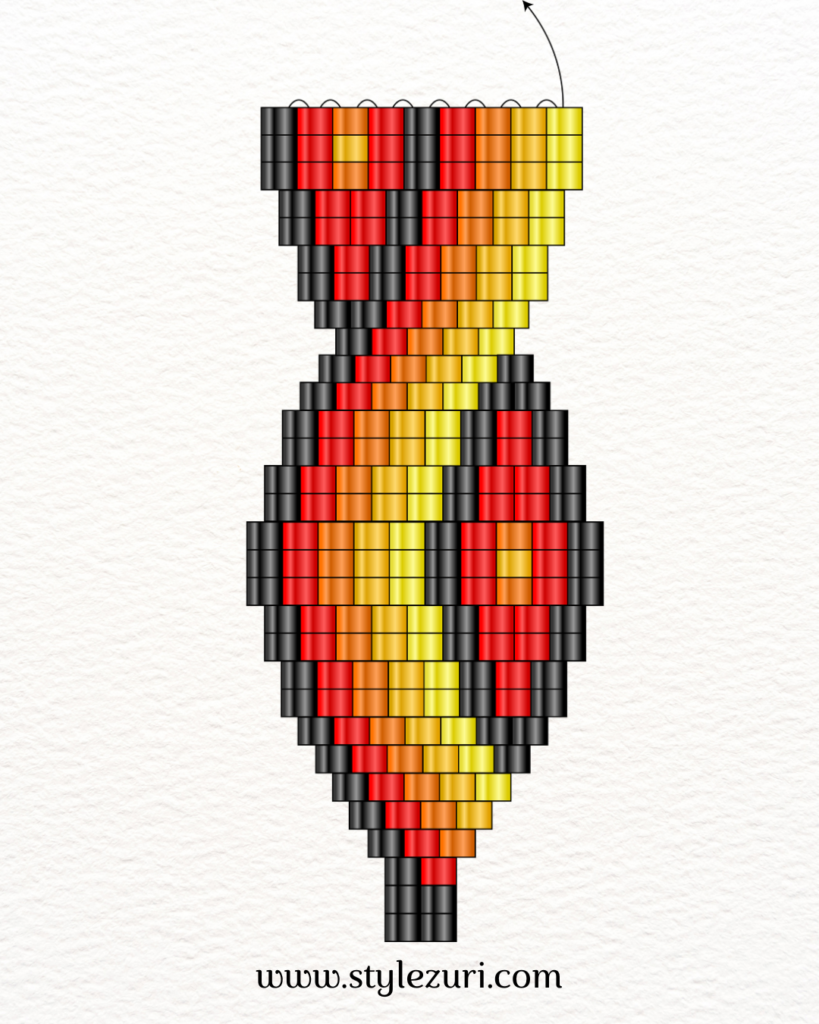
In this row, we will replicate the first row’s ladder stitch pattern, but this time we’ll be increasing. Start by picking up 6 beads at the beginning, and then continue with the brick stitch using 3 beads each time you pick up beads. Remember, this is also an increase.
Once you’ve completed this row, the pattern will continue repeating from here. You can assume this is where we begin again and proceed with the same steps we used from row 2. Continue this process to your desired length for either the bracelet or necklace.
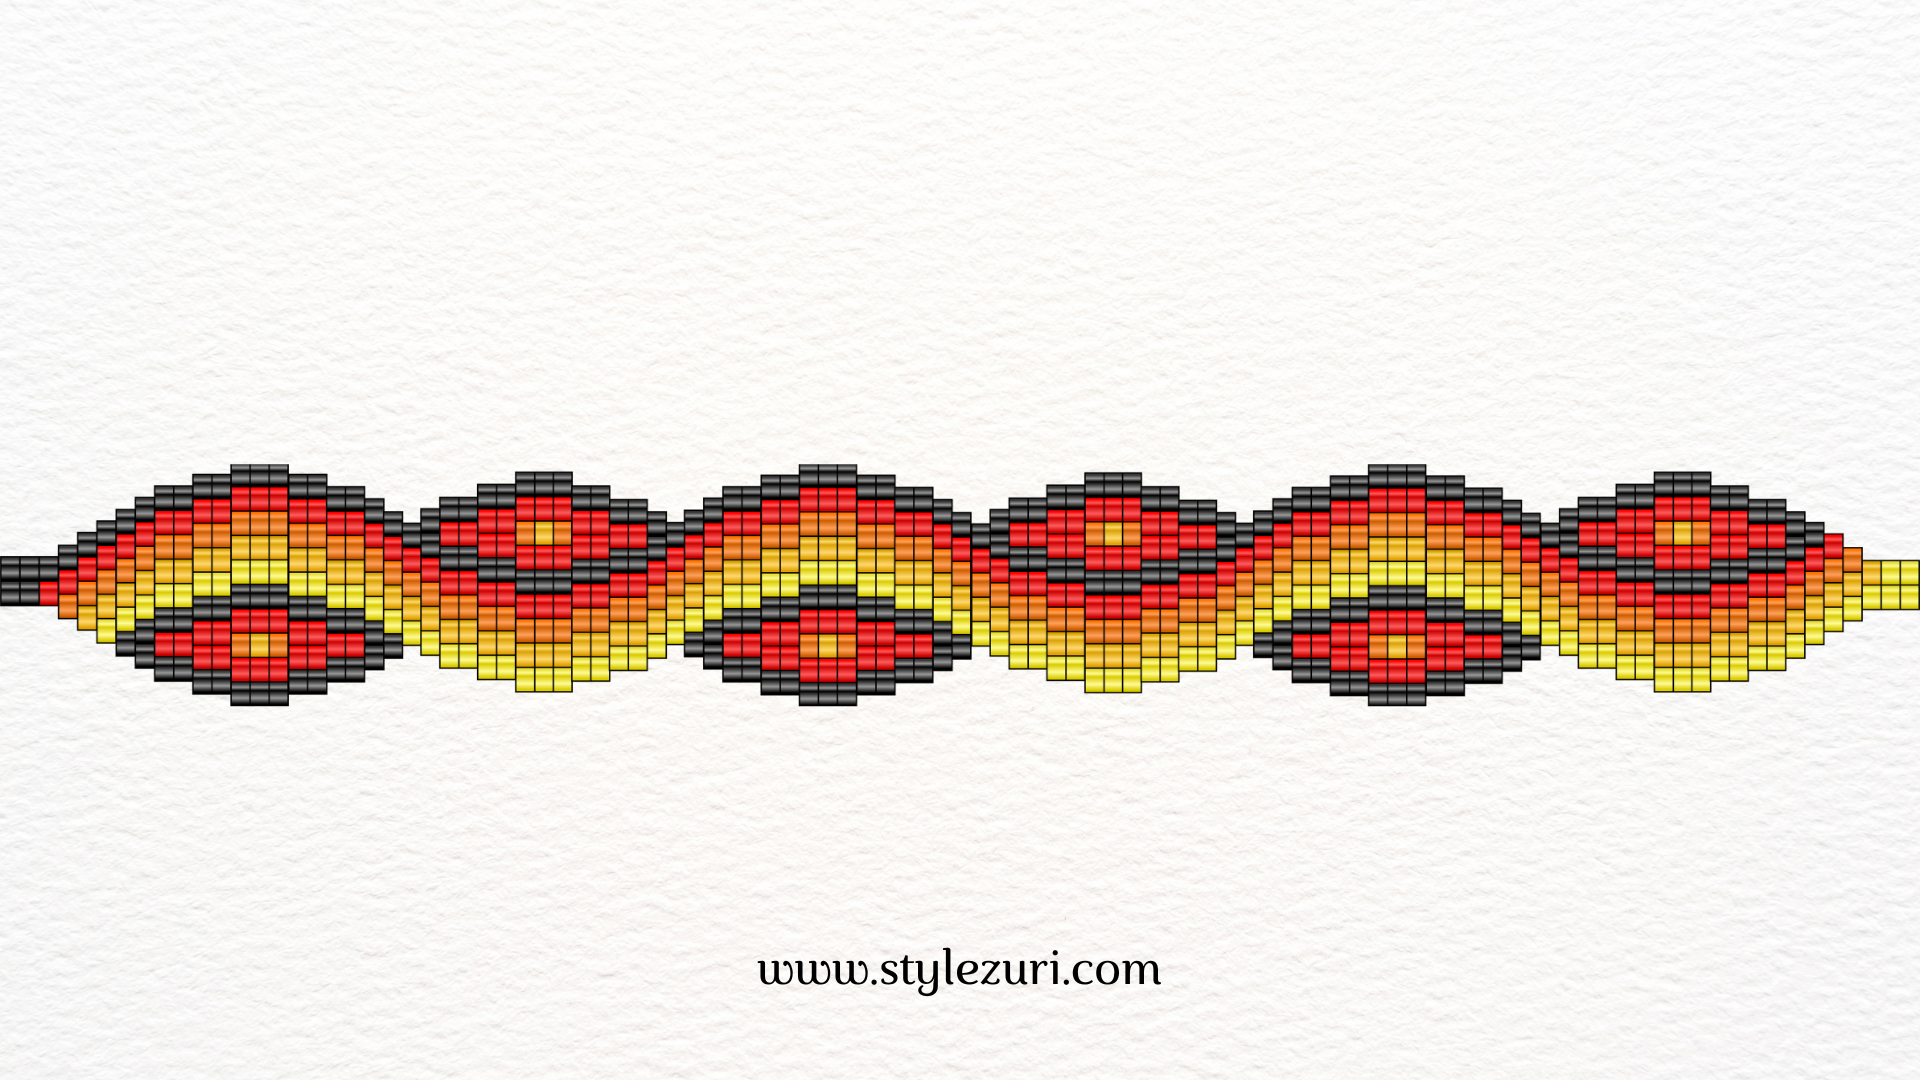
VIDEO TUTORIAL
Congratulations! You’ve successfully created a stunning wave-inspired beaded bracelet that can also be transformed into a beautiful necklace or matching earrings. See how easy that was? You have the flexibility to play with colors and patterns, making each piece uniquely yours. Whether you choose to stick with the suggested colors or explore your own creative palette, the possibilities are endless! Keep practicing these techniques, and don’t hesitate to experiment with different designs. Enjoy wearing your handmade jewelry or gifting it to someone special! Happy beading!
