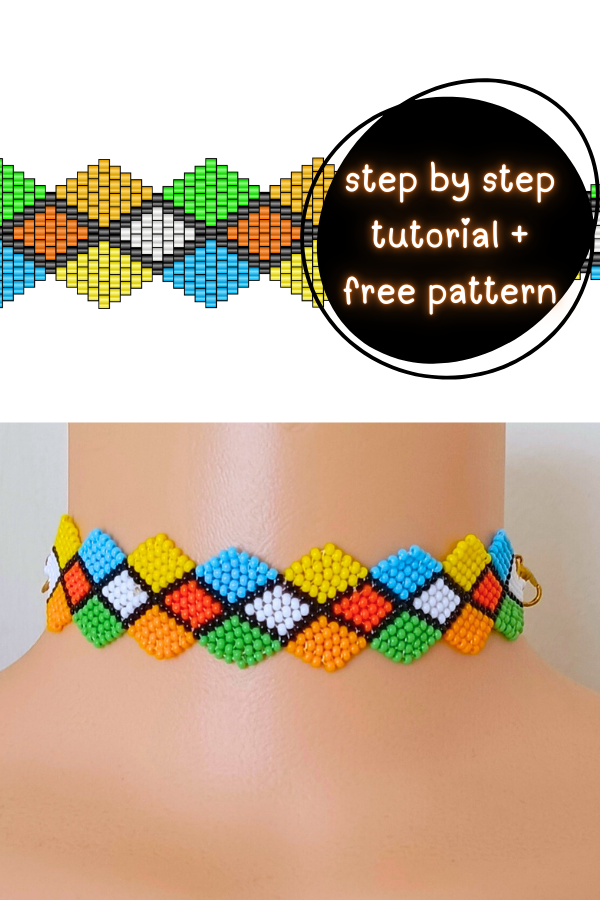
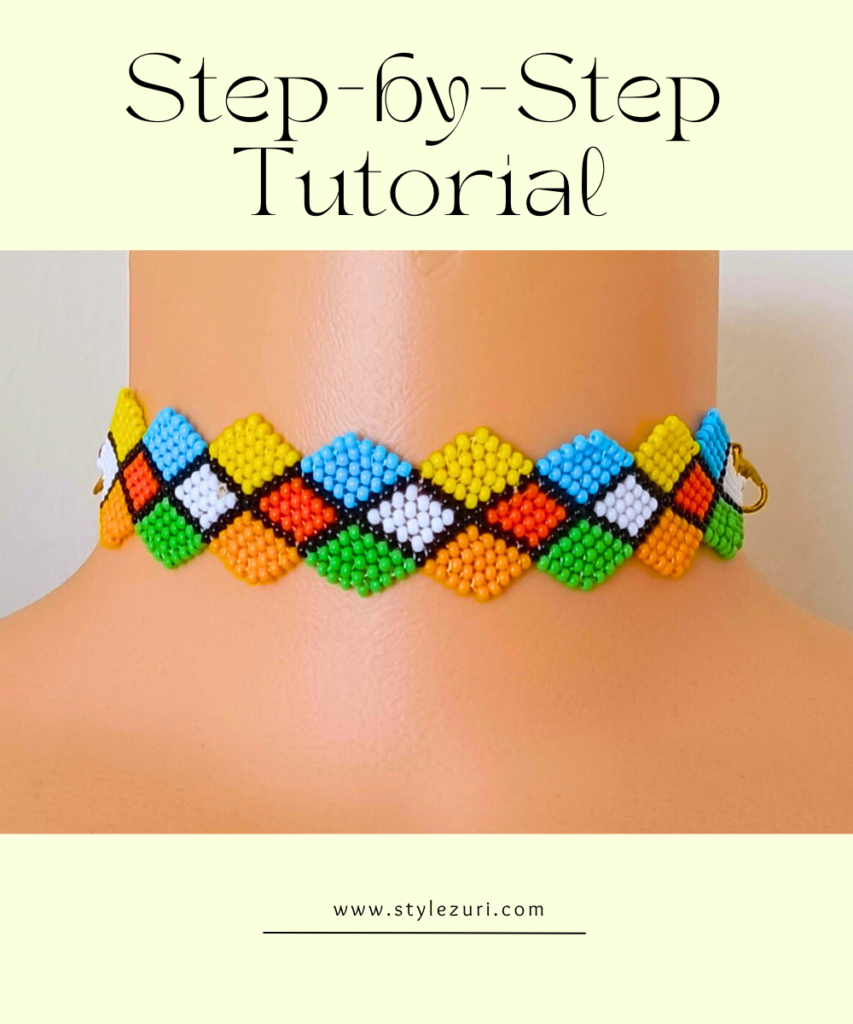
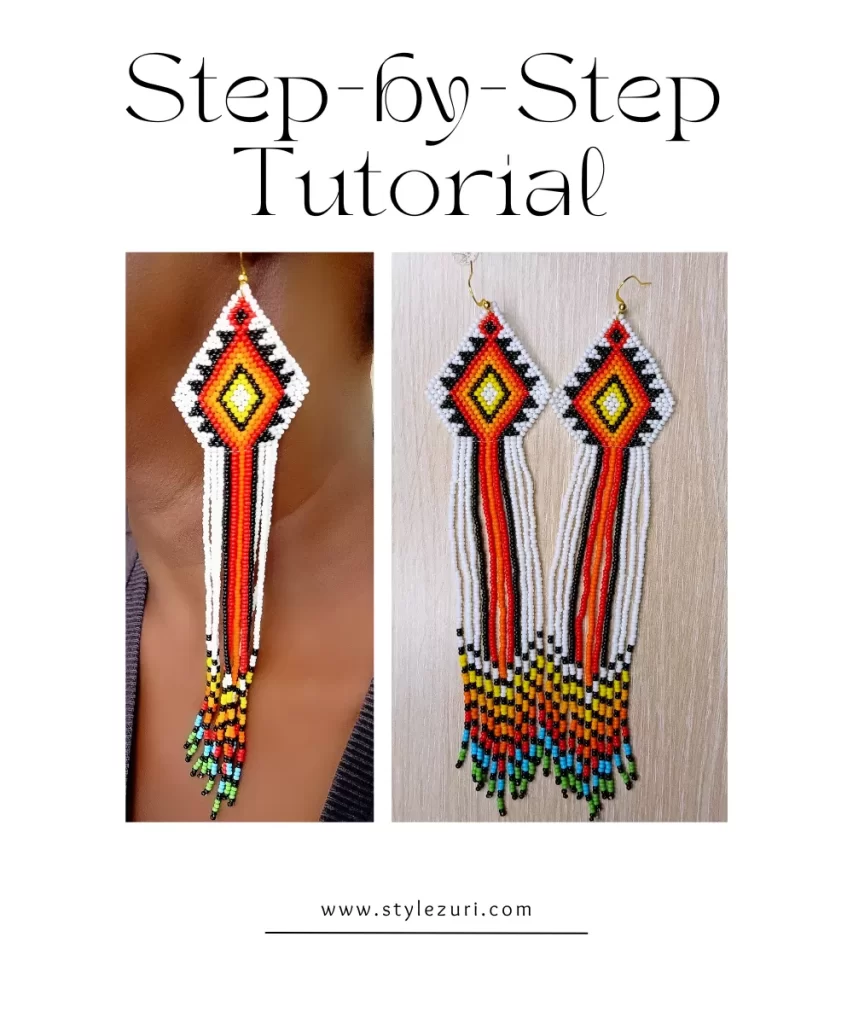
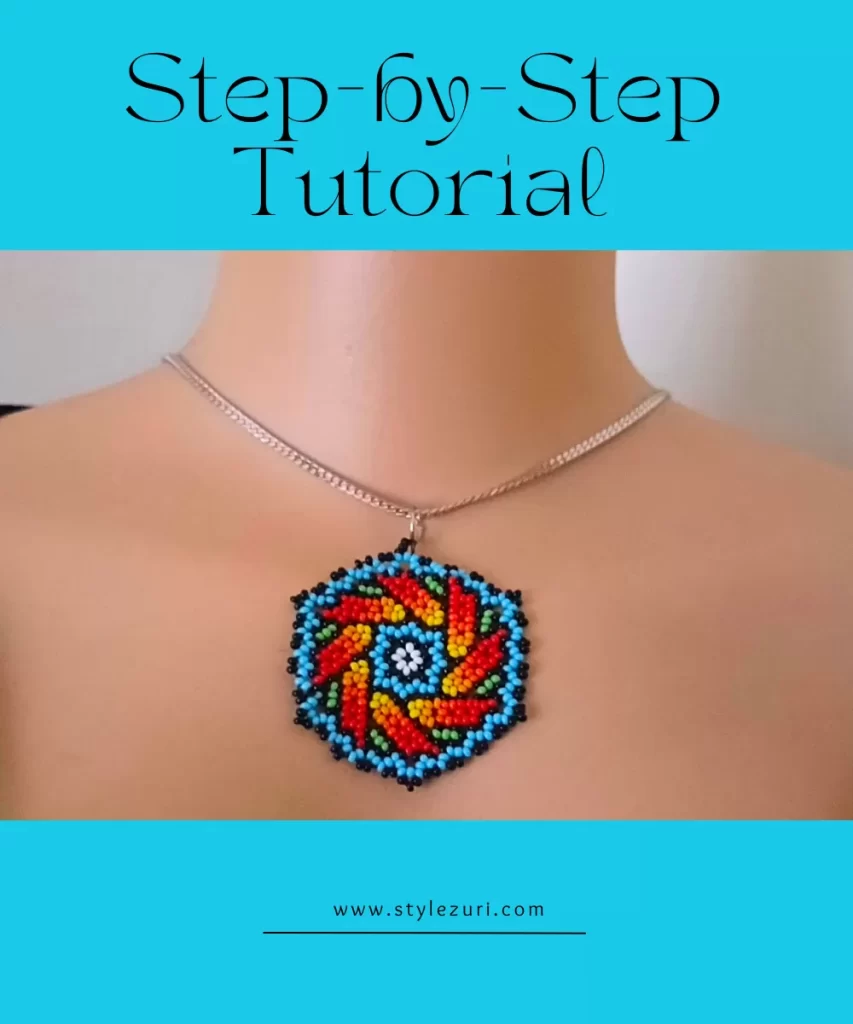
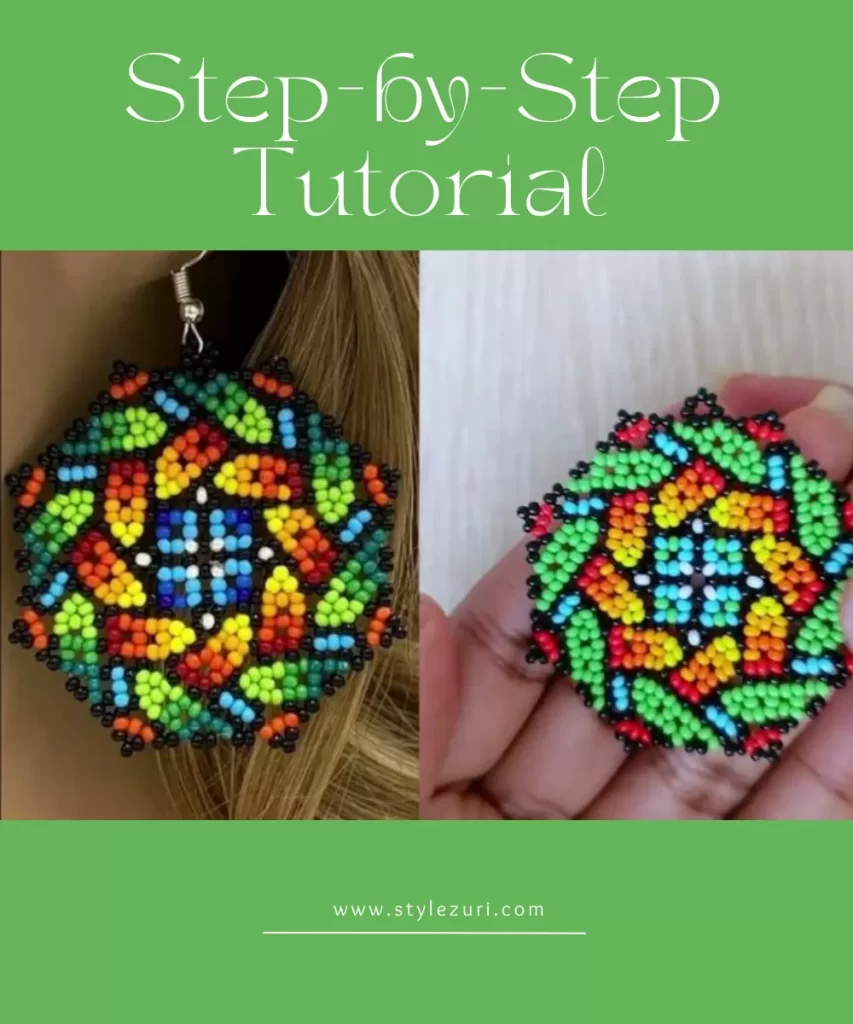
If you are a lover of bright colors, you will surely adore this tutorial! We will be making a beautiful beaded bracelet that can also double as a stunning necklace. The technique we’ll use is the brick stitch, incorporating a combination of increases and decreases to achieve a striking geometric pattern. For beginners, please check this guide to learn the brick stitch technique. This pattern looks fantastic as a necklace, making it a versatile addition to your jewelry collection.
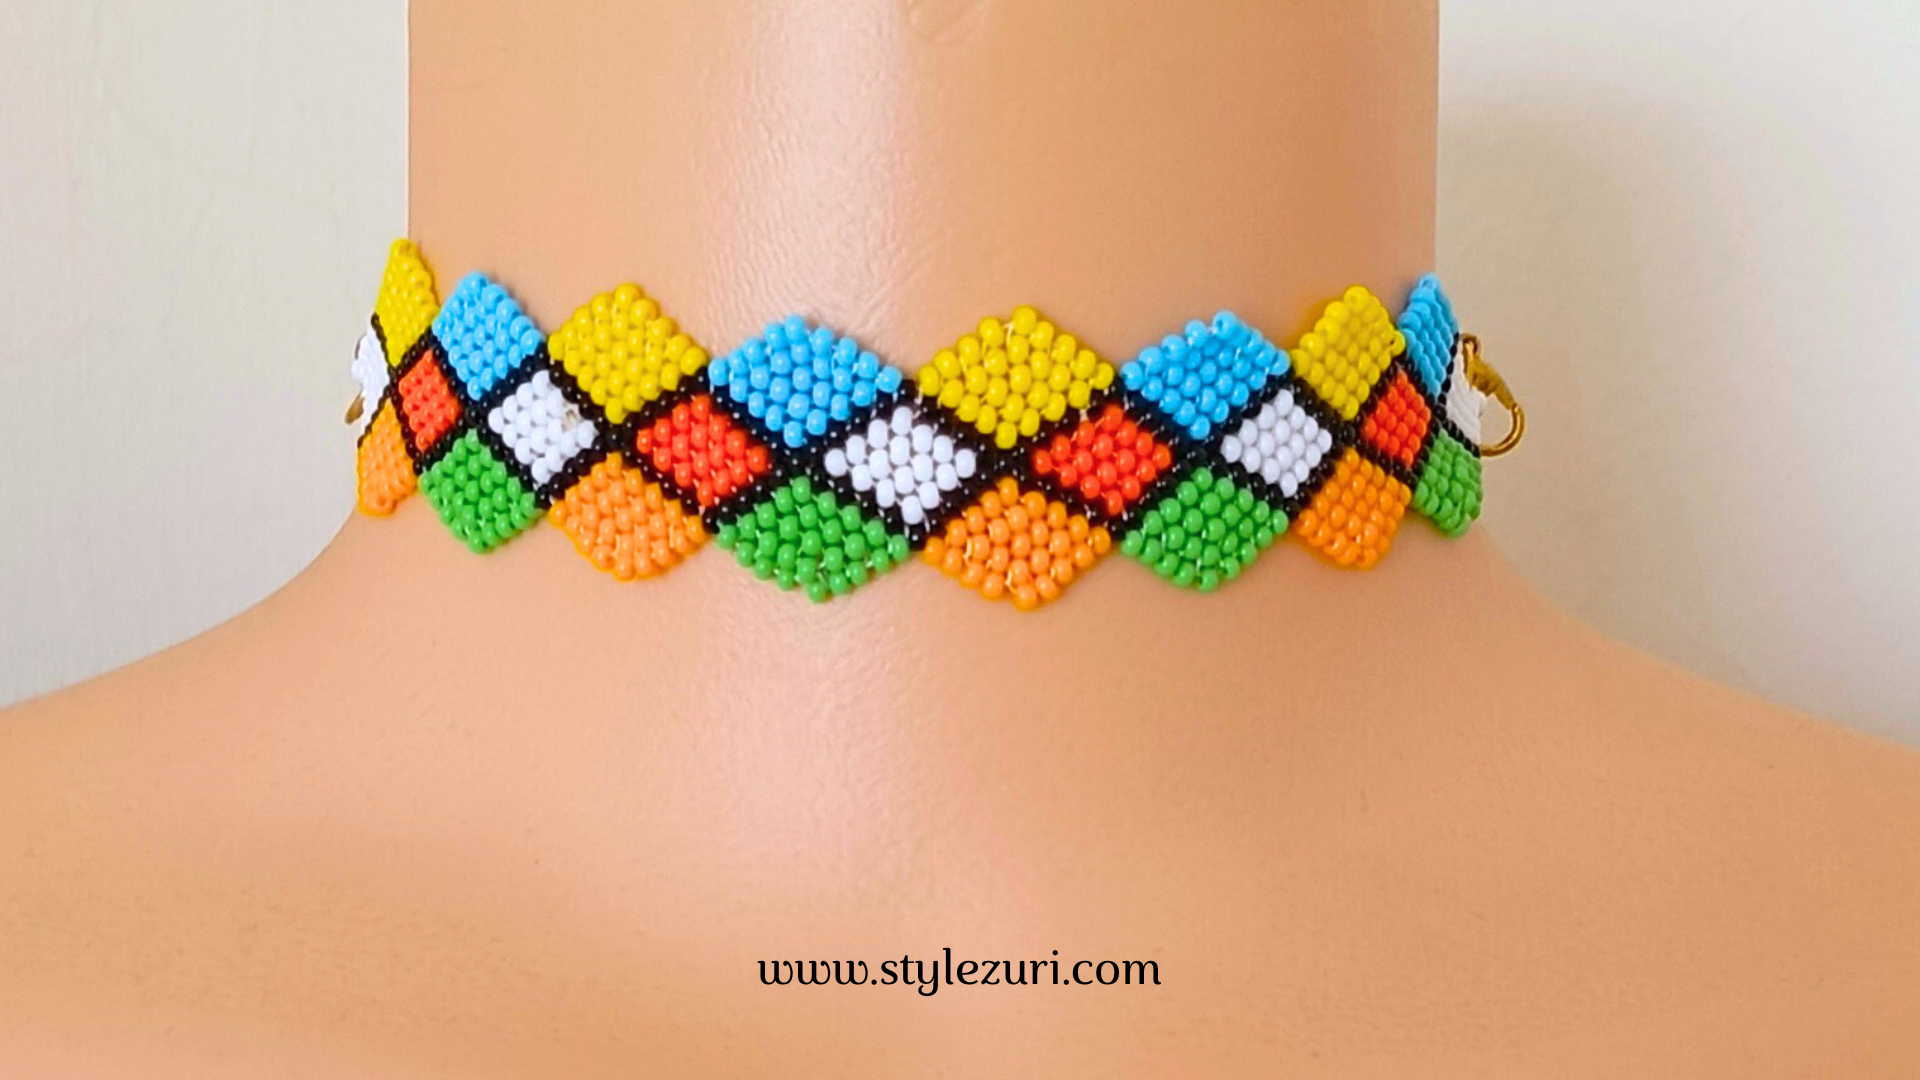
The materials you’ll need include size 10 seed beads in colors of your choice, but if you’d like to use the same palette as me, I recommend white, green, blue, black, light orange, dark orange, and yellow. Additionally, you will need a beading needle, thread, jump rings, and a lobster claw clasp to complete your project. Let’s get started on creating your vibrant piece!
Step 1
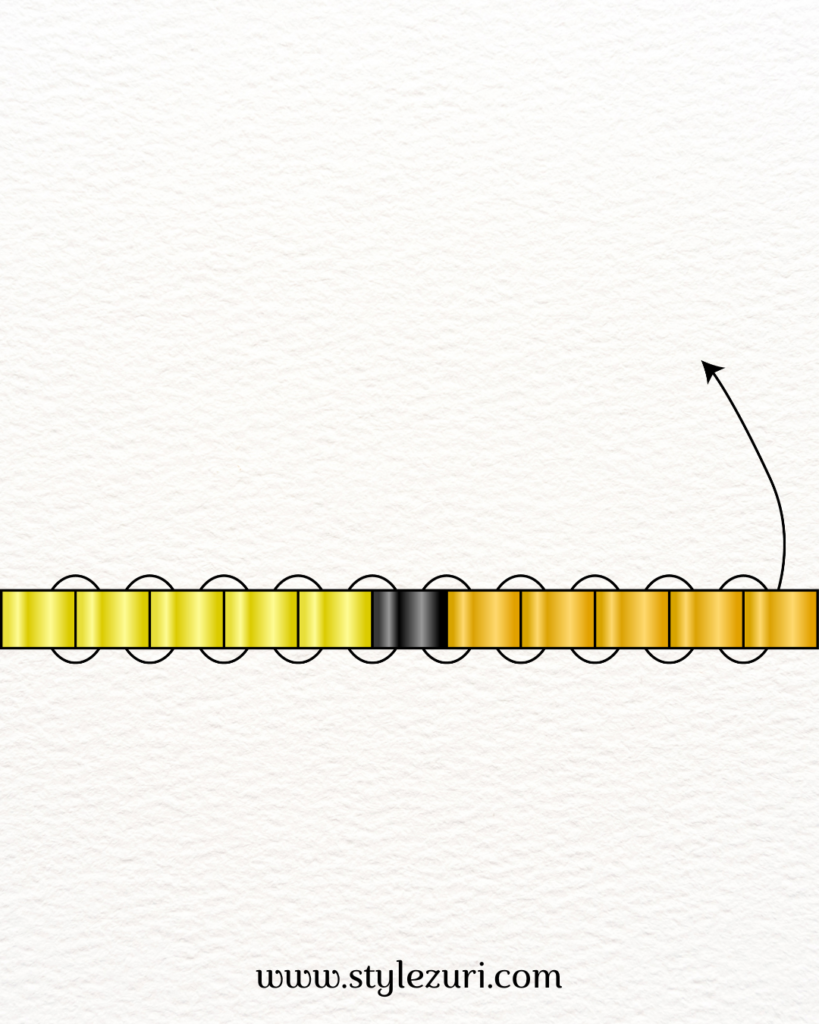
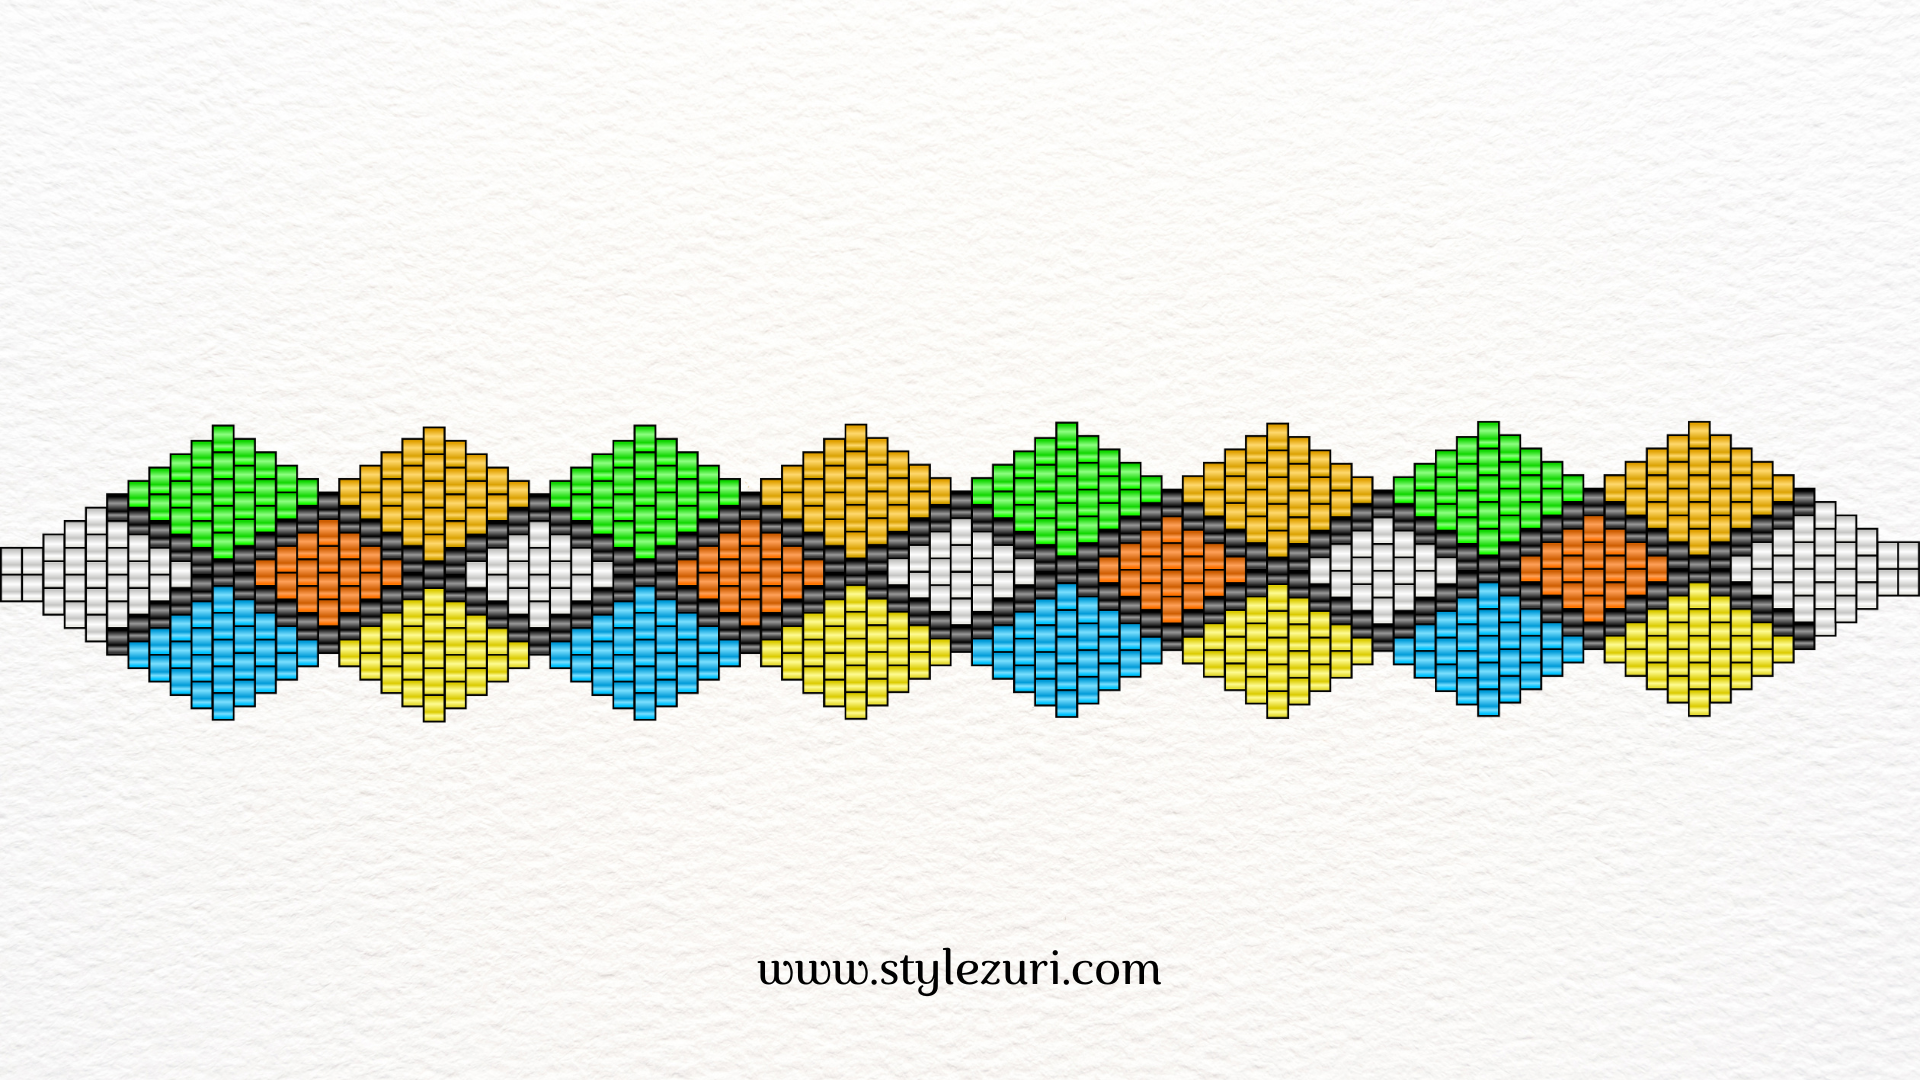
The first row consists of 11 beads using a technique called the ladder stitch. If you’re unfamiliar with how to do it, click here to learn the basics. Be sure to follow the color pattern shown in the illustration, as this is a single ladder stitch that will set the foundation for the whole design.
Step 2
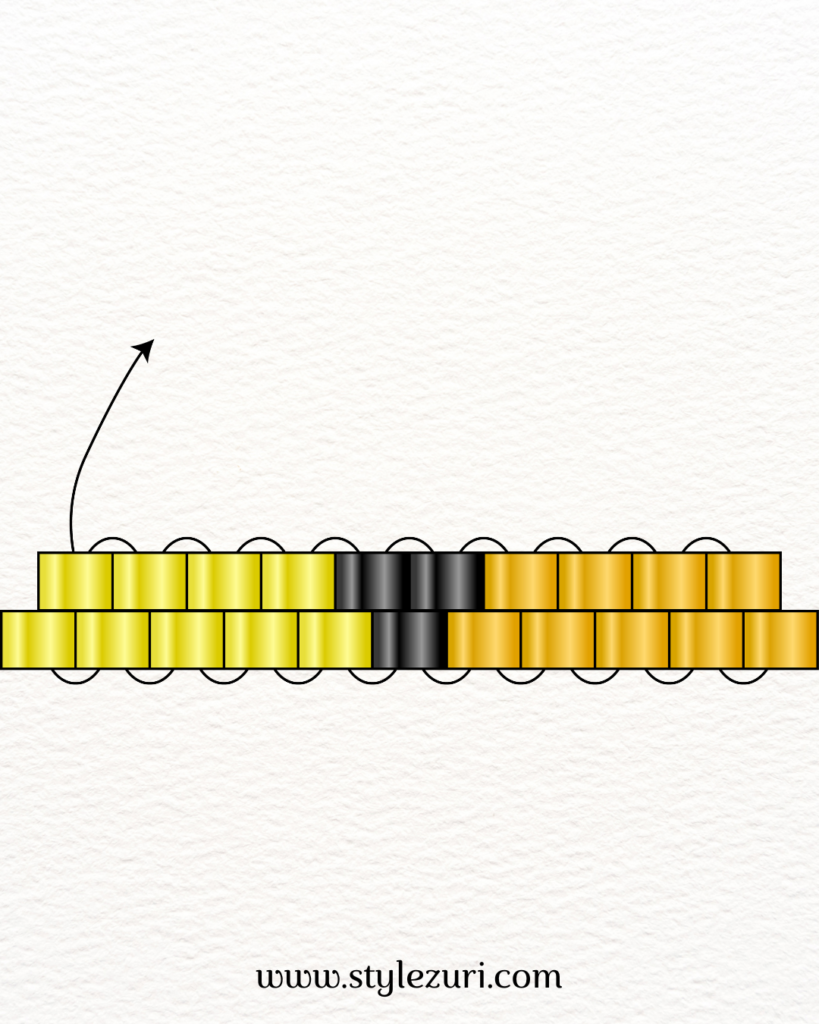
Row 2 utilizes the decrease brick stitch technique. Begin by picking up two beads and passing the needle through the second loop, skipping the first loop of the stitch. Continue with the brick stitch, following the pattern illustrated. If you’re unsure how to work with the decrease brick stitch, refer to this guide for detailed instructions. Make sure to keep an eye on the color pattern as you stitch!
Step 3
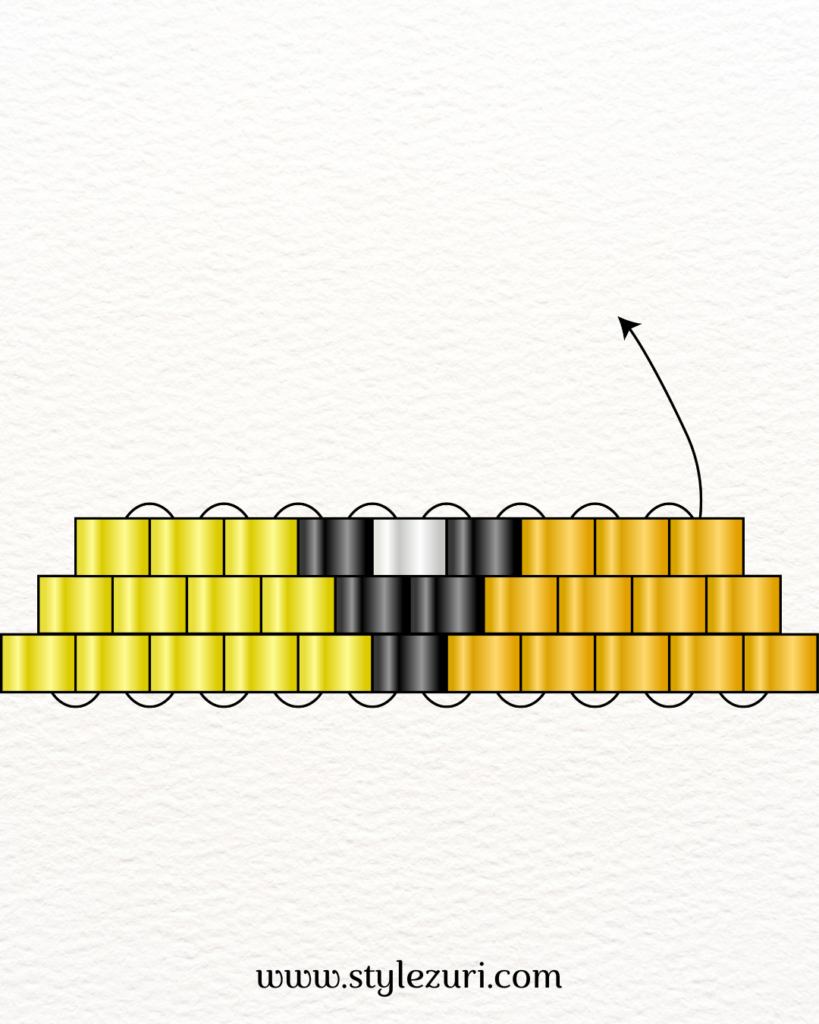
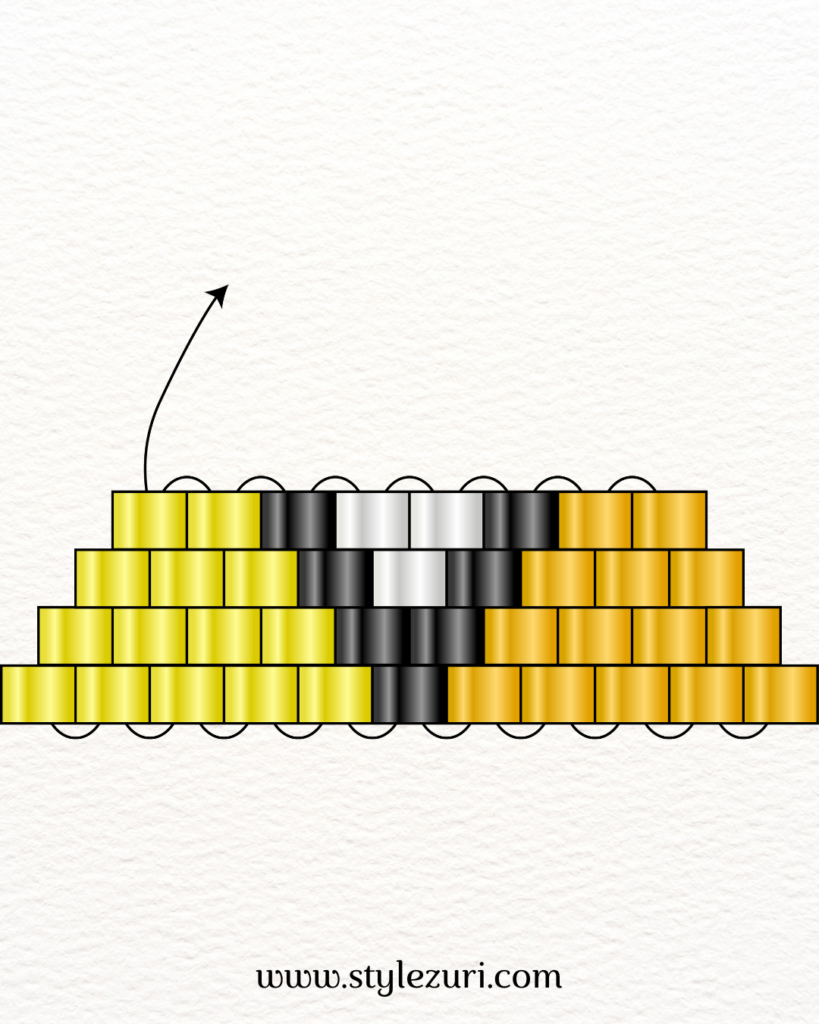
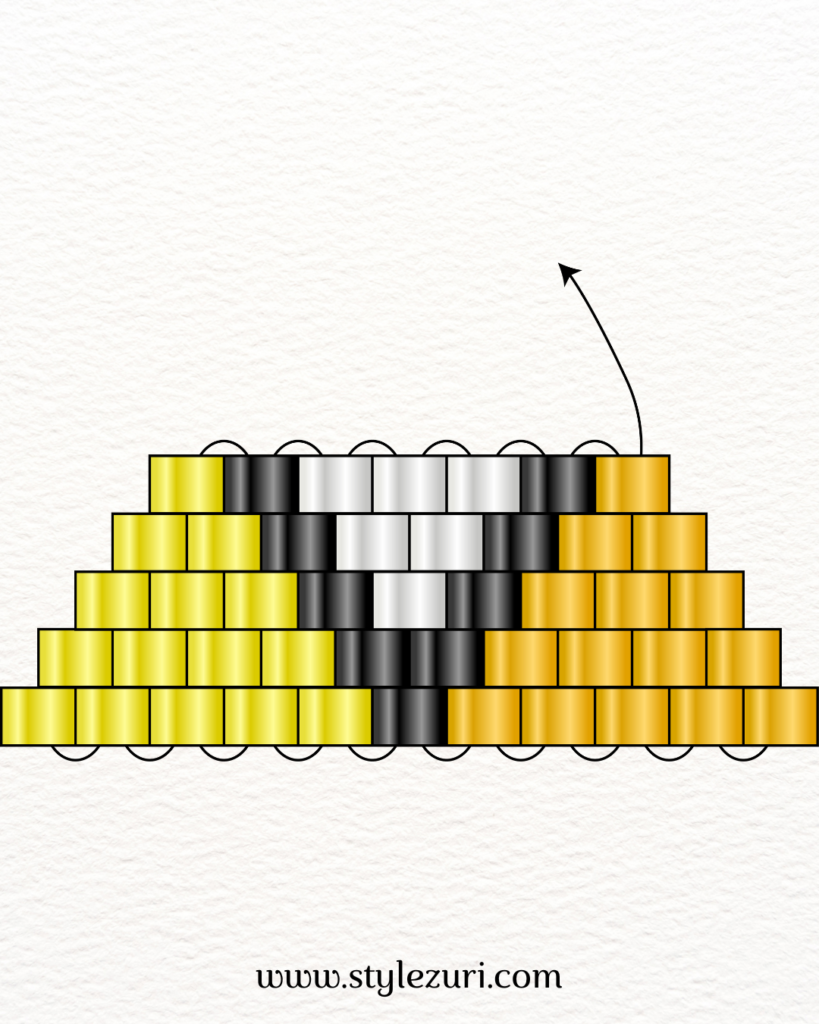
Continue applying the decrease brick stitch technique from rows 3 to 9, carefully following the pattern to guide your color choices for each bead. Pay close attention to the illustration to ensure that the colors align with the design. This consistency will help maintain the overall geometric pattern as you progress through these rows. Enjoy the process and watch your colorful bracelet or necklace take shape!
Step 4
Step 5
Step 6
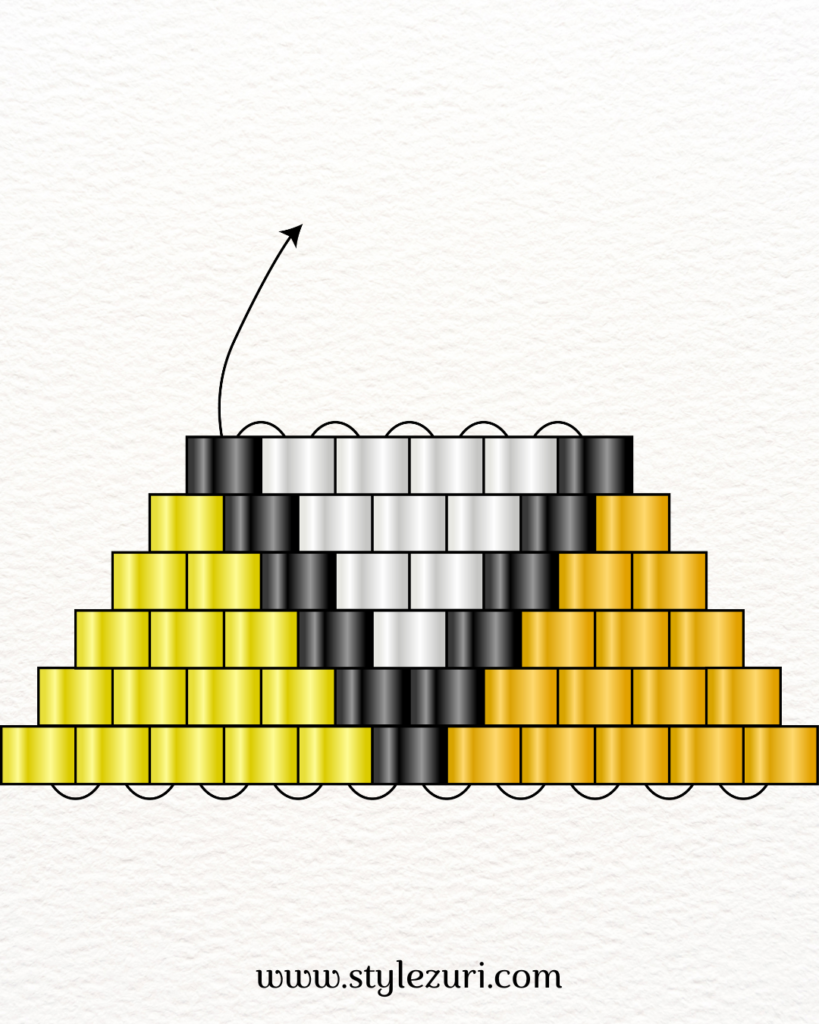
Step 7
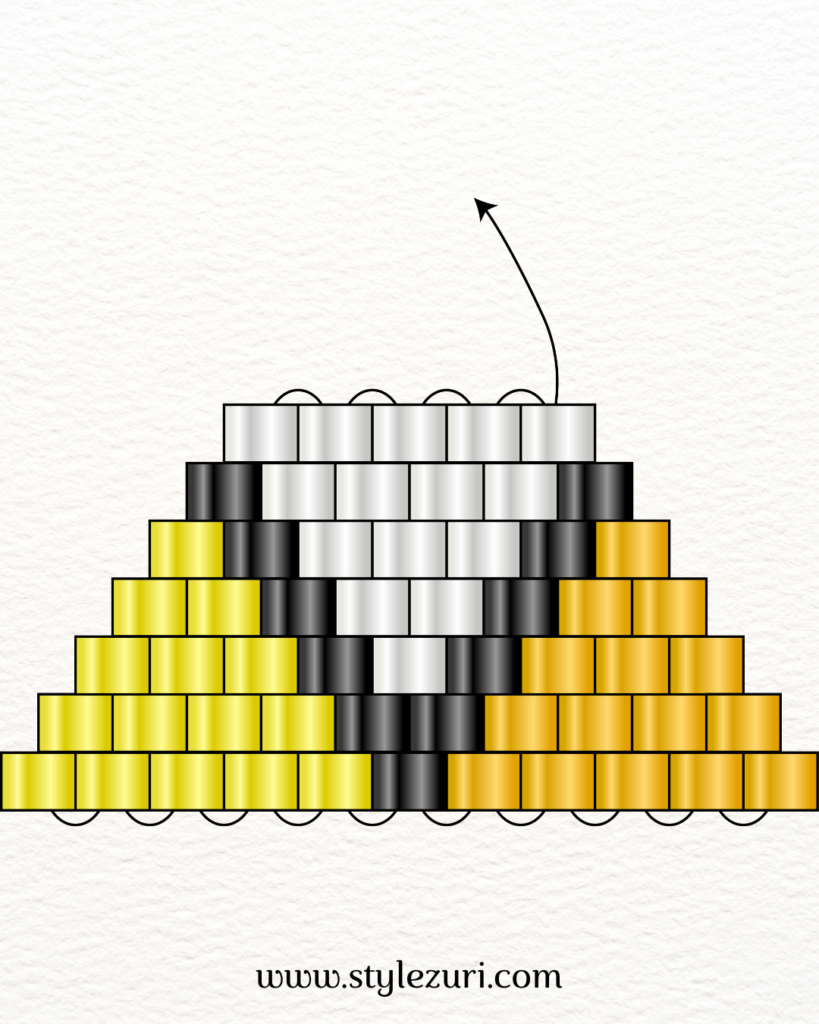
Step 8
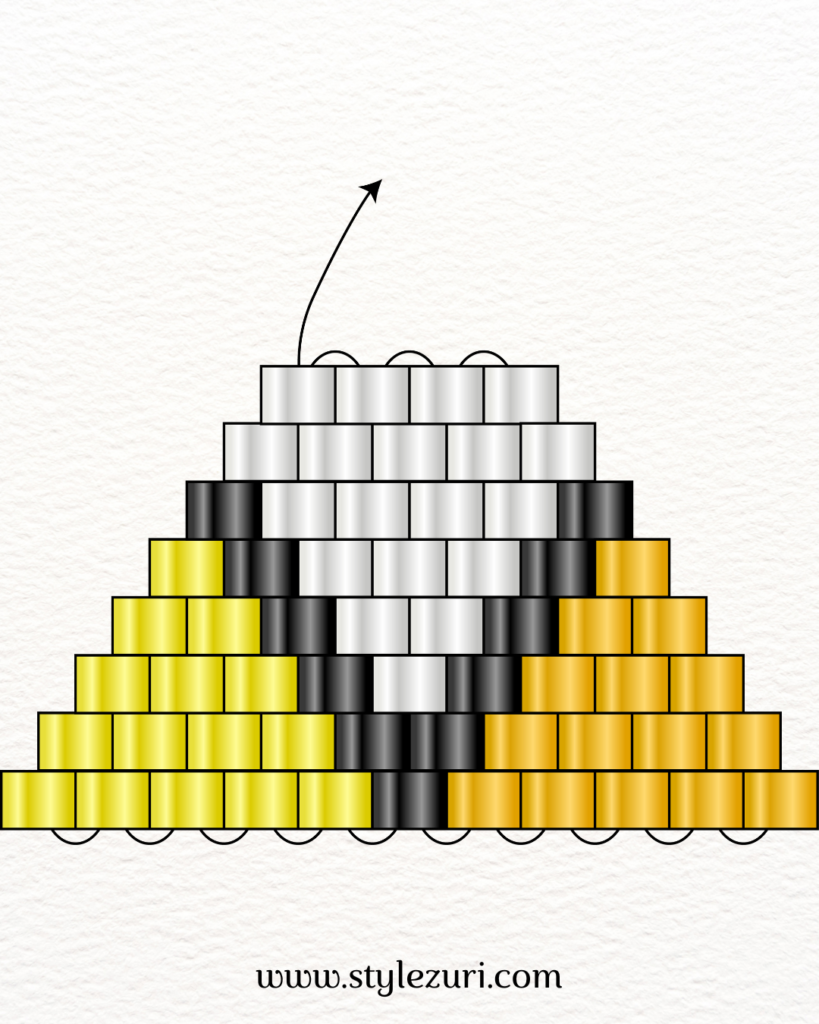
Step 9
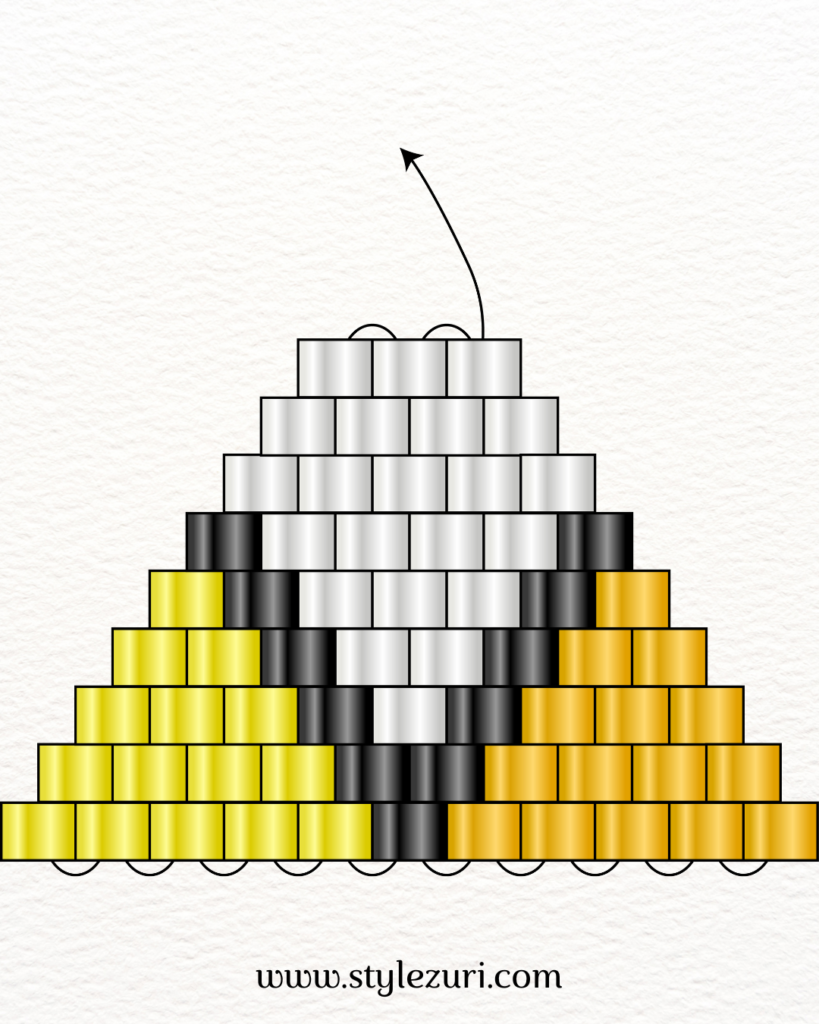
Step 10
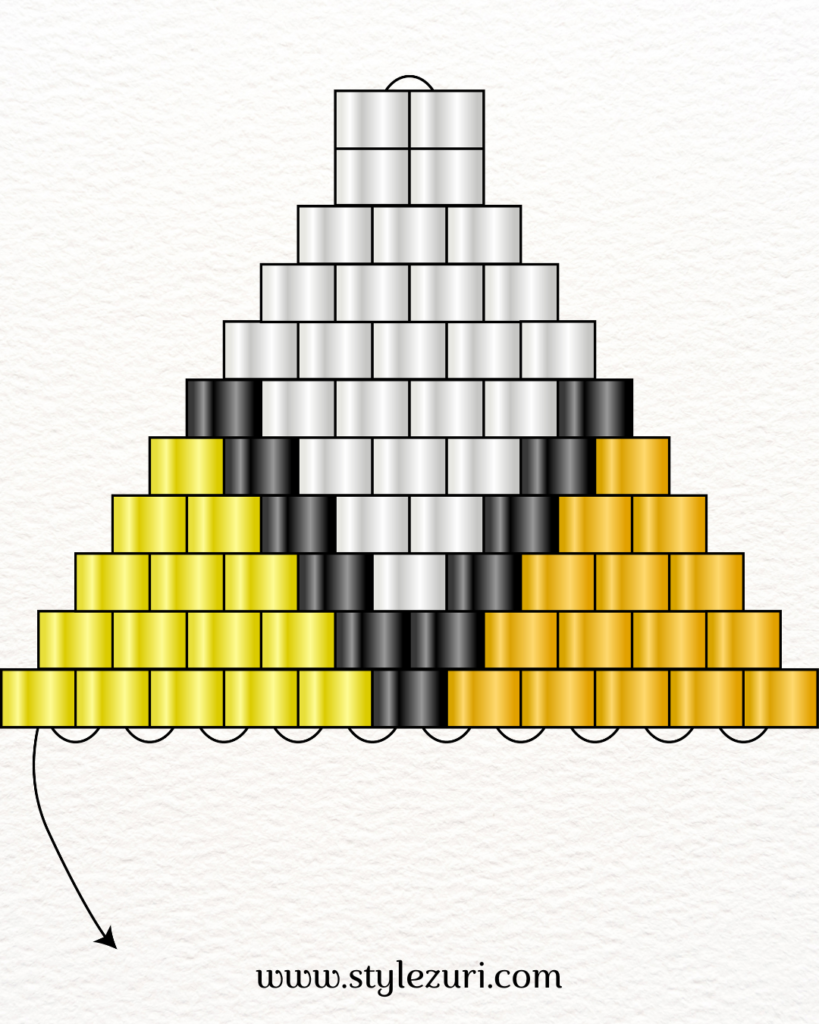
For the topmost row, pick up either 4 or 6 beads to create a loop where you’ll attach the jump ring. After forming the loop, pass the needle all the way down to the bottom row, where you started with your first row, just as illustrated.
Step 11
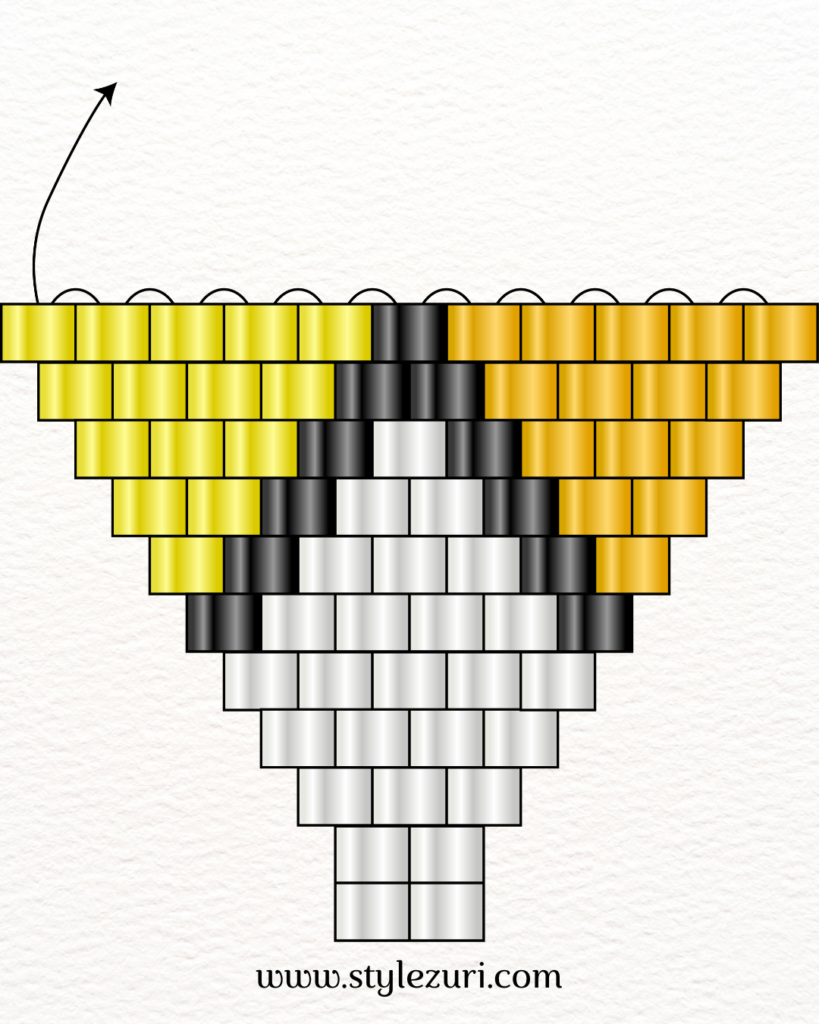
Now, turn your work and begin as if you’re starting from the second row again. Repeat the steps you’ve taken from row 2 to row 6, but this time, introduce a new color in the middle part of the pattern—dark orange—instead of white. Continue applying the decrease brick stitch technique through to row 6, ensuring to follow the pattern closely as you incorporate the new color.
Step 12
Step 13
Step 14
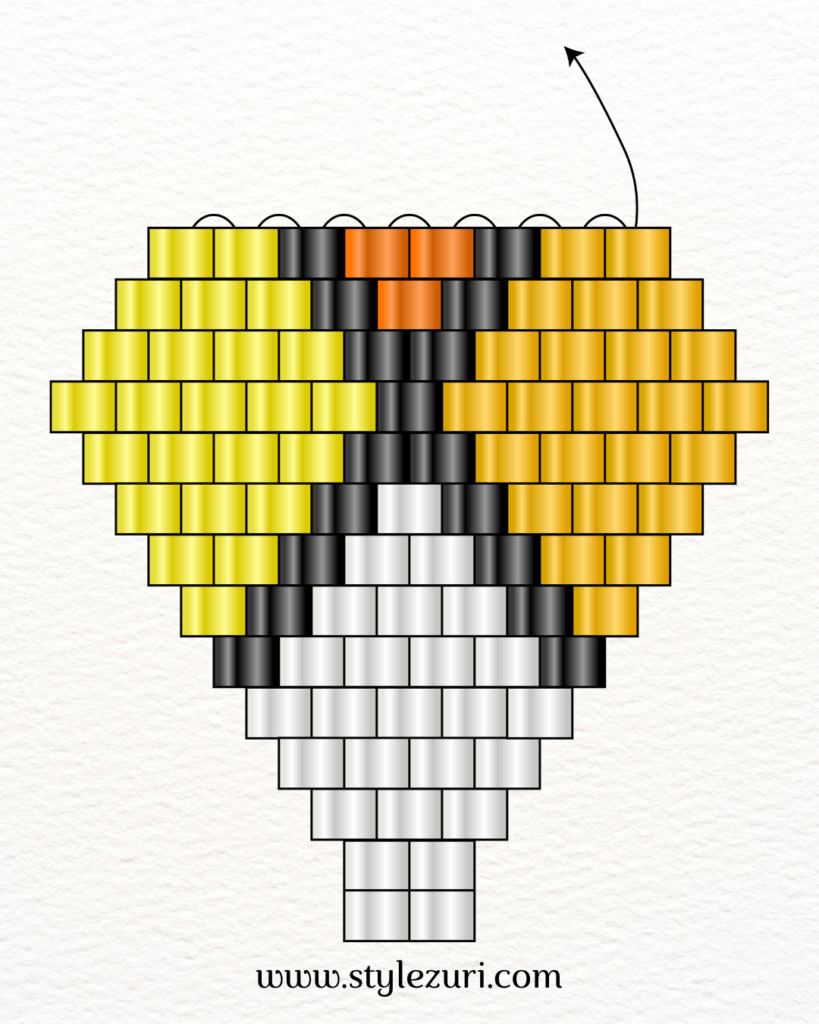
Step 15
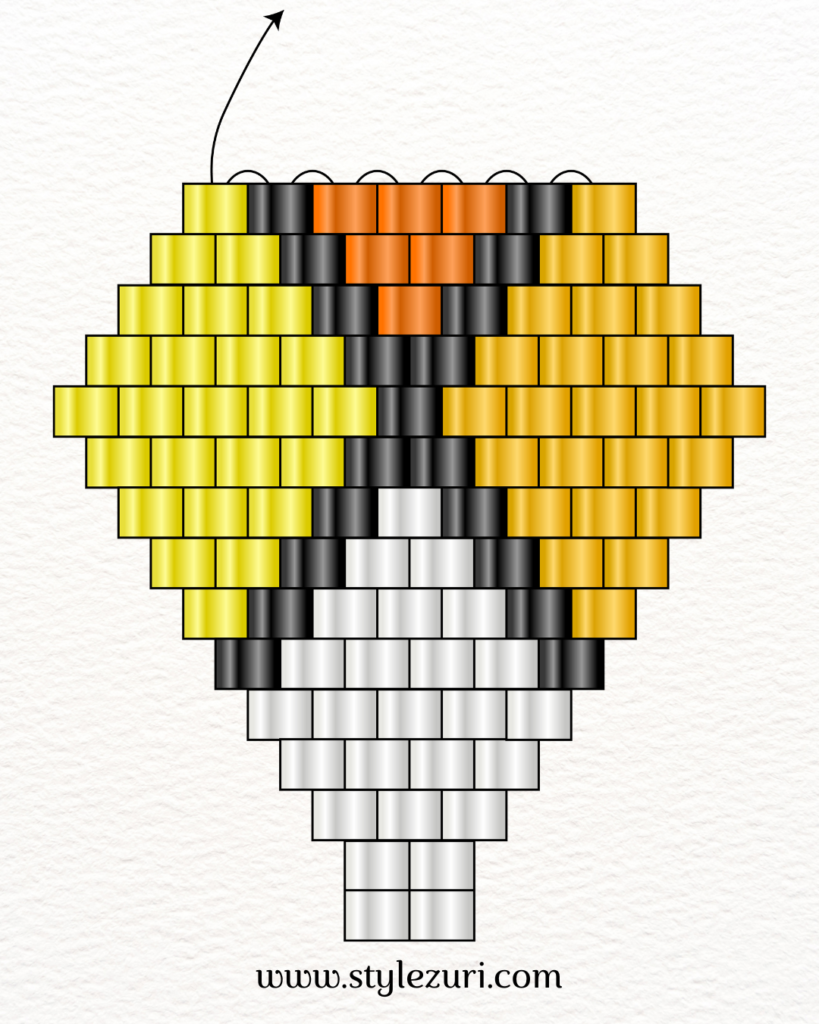
Step 16
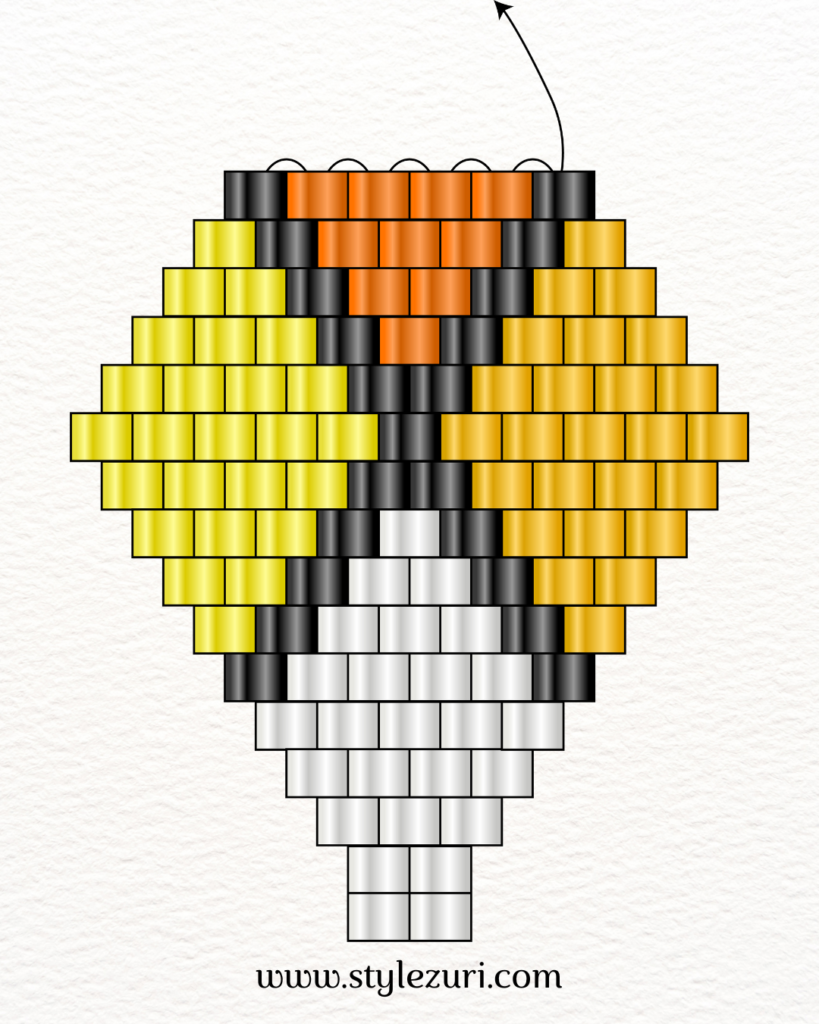
Step 17
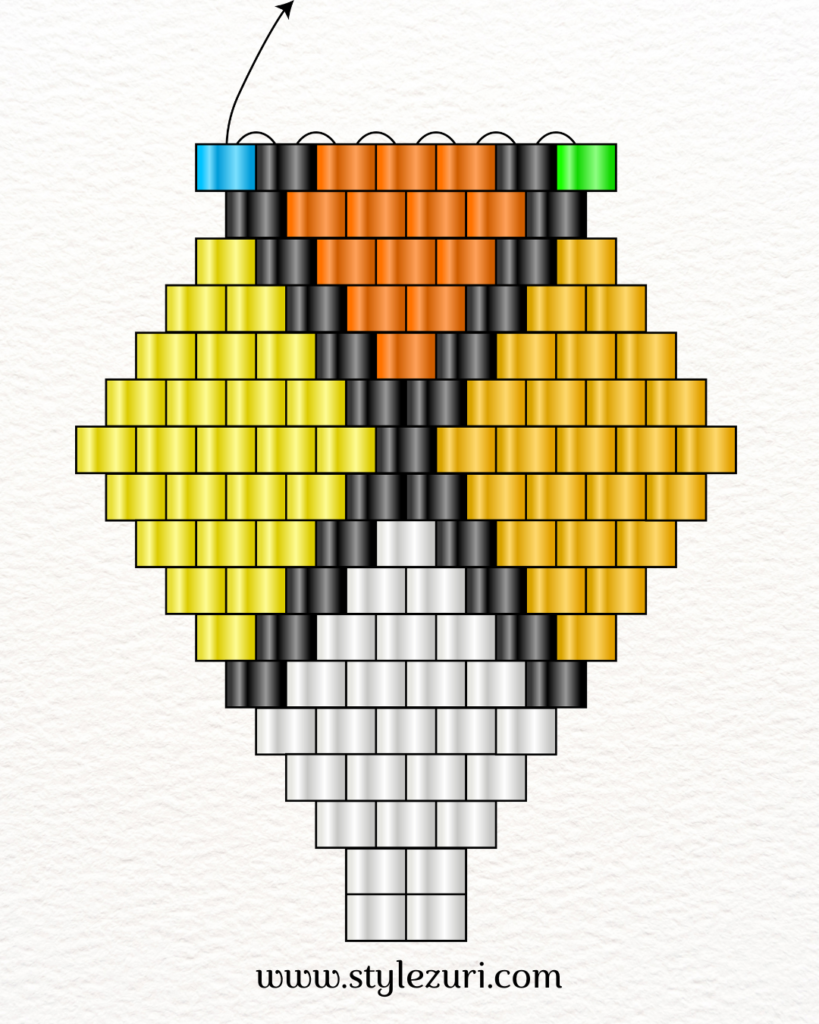
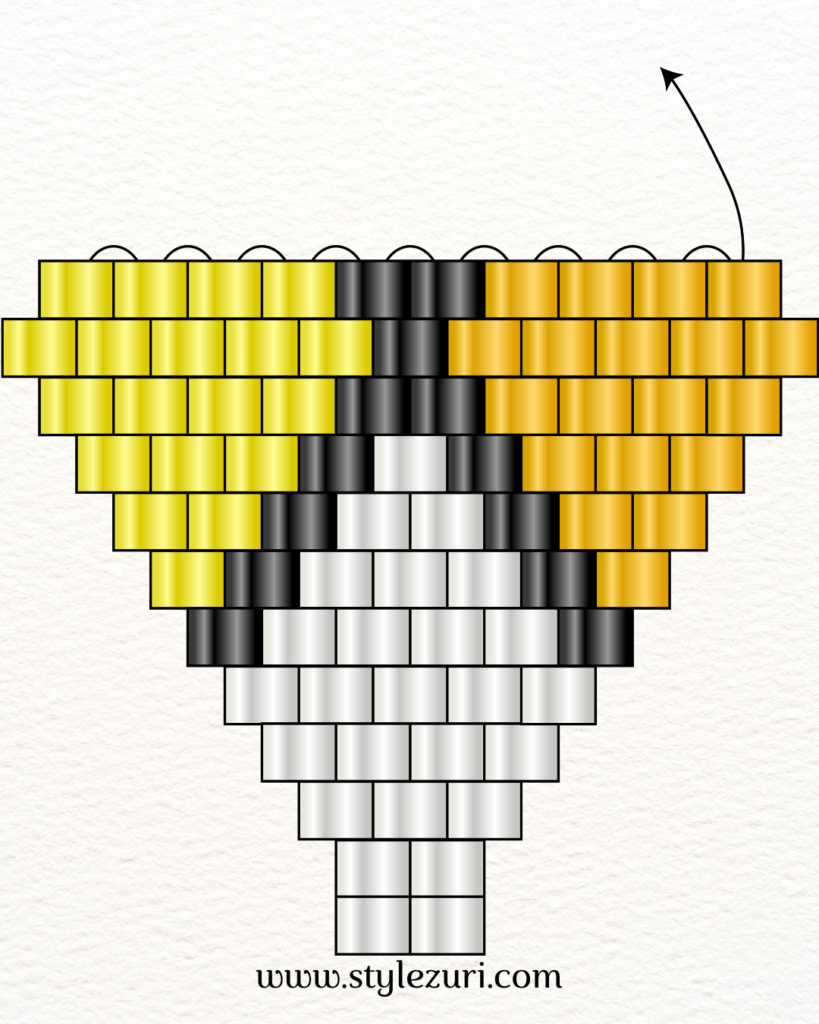
For this row, we will apply the increase technique and introduce two new colors on the sides, adding one bead in the row. Start by picking up two beads: a new color (for example, a green bead) followed by a black bead. Pass the needle through the first loop of the stitch and continue with the brick stitch until you reach the last loop. Here, you will pick an extra bead, which in this case is a blue bead, and pass the needle through the same last loop and back through the blue bead. If you need more guidance, check out this guide to help you along the way!
Step 18
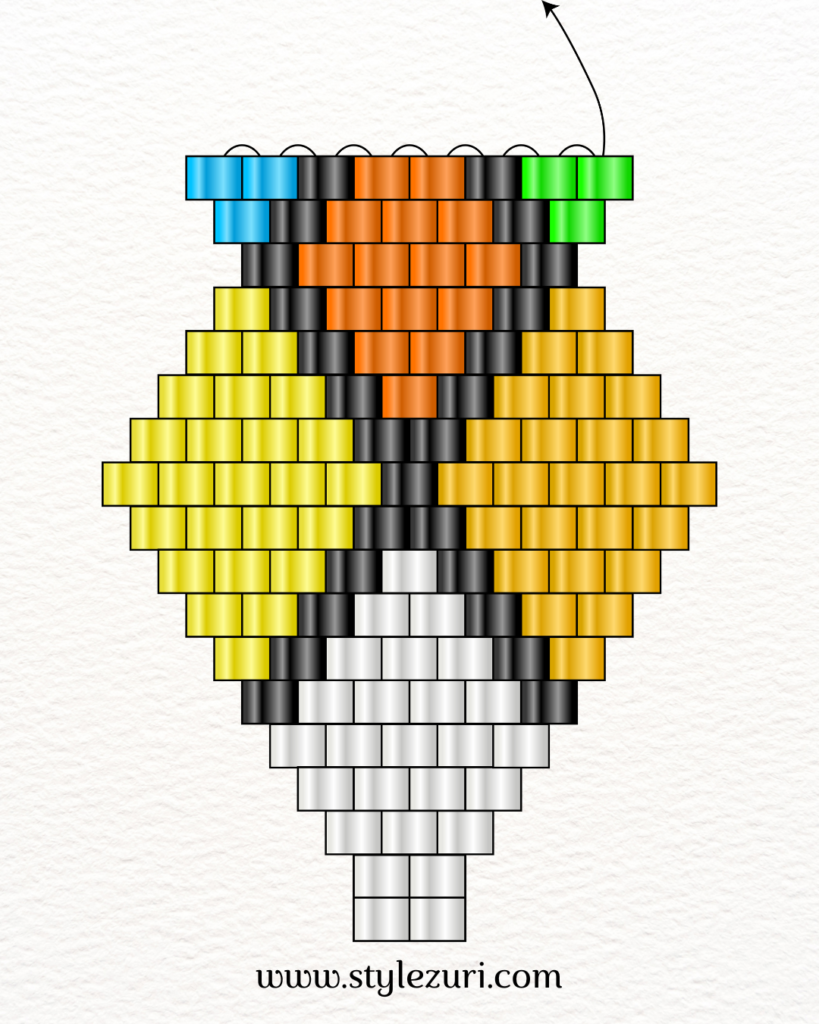
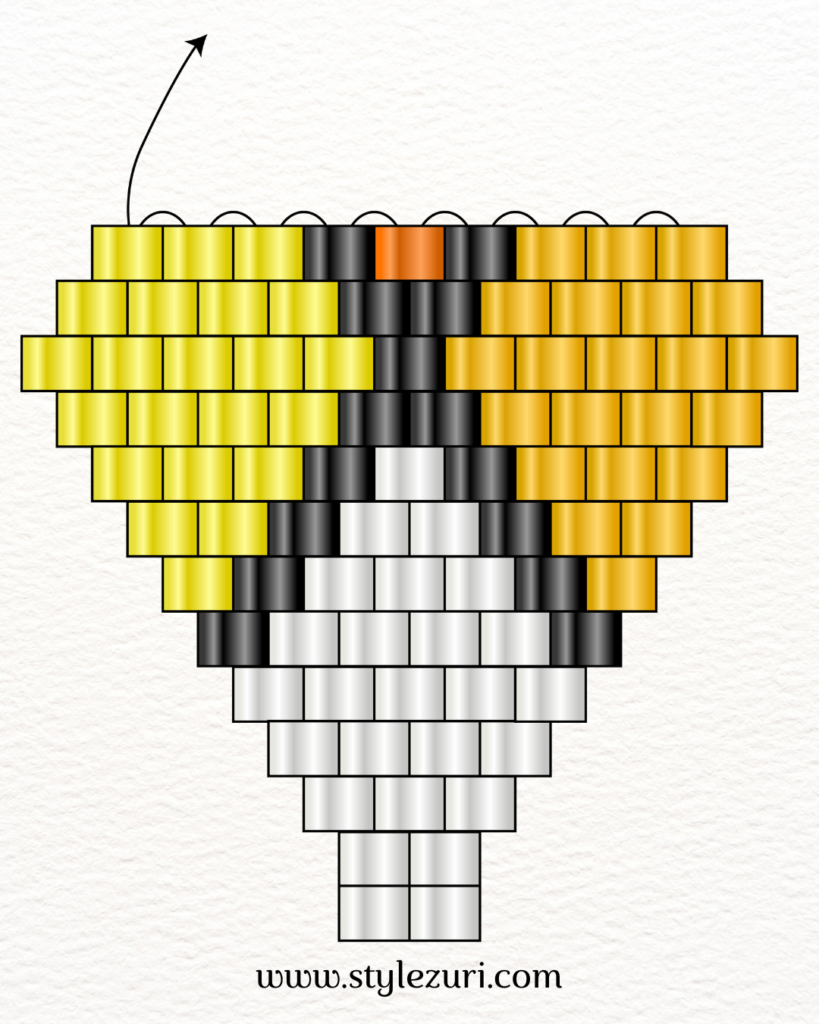
For this row, we will also add one bead, creating an increase. Note that while the new beads you’re adding are increasing, the orange beads are decreasing. Be sure to follow the pattern closely as you stitch. This careful attention to the color arrangement will enhance the overall design of your bracelet or necklace. Enjoy the process as you continue to build your beautiful geometric piece!
Step 19
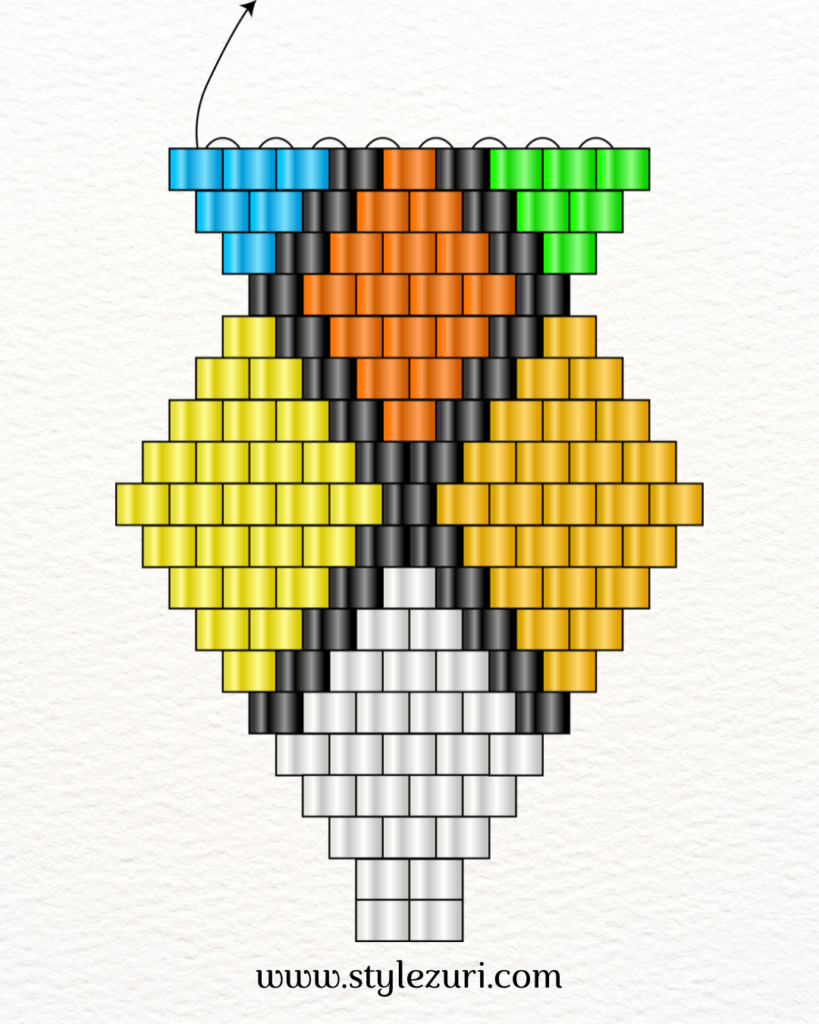
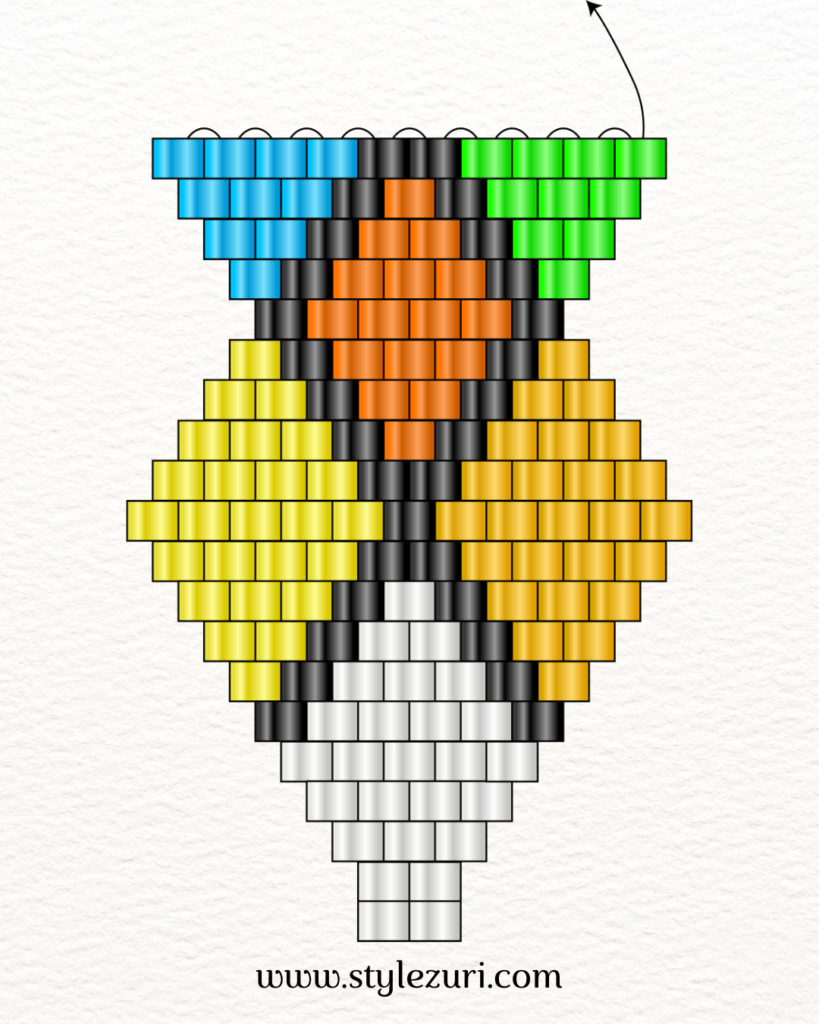
Continue increasing in the subsequent rows until you reach a total of 11 beads in a row. Pay close attention to the pattern as you select your colors to ensure they align perfectly with the design. This careful observation will help maintain the visual integrity of your geometric bracelet or necklace as you work your way up!
Step 20
Step 21
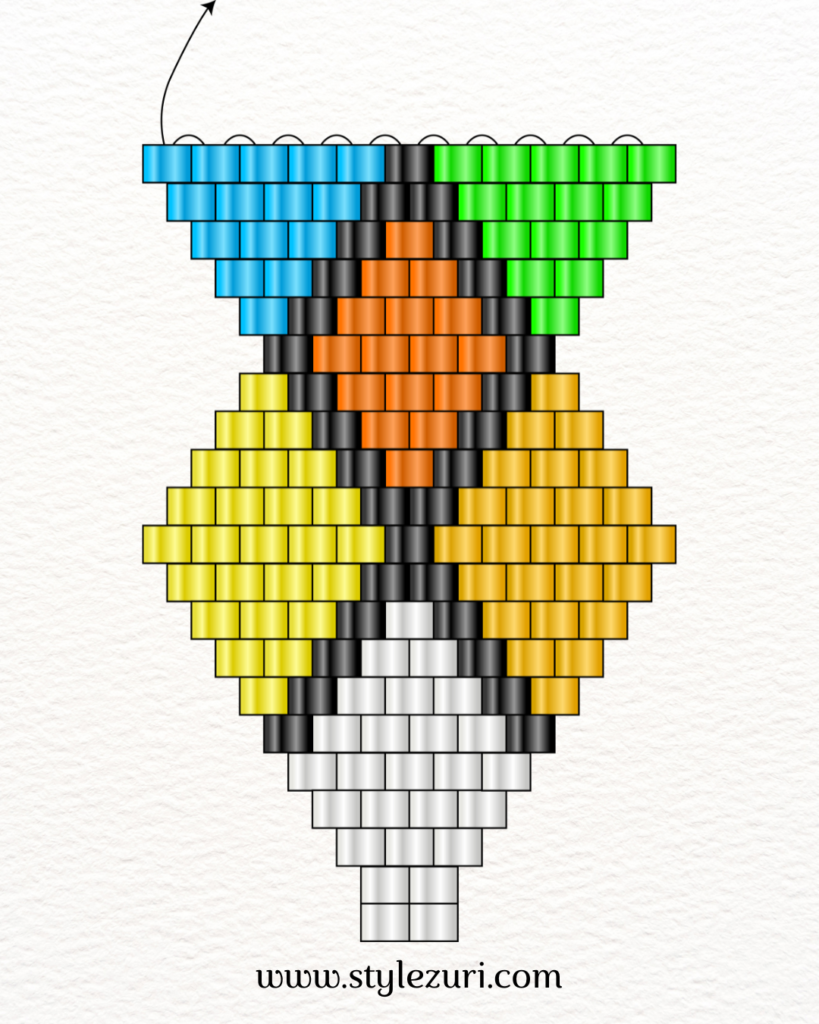
Once you reach the point of having 11 beads in a row, the pattern will repeat itself, resembling the beginning from the 1st row. The only difference will be the colors used, but the technique will remain the same. Continue following the same steps as you did from row 2, and keep stitching until you achieve your desired length for the bracelet or necklace.
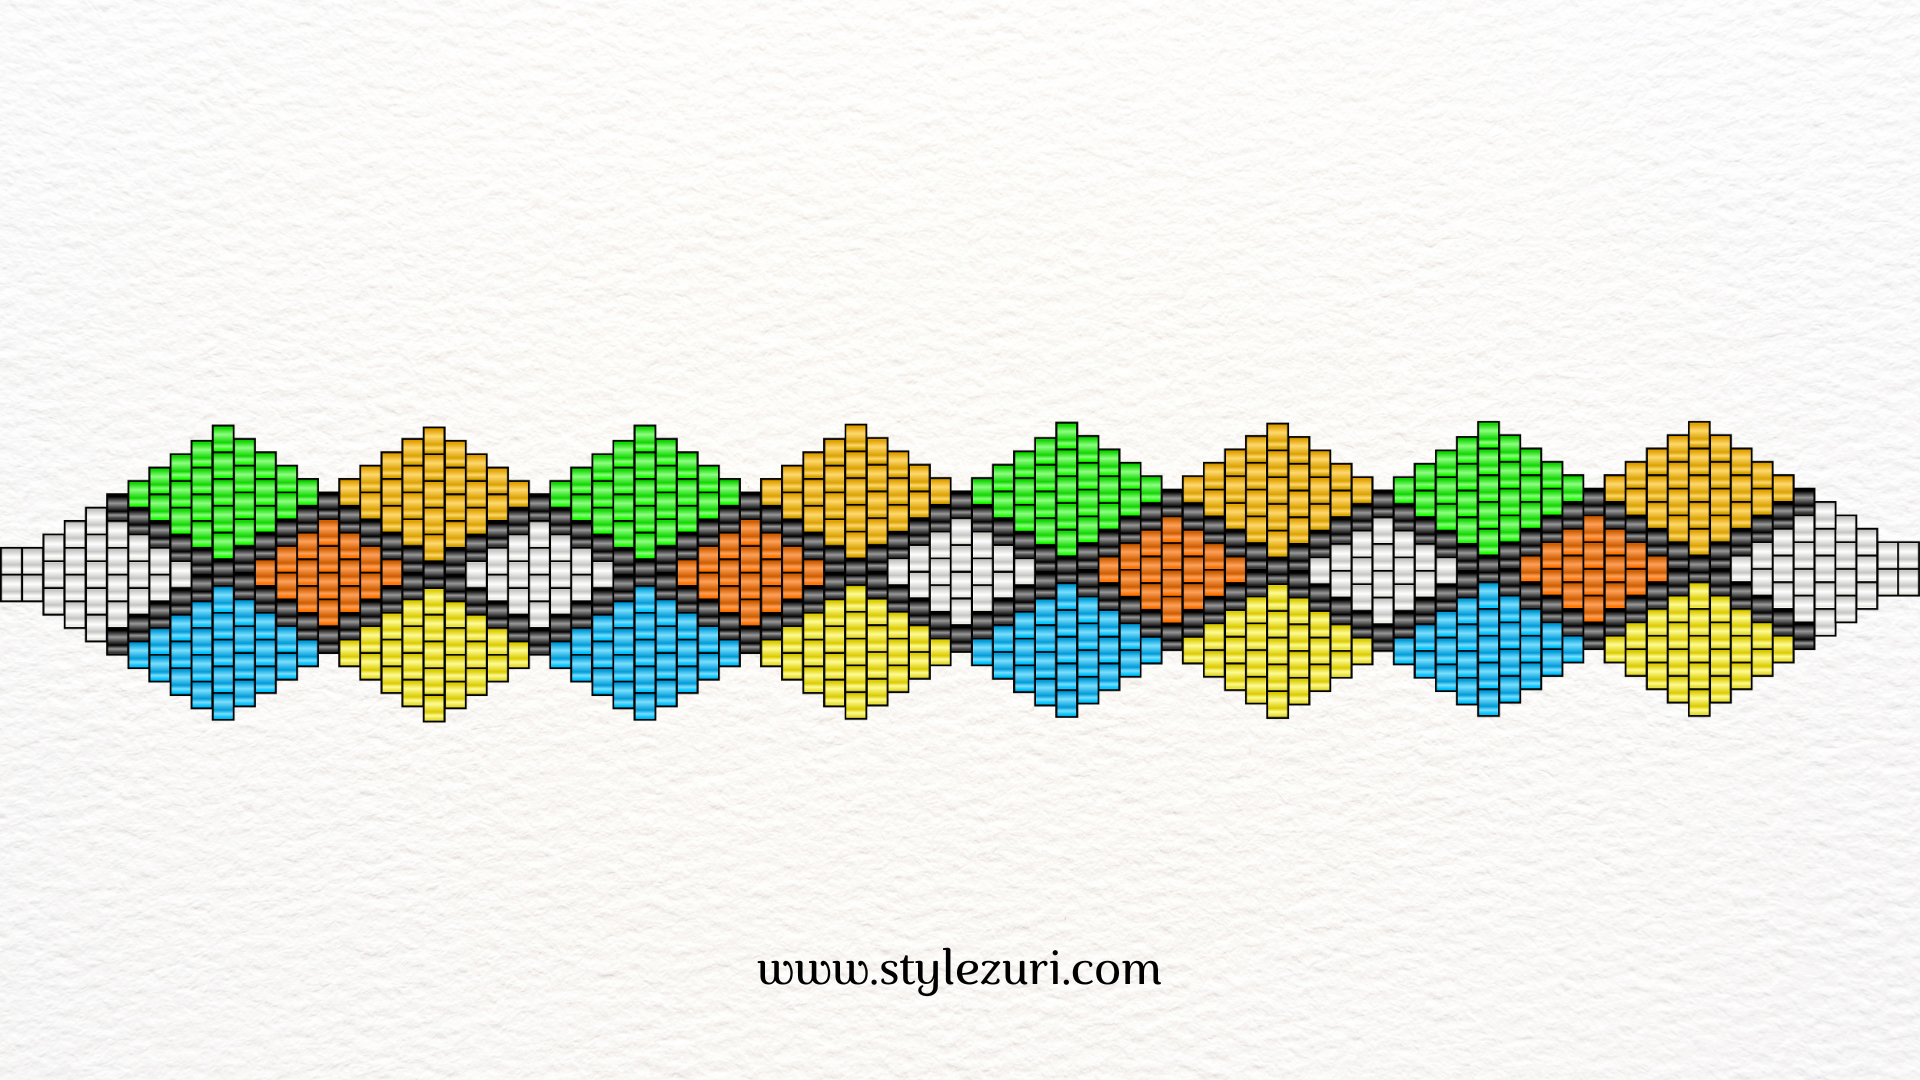
When you reach the end of your project, add the jump rings and the lobster clasps to finish your beautiful beaded bracelet or necklace. Enjoy your colorful creation and show off your stunning geometric design!
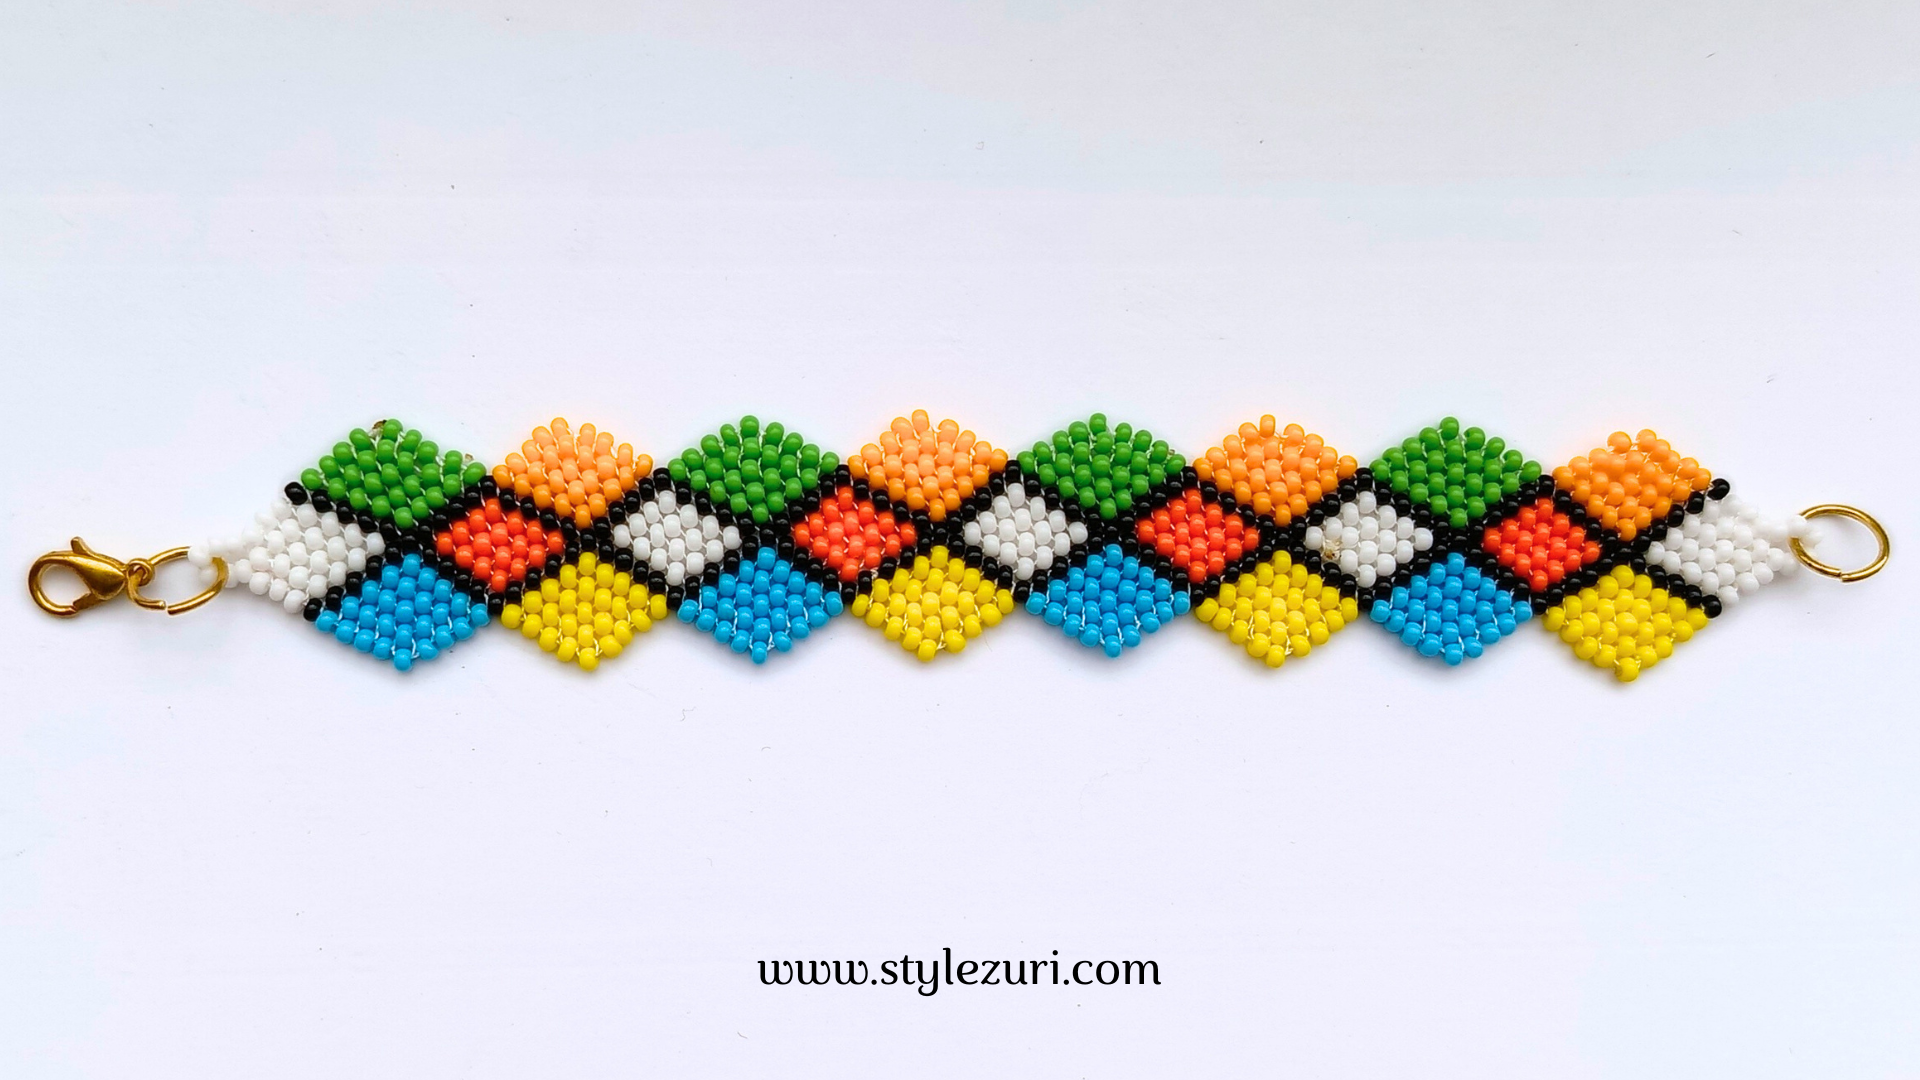
Congratulations on completing your vibrant beaded bracelet or necklace! You’ve crafted a stunning piece that showcases your creativity and skill in brick stitch. Remember, the beauty of this design lies in its versatility—you can experiment with different colors to make each piece unique. Happy beading, and keep exploring new designs and techniques in your jewelry-making journey!
