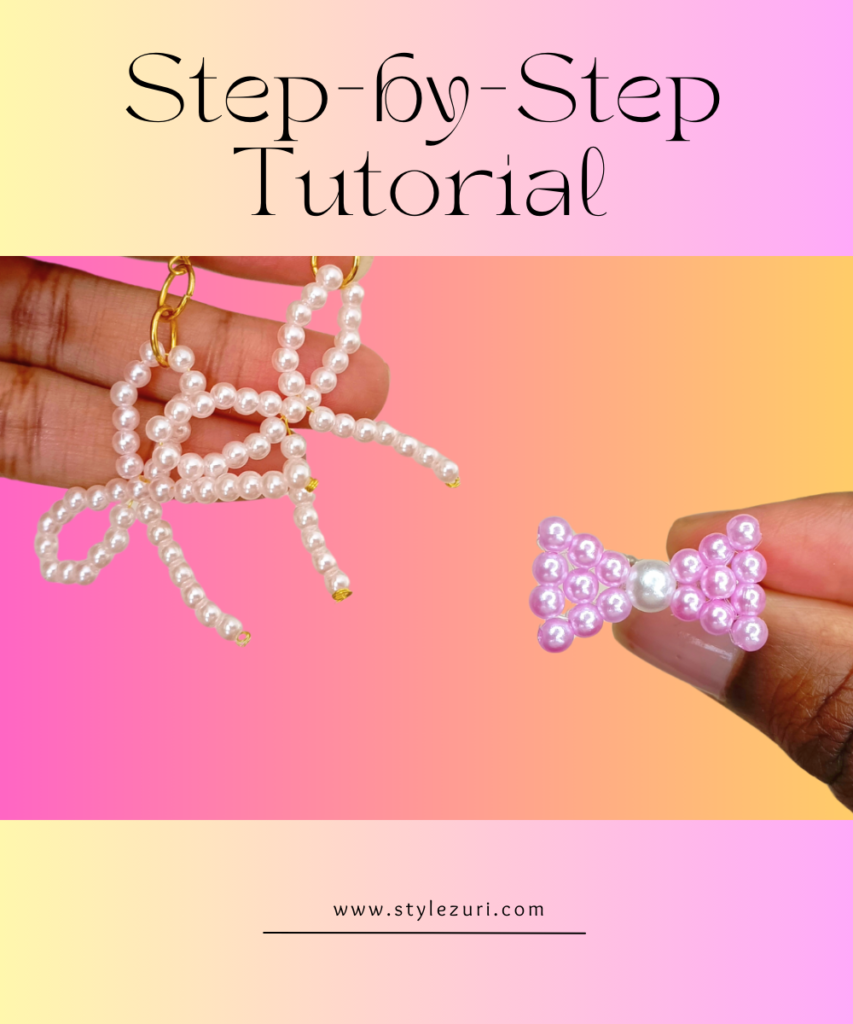
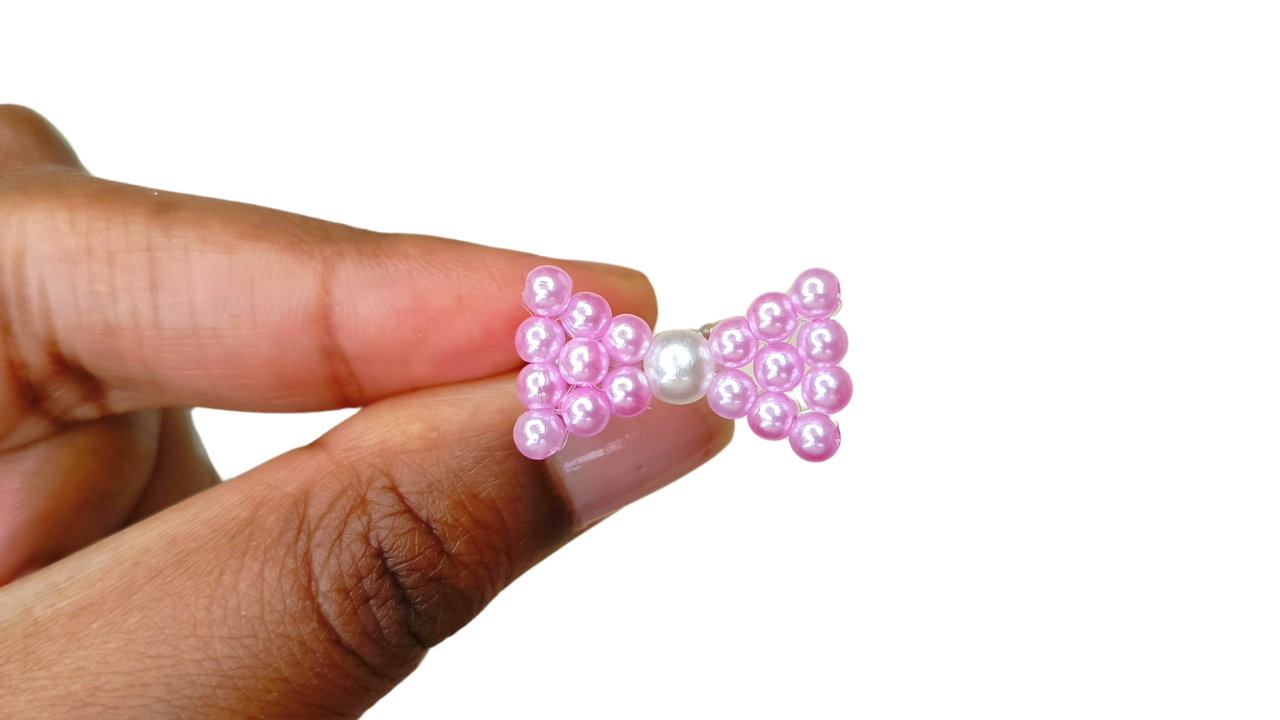
Hello! Today, we’re making a fun and super simple project—creating a beaded bow ring and earrings. This is by far the easiest DIY we’ve done so far, and the final look is absolutely adorable. Plus, if you get stuck, don’t worry! There’s a video tutorial for both the ring and earrings, right after each set of instructions. But I promise, you’ll be able to follow along easily!
To get started, here’s what you’ll need:
Materials:
- 3mm pearl beads
- 4mm pearl beads
- Size 11 seed beads
- 0.4mm wire (20cm length)
- Nylon thread
- Earring hooks
- Jump rings
Step-by-Step Beaded Bow Ring Tutorial
Step 1
Let’s start with the beaded bow ring. For this project, we’ll use nylon thread, 4mm beads, size 11 seed beads, and 3mm beads—that’s all you need. Begin by picking up one of the larger beads (4mm), followed by six 3mm beads. Leave a tail of thread because you’ll use it to tie a knot at the end to complete the ring.
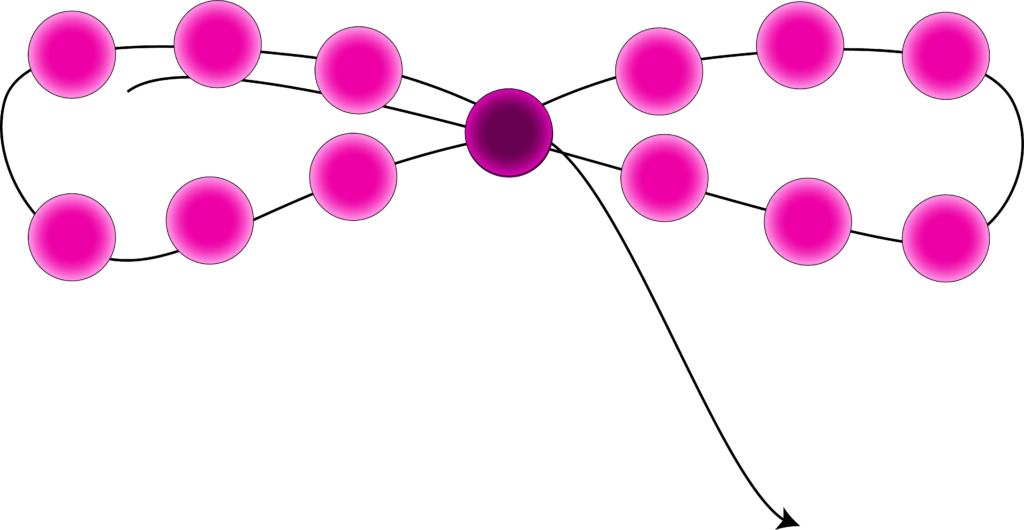
Pass the needle back through the larger bead (4mm), as shown in the illustration below.

Step 2
Next, pick up six of the smaller beads (3mm).

Step 3
Repeat what you did in step 1 by passing the needle back through the larger 4mm bead, just as shown in the illustration.
Step 4
Now, pass the needle through two of the 3mm beads, as shown in the illustration below. Then, pick up one more 3mm bead.

Step 5
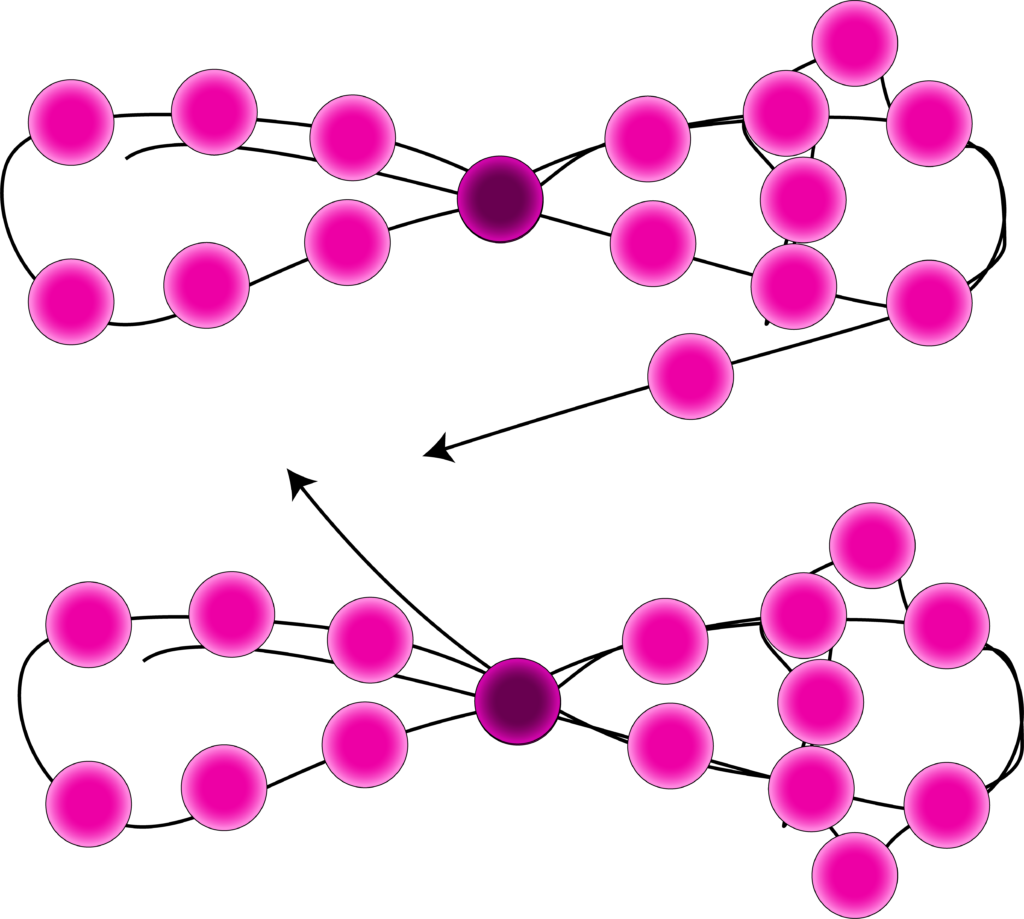
Turn the needle so that you can pass it through the opposite middle bead, positioning the bead you just picked in the center. Pass the needle through the opposite bead, as illustrated below, then back through the middle bead you just placed and through the bead you started from.

Step 6
Now, pick up one 3mm bead and pass the needle through the next two beads. Make sure to pass the needle through exactly two beads.

Step 7
Now, pick up one 3mm bead and pass the needle through the two 3mm beads and the larger 4mm bead, just as illustrated. From here, you will repeat the same steps on the other side, and eventually, you will see how the bow is formed. The beads will be compact, unlike the illustration, which shows them spaced out for easier understanding.
Step 8
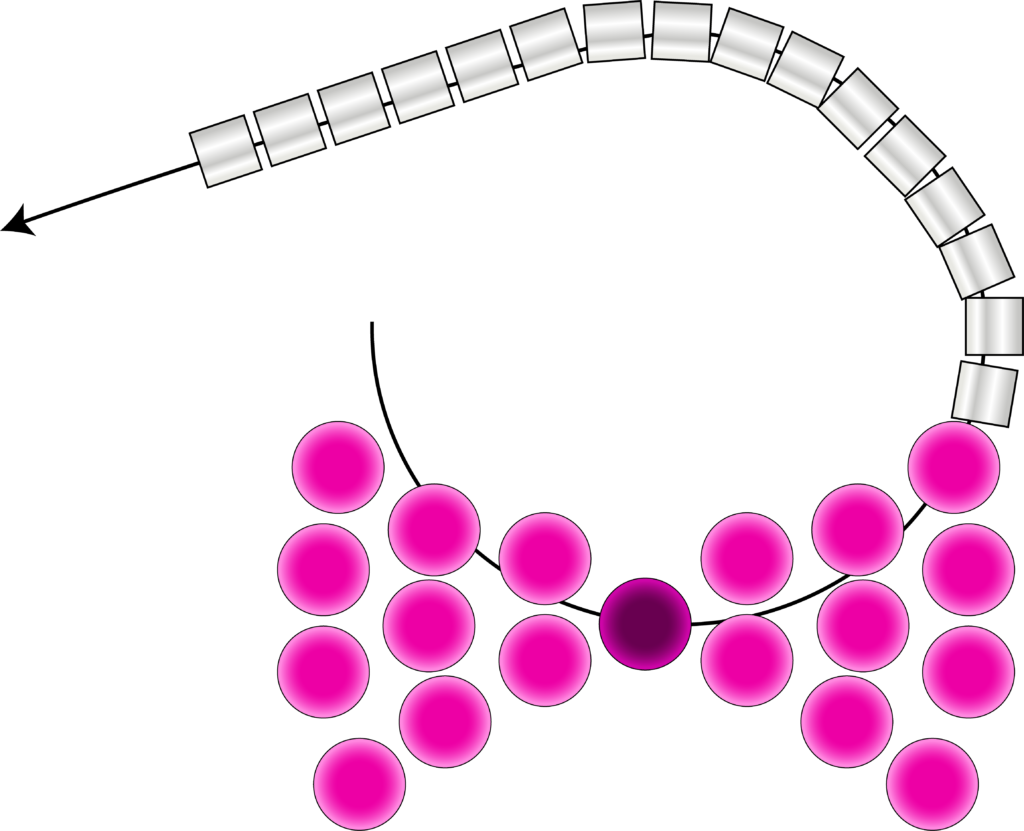
When you reach the end, pick up size 11 seed beads to create the ring band according to your finger size. Tie a double knot using the tail of the thread that you left untouched. And that’s all there is to it! See how easy it was? If you need a clearer understanding, check out the video below.
Beaded Bow Earrings Video Tutorial
Step-by-Step Beaded Bow Earrings Tutorial
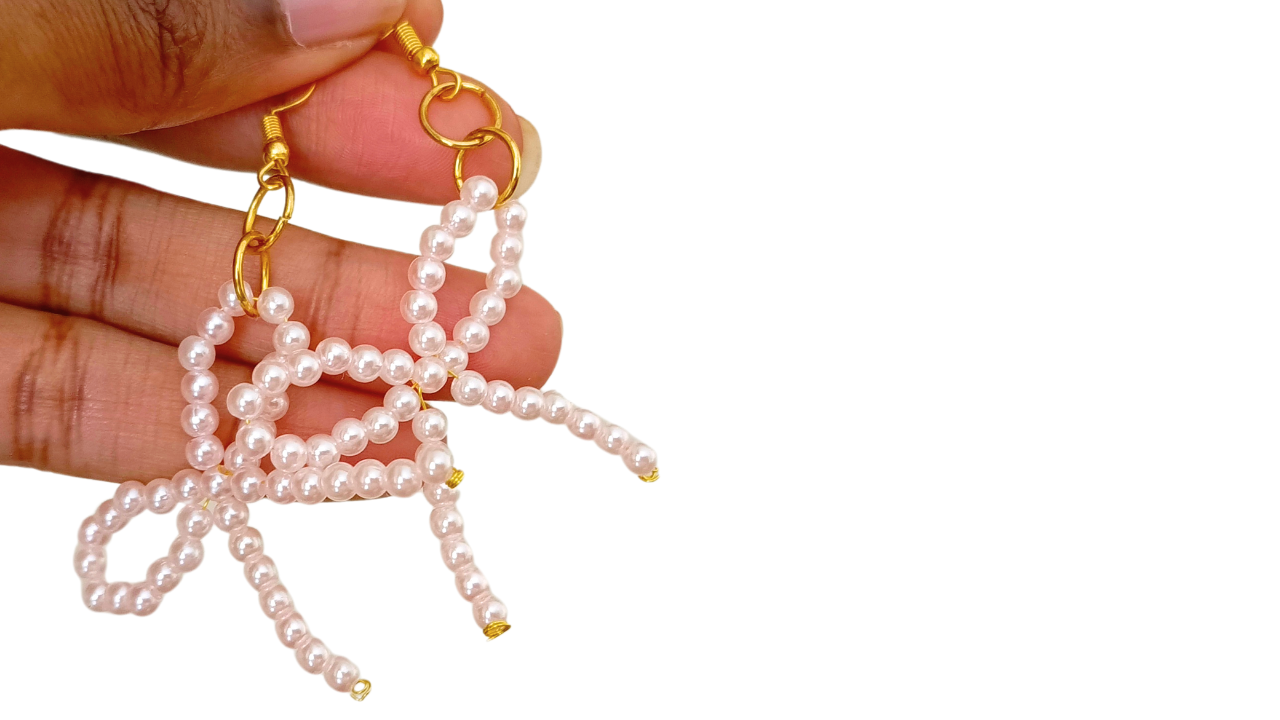
Now, let’s move on to the easy bow earrings. For this project, you’ll need 0.4mm wire (20cm long), size 3mm beads, a jump ring, and an earring hook.
Step 1
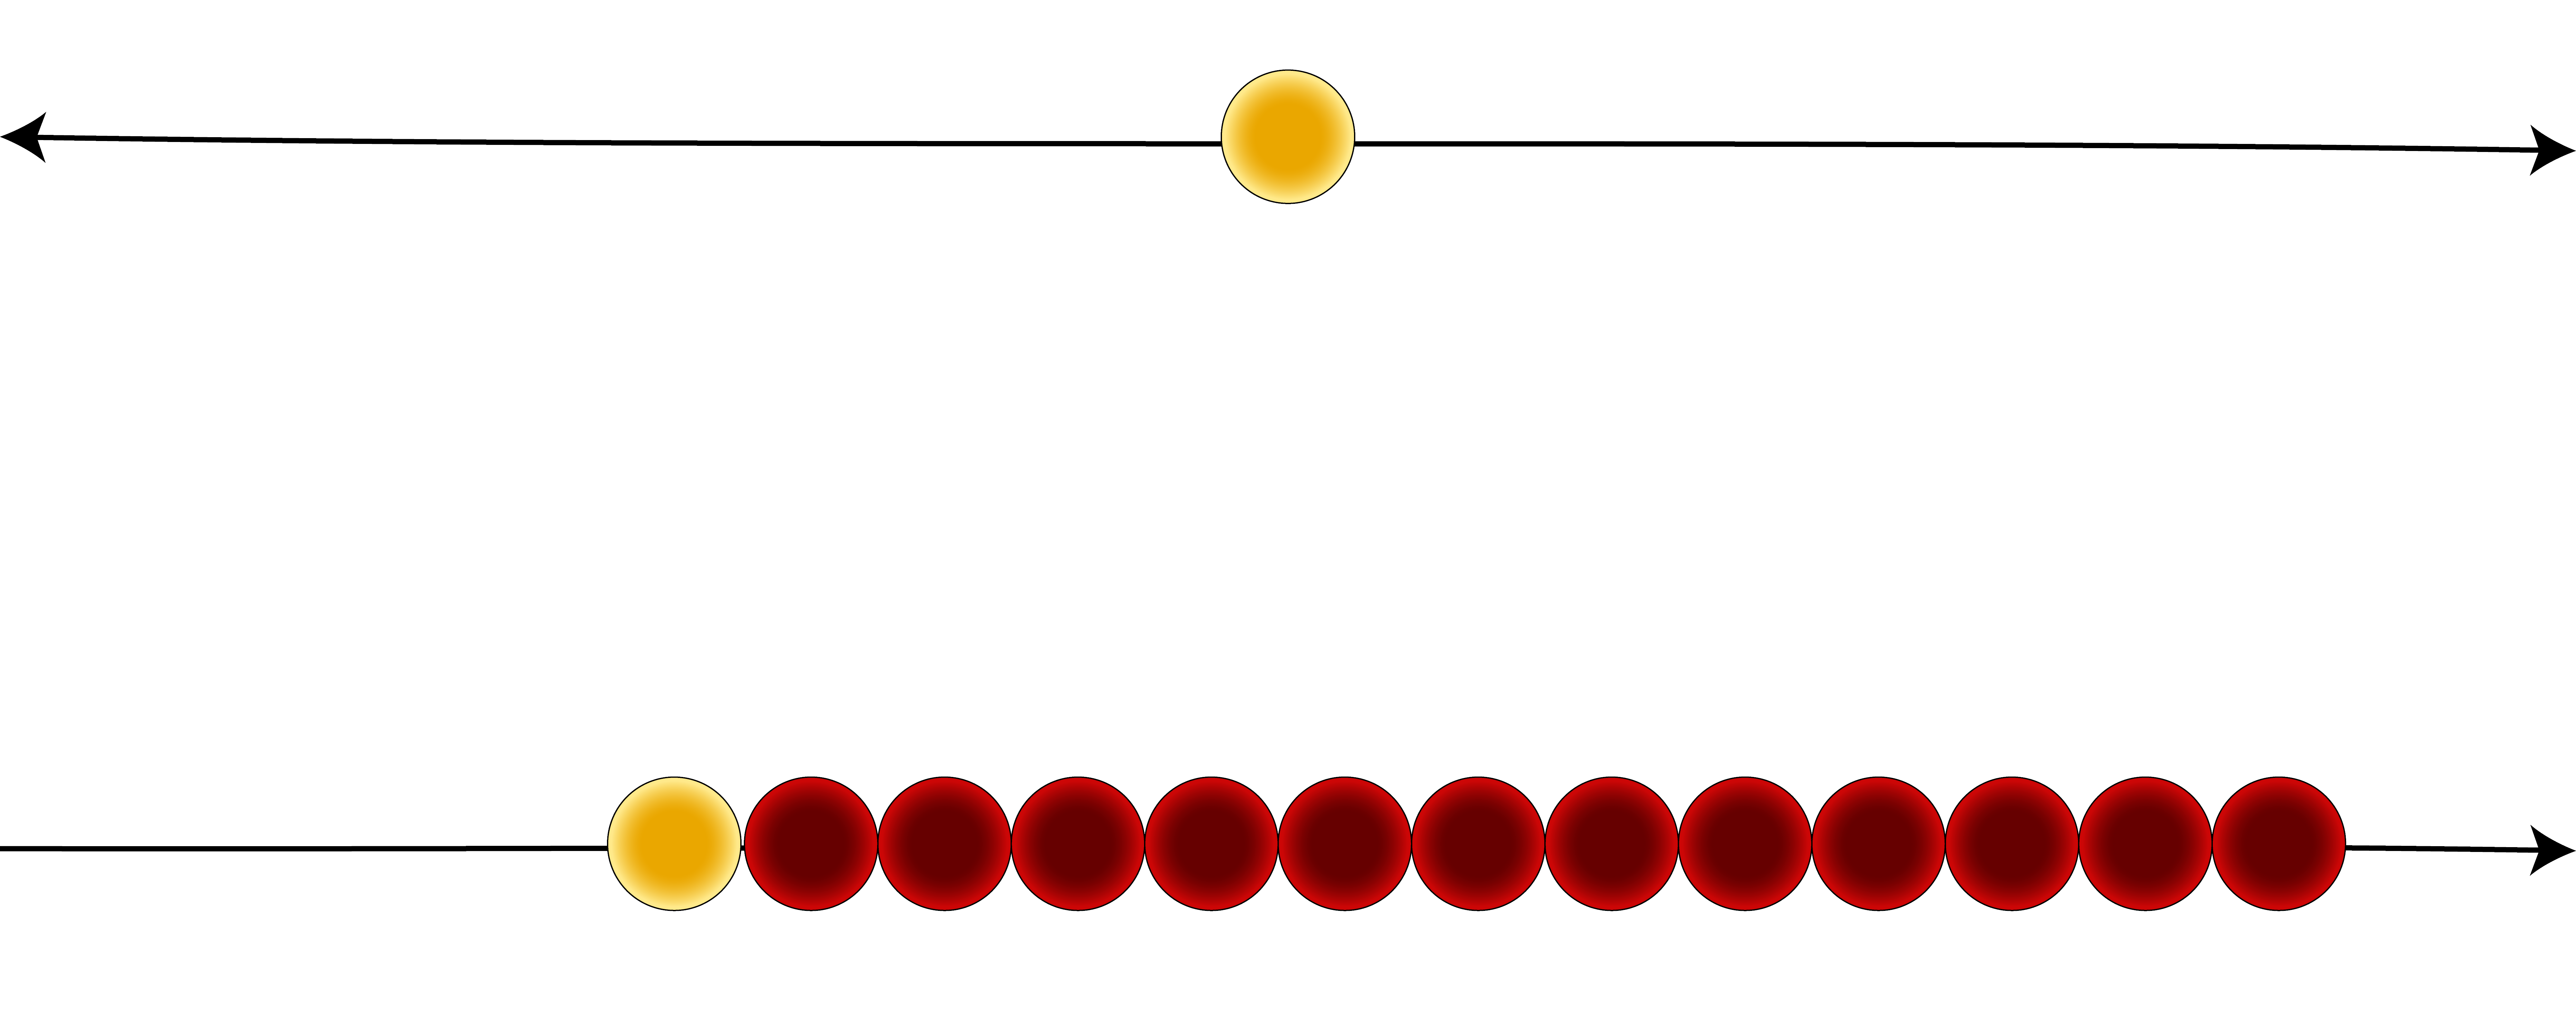
Start by picking one bead in a different color and pulling it to the middle; this will be our middle bead. Make sure it’s centered, as we will use both sides of the wire to create the bow. Next, pick up 12 beads in a different color, as illustrated below.
Step 2
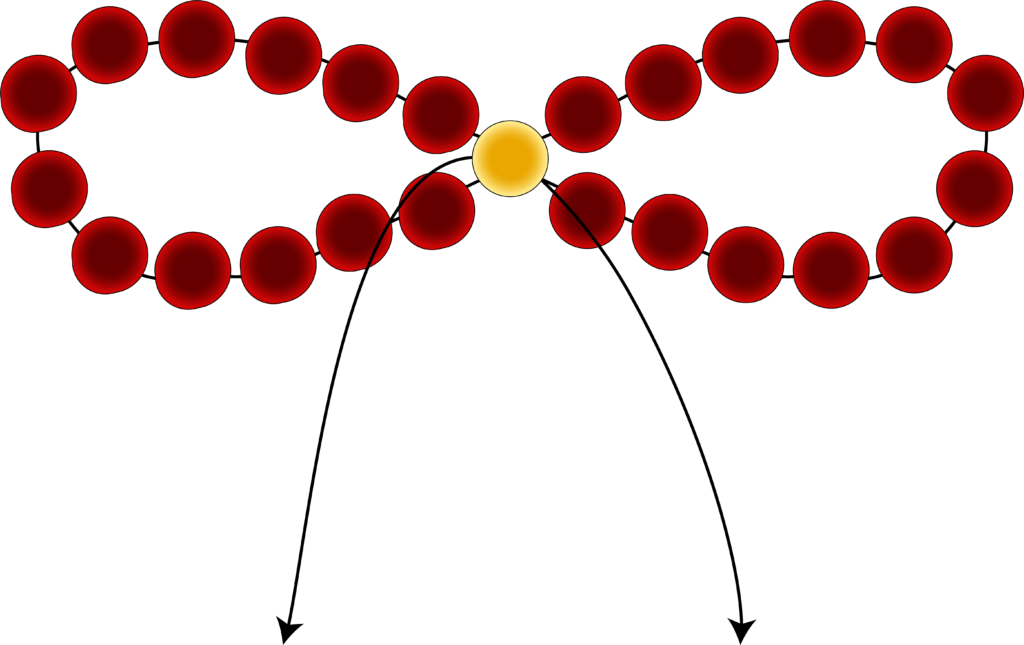
Pass the needle back through the middle bead, as illustrated below, and leave that section of wire hanging for now; we will come back to it later.

Step 3
Now, on the other side of the wire, pick up 12 beads, just like we did in step 1.

Step 4
Pass the needle back through the middle bead.
Step 5
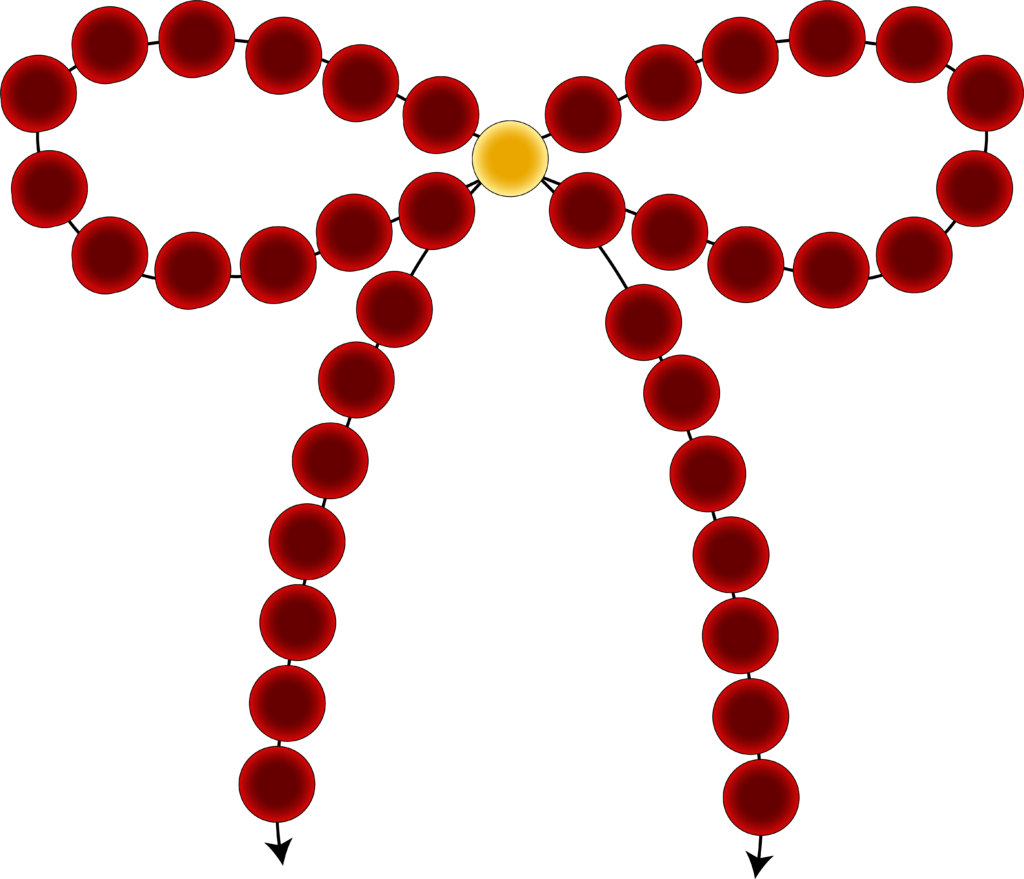
Finally, pick up 7 beads on each of the hanging wires, as illustrated below. To secure them, use pliers to roll the wire ends multiple times so that the beads won’t slip off. That’s it! It’s very easy, but as always, if you prefer to see me working on it in real-time action, the video is below.
Beaded Bow Earrings Video Tutorial
Congratulations on completing your beaded bow ring and earrings! You’ve just created a charming set of jewelry that’s fun to make and perfect for adding a touch of flair to any outfit. I hope you enjoyed this easy DIY project as much as I did. Crafting is all about creativity, so feel free to experiment with different colors and bead sizes to further personalize your designs. Don’t forget to subscribe to my YouTube channel for more fun tutorials and DIY inspiration!

